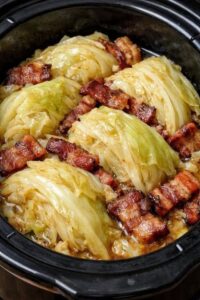
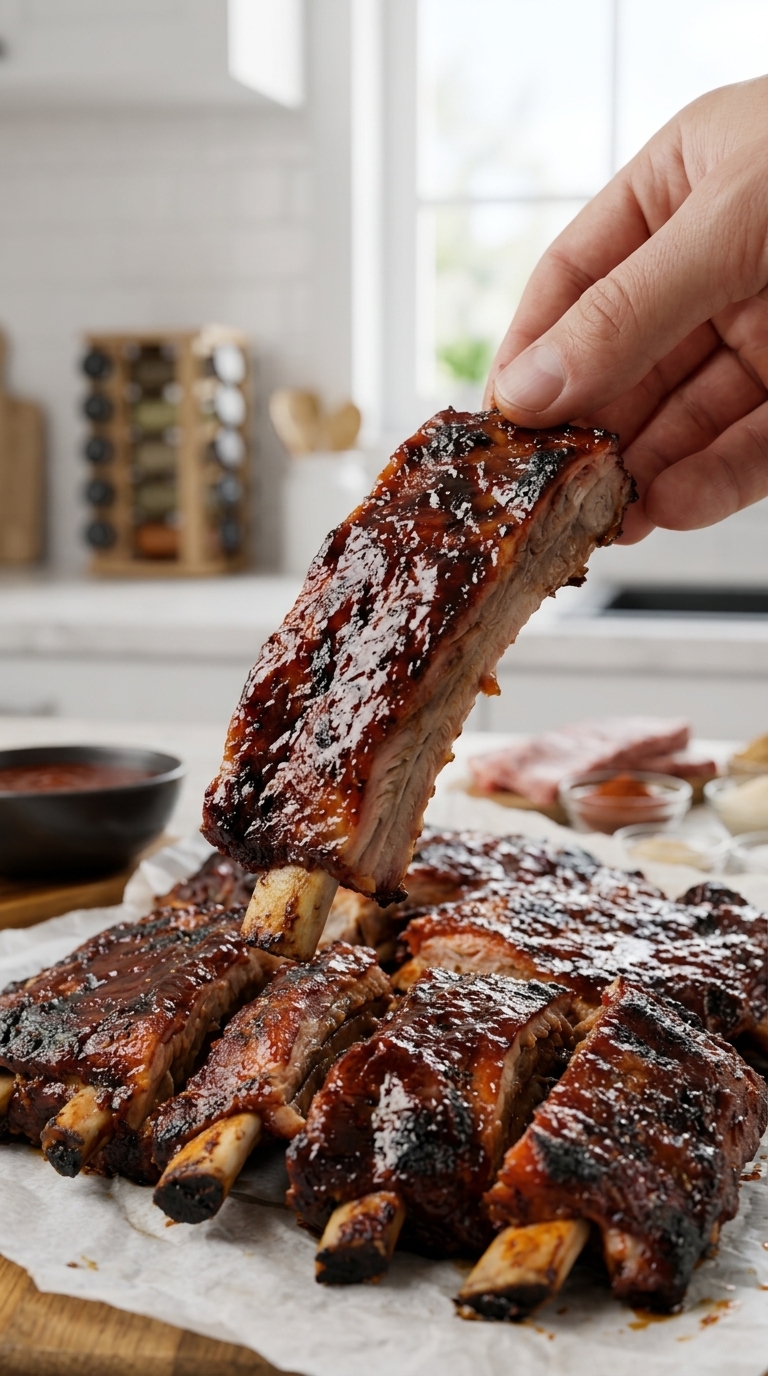
Fall-Off-The-Bone Baked BBQ Ribs deliver everything people love about slow-cooked barbecue: tender meat, deep smoky flavor, sticky caramelized sauce, and juicy ribs that practically slide off the bone. These oven-baked pork ribs develop incredible texture through low-and-slow cooking before finishing under high heat for that glossy charred barbecue crust that makes every bite unforgettable.
The secret to these baked BBQ ribs comes from sealing them tightly in foil while they slowly roast in the oven. The trapped steam gently breaks down the connective tissue in the pork, creating tender ribs without needing a smoker or grill. Once coated in barbecue sauce and broiled at the end, the ribs develop sticky dark caramelized edges that look and taste like classic barbecue restaurant ribs.
The first time I made these Fall-Off-The-Bone Baked BBQ Ribs was during a rainy weekend when outdoor grilling was impossible. I wanted ribs with rich barbecue flavor and tender meat without using a smoker. As the ribs slowly baked, the sweet smoky aroma filled the kitchen for hours. Once the sauce hit the broiler, the glaze bubbled into sticky charred perfection. By the time they reached the table, the meat pulled cleanly from the bone and everyone immediately reached for extra napkins and second servings.
Why These Oven-Baked Ribs Turn Out So Tender
Low Heat Slowly Breaks Down the Meat
Cooking the ribs at a low oven temperature for several hours allows the pork to become incredibly tender without drying out. The slow roasting process gradually melts the connective tissue and fat inside the ribs, creating juicy flavorful meat.
Baby back ribs work especially well because they contain enough fat to stay moist while still becoming tender relatively quickly compared to larger rib cuts.
The tightly sealed foil packet traps steam inside while the ribs cook. This gentle moist heat helps soften the meat fibers while keeping the ribs juicy throughout the long baking process.
When the ribs finish cooking properly, the meat visibly pulls away from the bone ends by about half an inch. That visual cue signals that the ribs are tender and ready for glazing.
Removing the Membrane Makes a Huge Difference
One of the most important preparation steps involves removing the thin silverskin membrane from the back of the ribs. This tough membrane can become chewy during cooking and prevent the seasoning from fully penetrating the meat.
Using a paper towel helps grip the slippery membrane more easily while peeling it away. Once removed, the ribs become noticeably more tender after baking.
The dry rub also adheres much better directly to the meat surface without the membrane blocking flavor absorption.
Although this step takes only a few minutes, it dramatically improves both texture and flavor in the finished ribs.
The Dry Rub Builds Deep Smoky Flavor
Brown Sugar Creates Caramelization
Brown sugar forms the flavorful base of the dry rub while also helping the ribs caramelize beautifully during the final broiling stage. As the sugar heats, it creates rich sweet smoky flavor and darker color on the outside of the ribs.
The sweetness balances the savory spices perfectly while complementing the sticky barbecue sauce added later.
Because the sugar slowly melts into the pork during baking, the ribs develop flavor all the way through rather than only on the surface.
Combined with the barbecue glaze, the sugar also helps create that glossy sticky coating seen on classic barbecue ribs.
Smoked Paprika Adds Rich BBQ Flavor
Smoked paprika gives the ribs deep smoky flavor even without a smoker or grill. It provides warmth, color, and subtle barbecue richness that pairs perfectly with pork.
Garlic powder and onion powder add savory depth while salt enhances every ingredient throughout the rub. Meanwhile, black pepper adds mild heat and earthy spice.
A small amount of cayenne pepper creates gentle warmth that balances the sweetness from both the brown sugar and barbecue sauce.
Because the rub cooks slowly into the meat over several hours, the flavors become rich, balanced, and deeply savory by the time the ribs finish roasting.
The Sticky BBQ Glaze Creates the Perfect Finish
Barbecue Sauce Forms a Glossy Sticky Coating
The barbecue sauce transforms during the final high-heat cooking stage. As it heats, the sugars caramelize and create a thick glossy coating around the ribs.
Brushing on a generous layer ensures every bite becomes sticky, smoky, sweet, and flavorful. The sauce also seals moisture into the ribs while adding rich barbecue flavor.
Any favorite barbecue sauce works beautifully in this recipe. Sweet sauces create deeper caramelization while smoky or spicy sauces add extra complexity.
Because the ribs already contain so much flavor from the dry rub and slow cooking process, the sauce becomes the perfect finishing layer rather than the sole source of flavor.
Broiling Creates Restaurant-Style Char
The final broil creates the dark caramelized spots that make these ribs look straight from a barbecue restaurant. High heat quickly thickens the sauce while adding slightly crispy sticky edges.
Watching closely during broiling matters because the sugars in the sauce can darken rapidly. Usually five to ten minutes creates the perfect charred finish.
The bubbling glaze also intensifies the barbecue flavor while adding beautiful shine to the ribs.
This final stage transforms the ribs from tender roasted pork into sticky glossy barbecue perfection.
Easy Tips for Perfect BBQ Ribs
Seal the Foil Packet Tightly
The foil packet must remain tightly sealed during baking so steam stays trapped inside. Escaping steam may dry the ribs out and reduce tenderness.
Heavy-duty aluminum foil works best because it resists tearing during the long cooking time. Wrapping the ribs securely also helps distribute heat evenly around the meat.
Adding apple juice or apple cider vinegar inside the packet creates moisture and subtle sweetness that complements the pork beautifully.
The liquid also helps create steam inside the packet while adding another layer of flavor throughout the ribs.
Let the Ribs Rest Before Slicing
Allowing the ribs to rest briefly after baking helps the juices settle back into the meat. Cutting immediately may cause the juices to run out too quickly.
Resting also slightly firms the ribs, making them easier to slice cleanly between the bones.
Turning the ribs bone-side up while slicing helps clearly reveal the spaces between each rib for cleaner cuts and better presentation.
Sharp knives also help preserve the tender meat without shredding the ribs apart while slicing.
Best Ways to Serve BBQ Pork Ribs
Classic BBQ Side Dishes Pair Perfectly
Fall-Off-The-Bone Baked BBQ Ribs pair wonderfully with classic barbecue sides like coleslaw, baked beans, cornbread, mac and cheese, potato salad, or roasted corn.
The rich smoky pork balances especially well with cool creamy sides and fresh crunchy vegetables.
Because the ribs themselves are incredibly flavorful and hearty, simple side dishes usually work best alongside them.
Extra barbecue sauce served on the side also allows everyone to customize their preferred level of sauciness.
Perfect for Gatherings and Family Dinners
These ribs work beautifully for casual weekend dinners, summer parties, game-day meals, or family gatherings because they feel comforting and impressive without requiring outdoor grilling.
Since most of the cooking time is hands-off, they are surprisingly easy to prepare despite their rich slow-cooked flavor.
Leftover ribs also reheat very well in the oven wrapped loosely in foil to preserve moisture.
The sticky sauce and tender meat make these ribs one of those meals people remember long after dinner ends.
Frequently Asked Questions
How do I know when ribs are done?
The meat should pull back from the bone ends by about half an inch and feel very tender when pierced.
Can I use spare ribs instead of baby back ribs?
Yes, but spare ribs may require slightly longer cooking time because they are larger and meatier.
Why should I remove the membrane?
Removing the membrane improves tenderness and allows the seasoning to penetrate the meat more effectively.
Can I make the ribs ahead of time?
Yes. Bake the ribs ahead, then glaze and broil them shortly before serving.
How should leftovers be reheated?
Wrap the ribs in foil and reheat in a 300°F oven until warmed through to preserve moisture.
Ingredients
Equipment
Method
- Preheat the oven to 275°F (135°C).
- Remove the membrane from the back of the ribs using a paper towel for grip.
- Pat the ribs dry with paper towels.
- Combine the brown sugar, smoked paprika, garlic powder, onion powder, salt, black pepper, and cayenne pepper in a bowl.
- Rub the seasoning mixture generously over both sides of the ribs.
- Place the ribs onto a large sheet of heavy-duty aluminum foil and pour the apple juice into the bottom of the foil packet.
- Seal the foil tightly around the ribs and place the packet onto a baking sheet.
- Bake for 2.5 to 3 hours until the meat pulls back from the bone ends.
- Carefully open the foil packet and brush a thick layer of BBQ sauce over the ribs.
- Increase the oven temperature to 450°F or switch to broil and cook uncovered for 5 to 10 minutes until the sauce bubbles and caramelizes.
- Allow the ribs to rest for 10 minutes before slicing and serving.
Notes
Conclusion
Fall-Off-The-Bone Baked BBQ Ribs combine tender slow-cooked pork, smoky spices, sticky barbecue glaze, and caramelized charred edges into one unforgettable comfort food meal. The low-and-slow oven method creates juicy ribs that taste incredibly rich and satisfying without needing a smoker or grill.
Whether served for family dinners, cookouts, weekend comfort meals, or celebrations, these sticky baked BBQ ribs always impress with their tender texture and bold barbecue flavor. Once you taste the glossy sauce, smoky rub, and perfectly tender meat, this recipe will likely become your favorite way to make ribs at home.