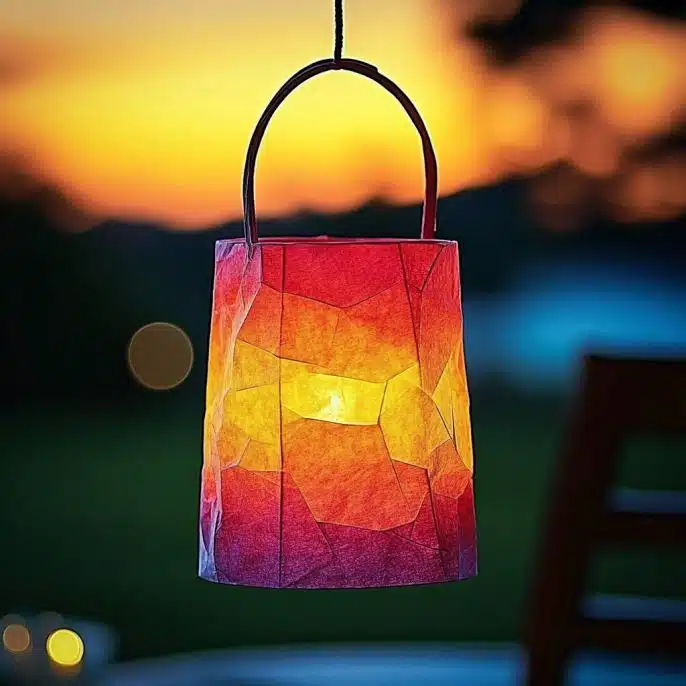
Kids Lantern Craft
Create magical glowing lanterns with simple recyclables and colorful decorations, perfect for sparking creativity in children.
Ingredients
Method
Making the Lantern
- Wash your container thoroughly and remove any labels. Cut off the top to create an open lantern if using a bottle or jug.
- Tear tissue paper or old magazine pages into small pieces. The more colors, the better!
- Brush a layer of white glue or Mod Podge all over the outside of your container.
- Stick the torn paper pieces all over the gluey surface, overlapping them for a fun stained-glass look.
- Brush another layer of glue or Mod Podge over the paper pieces to seal them. Sprinkle on glitter while it’s still wet if desired.
- Use a hole punch to make two holes near the top rim. Thread a string, yarn, or pipe cleaner through both holes and tie or twist securely.
- Pop in your battery tealight or glow stick.
- Turn off the lights, head outside, or snuggle up in a dark room to enjoy the glowing lantern.
Notes
Add stickers or pressed flowers for more texture, and you can create themed lanterns for different seasons or occasions.
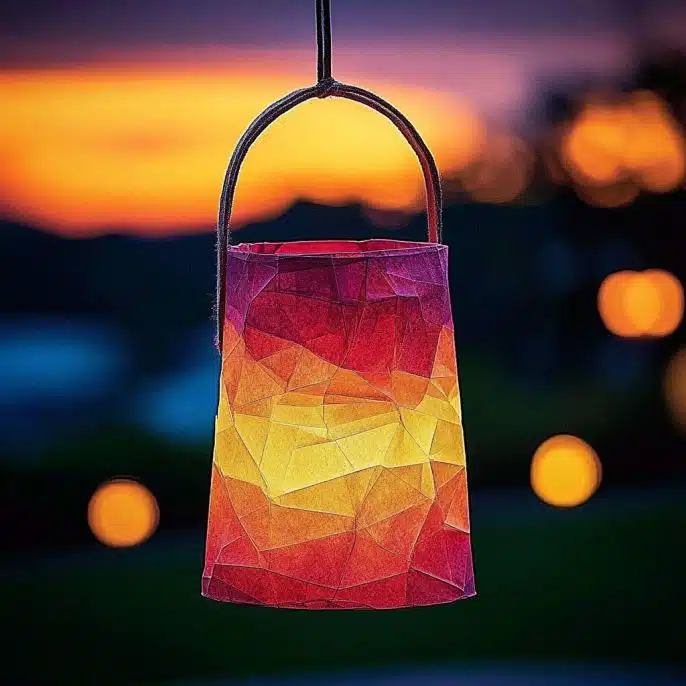
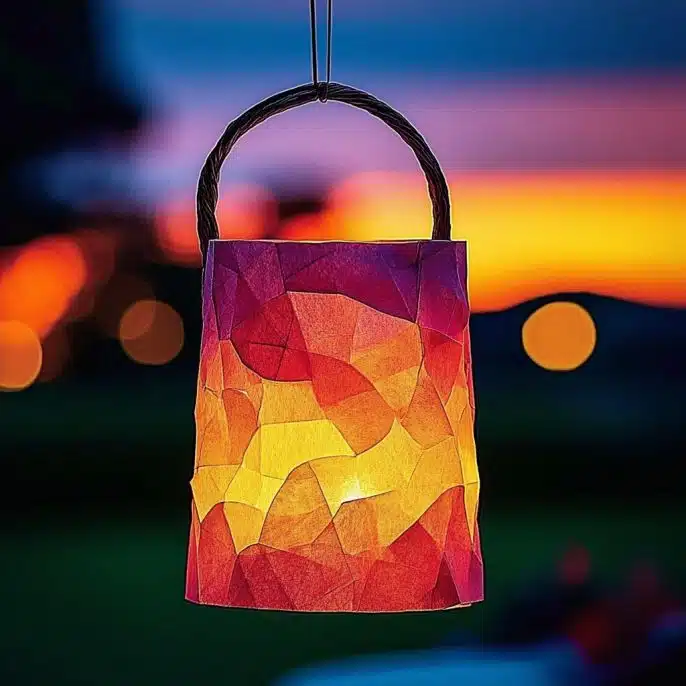
Kids Lantern Craft
Create magical glowing lanterns with simple recyclables and colorful decorations, perfect for sparking creativity in children.
Ingredients
Method
Crafting Steps
- Clean & Prep the Container: Wash your container thoroughly and remove any labels. If you’re using a bottle or jug, carefully cut off the top to create an open lantern.
- Tear Up the Paper: Tear tissue paper or old magazine pages into small pieces. Kids love this step — the more colors, the better!
- Glue the Base: Brush a layer of white glue or Mod Podge all over the outside of your container.
- Decorate!: Stick your torn paper pieces all over the gluey surface. Overlap them for a fun stained-glass look. Be bold with color combos!
- Seal & Sparkle: Brush another layer of glue or Mod Podge over the paper pieces to seal them. Sprinkle on glitter while it’s still wet if you’d like extra sparkle!
- Add the Handle: Use a hole punch to make two holes near the top rim. Thread a string, yarn, or pipe cleaner through both holes and tie or twist securely.
- Light it Up: Pop in your battery tealight or glow stick. No flames, no worries!
- Show it Off: Turn off the lights, head outside, or snuggle up in a dark room — and watch your child’s face glow right along with their lantern.
Notes
✨ Add stickers, washi tape, or pressed flowers for more texture.✨ Theme it up — fall leaves for an autumn walk, spooky colors for Halloween, bright hues for summer nights.✨ Make a whole set — line them up along the porch or carry them on a backyard adventure.