Before we jump into the mixing and molding, let me just say—thank you for being here. Whether you’re a longtime DIY enthusiast or simply curious about adding a little handmade magic to your home, I’m so grateful you stopped by! This little project is one of my absolute favorites. It’s simple, sensory, and endlessly customizable. And trust me, once you make your first batch of DIY aroma stones, you’ll be looking for excuses to whip up more!
If you’re someone who loves a clean, naturally fragranced home—but doesn’t love burning candles all day—aroma stones are about to become your new obsession. Sign up below to get the recipe delivered straight to your inbox. That way, you’ll have it handy for whenever the crafting itch strikes again!
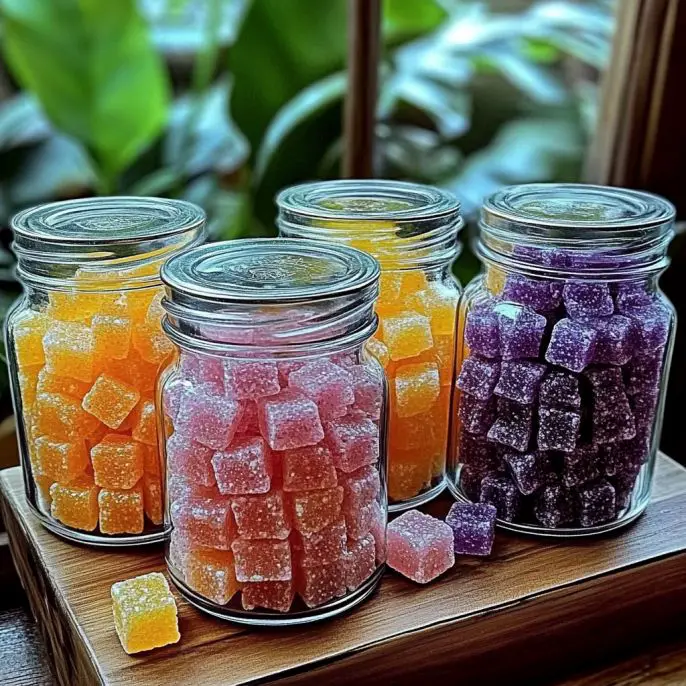
What Are DIY Aroma Stones?
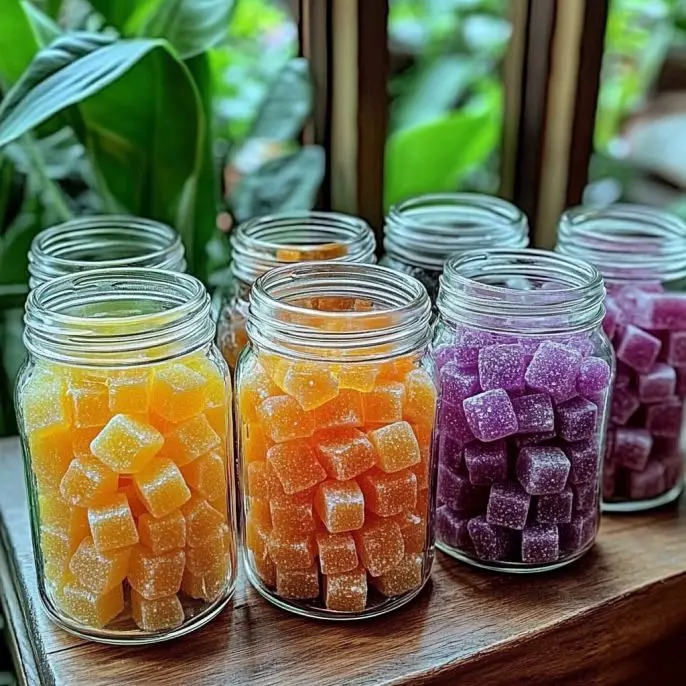
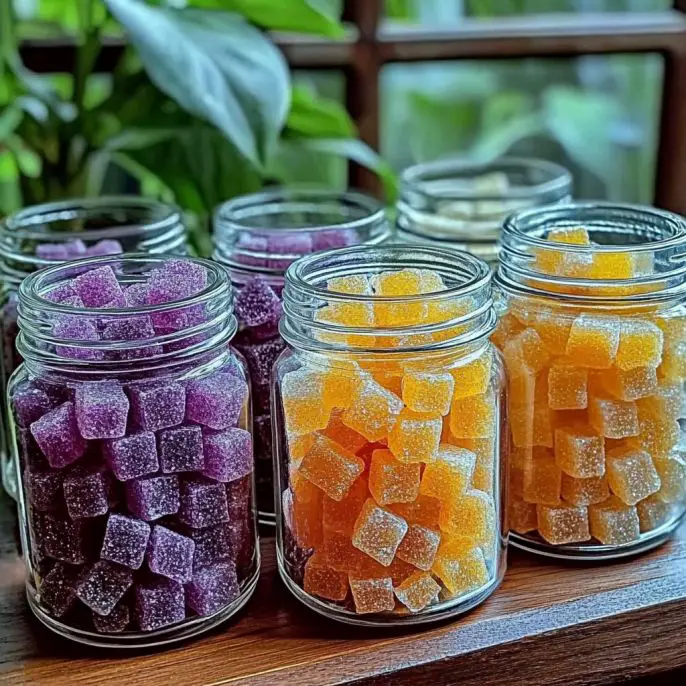
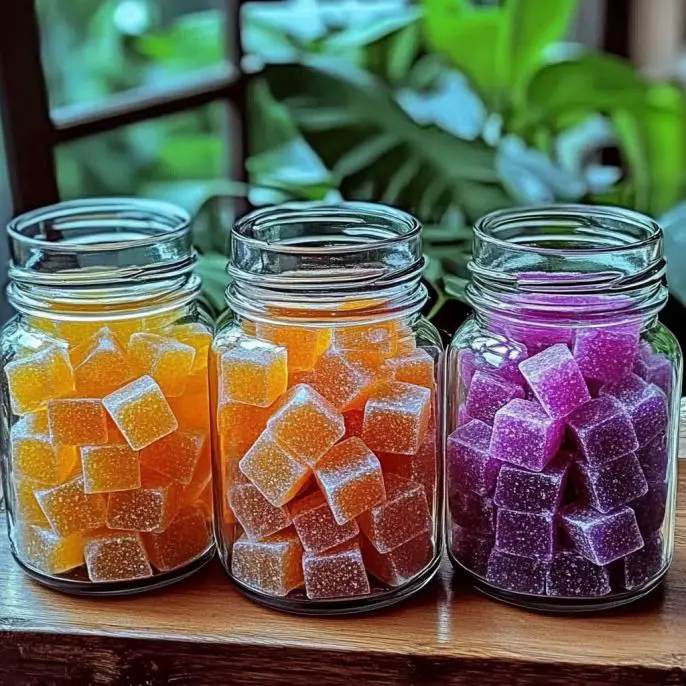
DIY aroma stones are a charming, mess-free way to add natural fragrance to your space. They’re crafted from a gentle mixture of baking soda, cornstarch, and water—plus the essential oils and colors you love most. You can shape them by hand or use fun silicone molds for intricate designs. Once dried, these beautiful little stones slowly release their scent, offering long-lasting aromatherapy without flames, electricity, or fuss.
Why You’ll Love This DIY
✨ Totally customizable: From scent to shape to color—this project is all about you.
🕊 Safe & flameless: No heat or plug-ins required. Perfect for bathrooms, closets, drawers, or office desks.
🧼 Clean and natural: Just five simple ingredients you likely already have on hand.
🎁 Gift-worthy: These make adorable homemade gifts, especially in little sachets or mason jars.
What Do Aroma Stones Smell Like?
That’s the best part—they smell like whatever your heart desires. Whether you’re going for the calming embrace of lavender, the zing of citrus, or the grounding warmth of sandalwood, the fragrance is all up to you. And because the stones are porous, they release their scent gradually over time, giving your space a constant but subtle aroma.
Honestly, the smell while you’re making them? Just divine. Like walking into a spa you built yourself.
Benefits of DIY Aroma Stones
-
Non-toxic and child-safe
-
Budget-friendly (especially compared to store-bought diffusers or candles!)
-
Eco-conscious: No disposable parts or electricity
-
Therapeutic: The scent + the making process = total stress relief
Ingredients You’ll Need
-
2 cups baking soda
-
1 cup cornstarch
-
1¼ cups water
-
Food coloring (optional but fun!)
-
10–15 drops of essential oils per portion
Tools & Supplies
-
Large mixing bowl
-
Whisk or spoon
-
Silicone molds or your hands for shaping
-
Wax paper or drying rack
-
Measuring cups
Additions & Substitutions
-
🌿 Swap out essential oils for fragrance oils (though they may be less natural).
-
🎨 No food coloring? Use mica powder or leave them plain for a minimalist look.
-
🪨 Want more texture? Add a sprinkle of dried lavender buds or rose petals.
How to Make Aroma Stones: Step-by-Step
Step 1: Mix the Dry Ingredients
In a large bowl, combine 2 cups baking soda and 1 cup cornstarch. Whisk them together until smooth.
Step 2: Add Water
Slowly pour in 1¼ cups water, stirring as you go. You’re aiming for a texture like wet sand—moldable but not soupy.
Step 3: Divide and Color
If you want multiple colors, portion out the mixture into separate bowls. Add a few drops of food coloring to each and stir well.
Step 4: Add Essential Oils
To each bowl, add 10–15 drops of essential oil. Mix thoroughly. Don’t be shy with scent—it’s the whole point!
Step 5: Shape Your Stones
Use your hands to form small stones or press the mixture into silicone molds for defined shapes (flowers, hearts, seashells—you name it!).
Step 6: Dry Thoroughly
Place stones on wax paper or a drying rack. Let them dry for 24–48 hours, depending on size and humidity.
Step 7: Use & Enjoy!
Once hardened, pop them into drawers, linen closets, or bowls around the house. Breathe in that custom-crafted scent every time you walk by.
What to Pair with These Aroma Stones
-
A bowl of dried flowers for a DIY potpourri centerpiece
-
A wooden tray on your nightstand or vanity
-
A small cloth pouch to tuck into your car or gym bag
-
Pair with a DIY room spray for a scent layering effect
Pro Tips for Perfect Aroma Stones
-
Don’t overdo the water—too much can make the stones too soft or slow to dry.
-
Want stronger scent? Add a few extra drops once they’re fully dry.
-
If they crack while drying, you can remold with a touch of water.
How to Store Aroma Stones
Keep any extras in an airtight container or jar. If they start to lose scent after a few weeks, just add a drop or two of essential oil to refresh them!
FAQs
How long do aroma stones last?
They’ll hold their shape indefinitely and their scent for 2–4 weeks, depending on oil strength and placement. Refresh with a few more drops as needed.
Can I reuse the stones?
Absolutely! Just add a couple more drops of essential oil once the scent fades.
Are they safe around pets and kids?
Yes, as long as you use kid- and pet-safe essential oils like lavender or chamomile—and keep them out of little mouths.
Can I use these in my car?
They’re perfect for it! Just pop one into a cup holder or fabric pouch.
Wrapping It All Up
Simple, natural, beautiful—DIY aroma stones are one of those delightful projects that feel like self-care in craft form. They’re soothing to make, heavenly to smell, and genuinely useful. Whether you’re setting a peaceful mood at home or gifting a friend with a little love in stone form, this recipe delivers.
If you loved this project, you’ll definitely want to check out my Homemade Peach & Basil Potpourri or DIY Dried Citrus Garland next!
Show Off Your Stones!
💬 Leave a review in the comments below and let me know your favorite essential oil combos.
📌 Don’t forget to pin this recipe on Pinterest and tag me if you share photos—I love seeing your creations!
Nutritional Info
Haha—none! These are zero-calorie, non-edible, and 100% scent-sational. 😄
But seriously, please don’t eat them.
Ready to make your space smell incredible? Let’s get stoned (the relaxing kind) with DIY aroma stones!
DIY Aroma Stones
Ingredients
Equipment
Method
- In a large bowl, combine 2 cups baking soda and 1 cup cornstarch. Whisk them together until smooth.
- Slowly pour in 1¼ cups water, stirring as you go. Aim for a wet sand texture—moldable but not runny.
- If using multiple colors, divide mixture into separate bowls. Add food coloring and mix until blended.
- Add 10–15 drops of essential oil to each bowl. Stir to evenly distribute scent.
- Shape mixture into stones by hand or press into silicone molds. Use your favorite designs!
- Place formed stones on wax paper or drying rack. Let dry for 24–48 hours depending on size and humidity.
- Once dry, place stones in drawers, bowls, or sachets around your home. Refresh scent with more oil as needed.
Notes
🎨 Try mica powder instead of food coloring for a pastel shimmer.
🪻 Add dried lavender or rose petals for a decorative, textured finish. Store extras in an airtight container and refresh the scent with more essential oils as needed.
More Craft Innovations
- After a Decade Together, She Discovered the True Value of Her Contributions
- My Daughter Disappeared After Prom Night—Almost a Year Later, an Ordinary Beanbag Chair Revealed the Truth
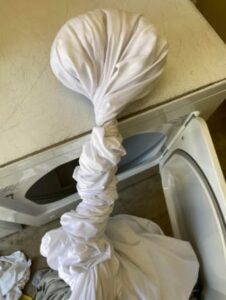
- Stop Your Bed Sheets From Balling Up in the Dryer: Simple Tricks That Actually Work
- Woman Injured While Trying to Separate Fighting Water Buffaloes: A Powerful Reminder About Livestock Safety