First off, thank you for being here! Whether you’re a parent, teacher, or just someone looking to spark a little creativity with the kids, I’m so excited to share this colorful, joy-filled project with you. This Salt Painting for Kids activity is a longtime favorite in our home — and I’m still amazed every time I watch the colors bloom across the page!
This craft is more than just fun — it’s educational, sensory, and absolutely beautiful when finished. The texture, the color diffusion, the surprise every time a new drop hits the salt… it’s mesmerizing for kids and adults! Plus, you probably already have everything you need to get started.
💌 Want a printable version of this craft (and more like it)? Subscribe below, and I’ll send it straight to your inbox!
What Is Salt Painting?
Salt painting is a simple, hands-on art activity where you draw with glue, sprinkle salt over the design, and then add color using watercolor paints or food coloring. The salt absorbs and spreads the color in a magical, tie-dye-like way that keeps kids captivated from start to finish.
It’s messy. It’s sparkly. It’s educational. It’s anything but boring!!
Why You’ll Love This Craft
- Super easy setup with household materials
- Sensory-rich: explores touch, sight, and motor skills
- Open-ended creativity: no two paintings are ever the same
- Great for all ages – toddlers to tweens love it
- STEAM-inspired: sneak in a little science with color diffusion
What Does Salt Painting Look and Feel Like?
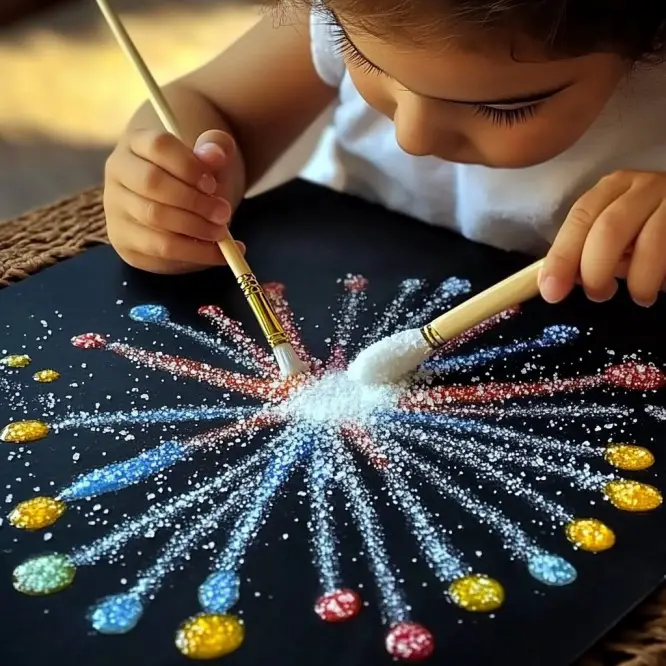
The final artwork has a soft, sparkly, textured look — think of frosted glass meets tie-dye. The salt creates a raised, glittery surface, and the watercolor creates stunning color blends and gradients. It’s magic on paper!
And here’s the kicker — when you touch the brush to the salty glue, the color travels like it’s alive. It’s a total wow moment.
Benefits of Salt Painting
- Enhances fine motor skills through glue drawing and paint control
- Teaches color theory and blending
- Promotes patience and focus
- Boosts confidence in young artists with minimal “mess-up” pressure
- Encourages self-expression and experimentation
Ingredients & Materials
Here’s what you’ll need:
- 🖤 Black or dark-colored cardstock (or any heavy paper)
- ✨ White school glue (PVA glue)
- 🧂 Table salt
- 🎨 Watercolor paints or liquid food coloring
- 🖌 Paintbrushes or pipettes
- 🧁 Small cups or palette for mixing colors
- 🧻 Paper towels for cleanup
Optional Add-Ins & Substitutions
- Use glitter glue or sprinkle glitter over the paint for sparkle
- Substitute watercolor with diluted acrylic paint
- Try liquid watercolors for ultra-vibrant hues
- Swap pipettes for droppers, cotton swabs, or even a spoon
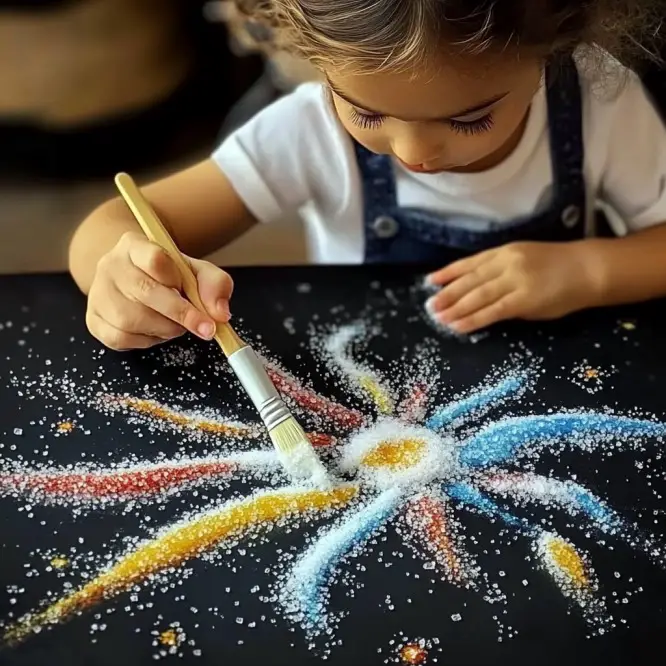
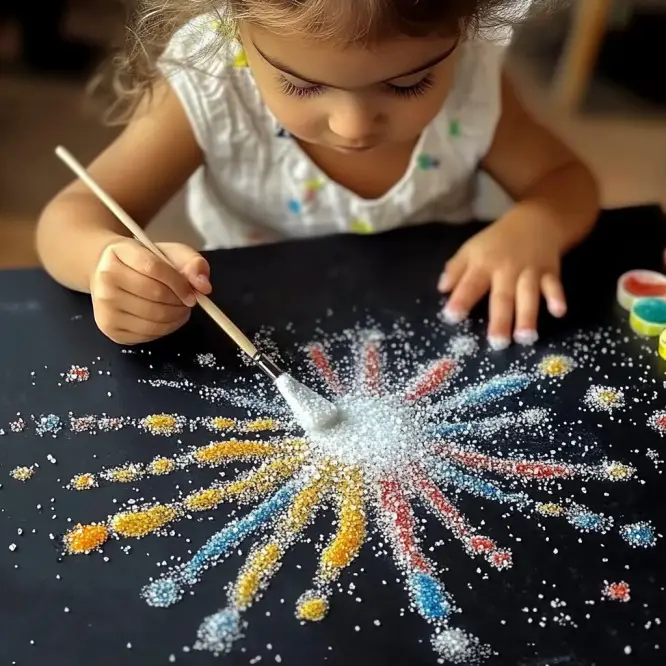
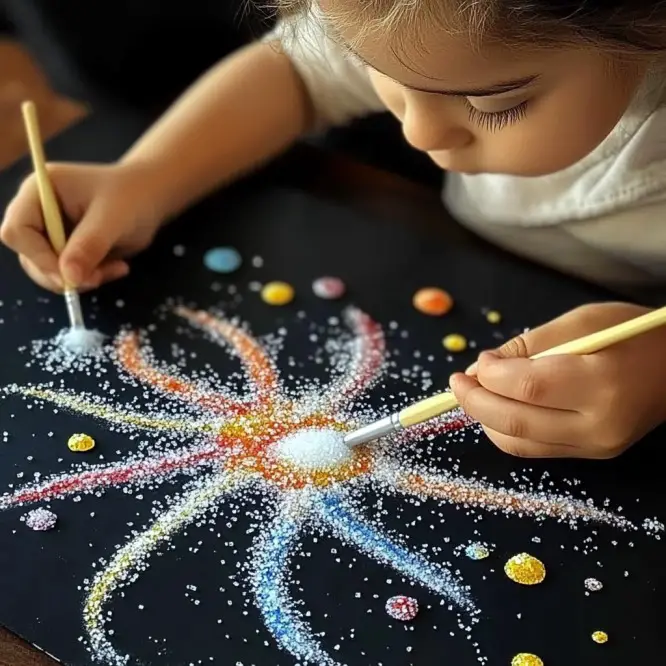
Step-by-Step: How to Make Salt Paintings
1. Prep Your Space
Lay down paper towels or a plastic tablecloth — this craft is fun, but it is a little messy.
2. Draw With Glue
Use white glue to create a design — hearts, stars, your child’s name, or abstract swirls!
3. Sprinkle Salt
Shake salt generously over the glue. Tilt the paper to remove excess. The salt should cover all glue lines.
4. Mix Your Colors
In small cups, mix watercolor or food coloring with a little water to create your vibrant palette.
5. Paint the Salt
Use a brush or pipette to drop color gently onto the salted glue lines. Watch the color travel and spread!
6. Add More Color
Continue with different shades. Allow them to blend and interact — no need to “paint” like a traditional image.
7. Dry Completely
Let your artwork dry flat overnight. The result? A stunning, textured, sparkly masterpiece.
What to Serve With This Craft (aka Pair It With…)
- A storytime session with an art-themed book like “Mix It Up” by Hervé Tullet
- A music playlist of calming classical or kid-friendly tunes
- Snacks that match the colors your child uses (rainbow fruit plate, anyone?)
Tips for Salt Painting Success
- Use dark paper to make the colors pop
- Avoid over-soaking the salt — a gentle dab of color goes a long way!
- Let it dry fully before handling — salt + moisture = fragile finish
- Test color strength before starting — dilute or intensify as needed
- Use a tray or box lid under the paper to catch excess salt
How to Store Salt Art
Once dry, these can be a little delicate, so:
- Store flat in a shadow box frame or plastic sleeve
- Avoid touching the surface too much — the salt can flake off over time
- These are great gifts or keepsakes — glue to a canvas or cardboard backing for display!
FAQs: Salt Painting Edition
Can I use regular printer paper?
You can, but heavy cardstock holds up much better to the glue and water. Thinner paper may warp.
What age is this for?
Ages 3 and up! Younger kids will need help with glue control and color mixing.
Does the salt ever mold?
Not if it’s allowed to dry fully. Be sure to store it in a dry place.
Can I make this a group activity?
Absolutely! It’s perfect for classrooms, parties, or rainy day family fun.
Final Thoughts: Why This Craft is a Keeper
This Salt Painting for Kids activity is one of those rare gems that combines easy setup, low cost, and huge creative payoff. The colors, the textures, the smiles — they all speak for themselves. And the best part? Every time your child picks up the brush, they’re not just making art — they’re exploring, experimenting, and expressing.
Let this be the first of many art adventures together. You’ve got the glue, you’ve got the salt, now all that’s left… is to paint the magic 💖
More Crafts to Try After This One
- 🎨 Bubble Wrap Stamping
- 🌈 Rainbow Pasta Necklaces
- 🐚 Seashell Collage with Watercolor Backgrounds
- ☃️ Salt Dough Ornaments for Every Season
Share Your Sparkly Salt Masterpiece!
📸 I love seeing your creativity in action!
Pin your creations to Pinterest and tag me so I can feature your artwork!
Or leave a comment below — what shape did your child choose?
Nutritional Info (Just Kidding… Sort of!)
This craft has zero sugar but 100% creativity. 😉
(Okay, okay — maybe don’t eat the salt…)
Ready to create some sparkle? Grab that glue and let the colors flow. This is one of those crafts your kids will remember — and ask to do again and again. Let’s get painting!
Salt Painting for Kids
Ingredients
Method
- Lay down paper towels or a plastic tablecloth to protect your workspace.
- Use white glue to create your desired design on the cardstock.
- Sprinkle salt generously over the glue and shake off the excess.
- Mix watercolor or food coloring with a little water in small cups to create vibrant colors.
- Use a brush or pipette to drop color gently onto the salted glue lines and watch the colors spread.
- Continue adding different shades, allowing them to blend together.
- Let your artwork dry flat overnight to ensure it sets properly.