Before we dive into today’s creative adventure, I just want to say — thank you. Thank you for being here, for embracing the beauty of handmade crafts, and for making space in your life for color, light, and a little magic. Projects like this one are simple yet soul-satisfying, and I’m so excited to share it with you.
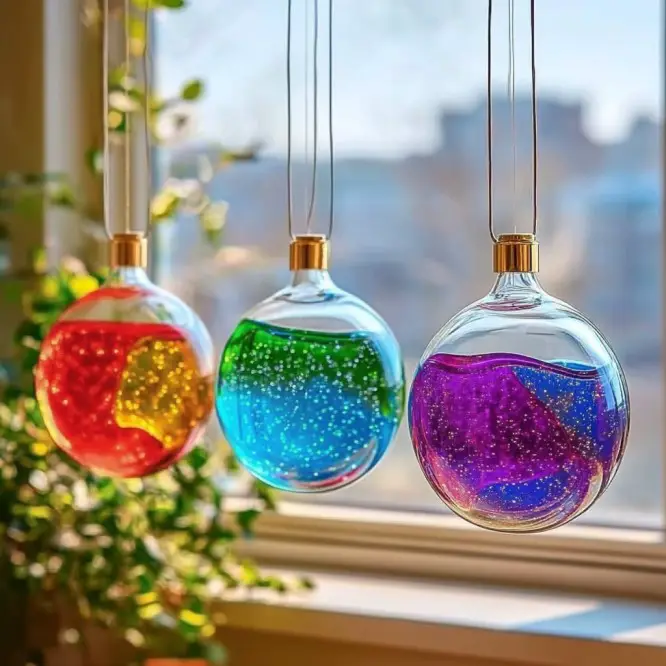
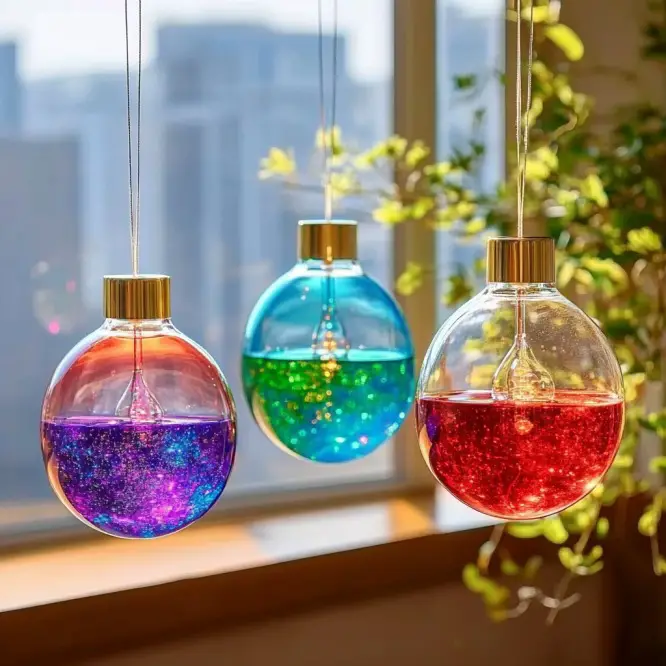
Today, we’re crafting Lava Lamp Style Suncatchers — a playful, science-meets-art activity that transforms everyday materials into stunning window art. Whether you’re making these with kids or simply channeling your inner child, this project is easy, joyful, and incredibly beautiful. 🌈✨
💌 Want more magical crafts like this sent straight to your inbox? Don’t forget to subscribe for weekly creative ideas, free downloads, and exclusive tips!
What Are Lava Lamp Style Suncatchers?
These DIY suncatchers mimic the dreamy swirls of a lava lamp using clear glue, food coloring, and oil — no heat or electricity needed! Once dry, they become translucent works of art that glow beautifully in the sunlight.
Why You’ll Love This Craft
- Incredibly easy and budget-friendly. You probably have most of the materials already!
- No mess, no stress. Just a few drops of color and a swirl of oil, and you’re halfway there.
- A fun science experiment in disguise. Kids love seeing how oil and glue behave together.
- Perfect for any season. Brighten up a dreary winter window or celebrate the vibrant shades of summer.
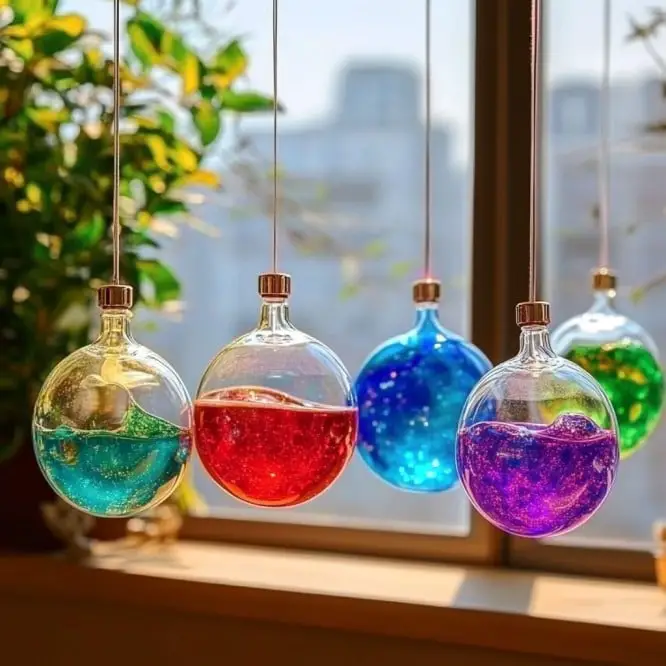
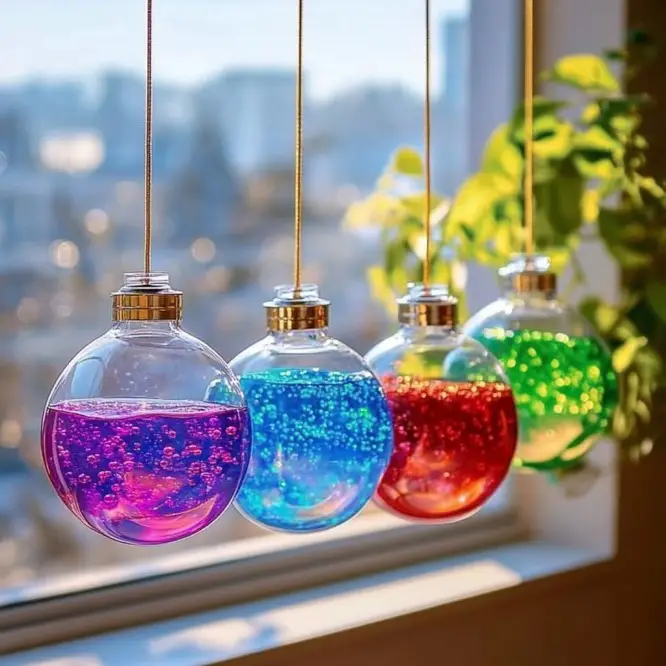
What Do They Look and Feel Like?
The final suncatchers feel like thick, flexible film — smooth and slightly glossy. The color patterns are mesmerizing, like little galaxies captured in plastic lids. And the way they glow in the sun? Absolutely enchanting. Think stained glass meets lava lamp!
Benefits of This Craft
- Encourages creativity and color theory exploration.
- Safe and easy for children with adult supervision.
- Makes a lovely handmade gift or window decoration.
- Helps repurpose plastic lids that might otherwise be tossed.
Ingredients & Materials
🛒 You’ll Need:
- 4–6 clean plastic lids (from yogurt, coffee cans, etc.)
- Clear school glue
- Liquid food coloring (choose your faves!)
- Vegetable oil or baby oil
- Toothpicks or cotton swabs
- Hole punch or skewer
- String or suction cup hooks
- Wax paper or tray
Tools You’ll Want On Hand
- Clean workspace (cover with wax paper!)
- Optional: Tweezers (for peeling dried glue)
- Drying surface away from curious hands and paws
Optional Add-Ins & Substitutions
Want to personalize your suncatchers even more?
- Add glitter to the glue for some sparkle.
- Tiny sequins or confetti shapes make fun floating designs.
- Essential oils (just a drop) for a subtle scent as it dries.
Step-by-Step: How to Make Lava Lamp Suncatchers
Step 1: Prep Your Station
Lay down wax paper or a tray. Flip your clean lids upside down.
Step 2: Pour the Glue
Add a thin, even layer of clear glue into each lid — just enough to coat the bottom.
Step 3: Drop the Colors
Use 2–4 drops of food coloring per lid. Space them around the edges.
Step 4: Add the Oil
Gently spoon 1–2 teaspoons of oil over the glue and colors.
Step 5: Swirl the Magic
Take a toothpick or cotton swab and slowly swirl — don’t mix too much! You want flowing blobs, not muddy water.
Step 6: Let It Dry
Set the lids in a flat, undisturbed space. Let dry 3–5 days. Seriously — don’t touch them!
Step 7: Peel and Punch
Once dry, peel out the suncatchers. Punch a hole at the top.
Step 8: Hang and Admire
Thread string through the hole or stick them to windows with suction hooks. Let the sun do the rest!
What to Pair with This Craft
- Music: Put on some retro 70s tunes to match the lava lamp vibe.
- Snacks: Try making my Peach Yogurt Popsicles while your suncatchers dry!
- Books: Great for storytime while the glue sets.
Tips for a Perfect Suncatcher
- Patience is key. They must dry flat and completely to peel cleanly.
- Use lids with a lip. It helps hold the glue in place.
- Avoid over-swirling. Less is more when it comes to dreamy designs.
- Dry in a dust-free area. Pet hair or lint can stick!
How to Store Finished Suncatchers
- Lay them flat between sheets of wax paper.
- Keep them away from direct heat to prevent warping.
- Hang or stick them on windows right away for the best effect!
FAQs
How long do these suncatchers last?
If kept out of moisture and heat, they can last for months — even years!
Can I use white glue instead of clear?
Clear glue is essential for that see-through finish. White glue will dry opaque.
What if my suncatcher tears while peeling?
Try warming the lid gently under warm water and peel slowly. Or just embrace the “abstract” look!
Can I reuse the plastic lids?
Yes! Just clean them off and use them again and again.
Wrap-Up: A Little Light, A Lot of Joy
Making Lava Lamp Suncatchers is more than just a craft — it’s an experience. It’s a way to slow down, play with color, and fill your space with light and joy. Whether you hang them in your kitchen, a child’s room, or give them as gifts, they’re sure to bring a smile.
Craving more creative fun with a pop of color? Check out these peach-perfect projects next:
💬 Let’s See Your Creations!
If you try this craft, I’d love to see your results!
Tag me on Pinterest or drop a comment with a photo — it truly makes my day to see your creativity shine.
🧡 Nutritional Information (Just Kidding!)
Okay, okay — these aren’t edible, but they are good for the soul. 😉
Thanks again for being here. Wishing you sunshine, sparkles, and all the good vibes today! 🌞🧡
Lava Lamp Style Suncatchers
Ingredients
Method
- Lay down wax paper or a tray. Flip your clean lids upside down.
- Add a thin, even layer of clear glue into each lid — just enough to coat the bottom.
- Use 2-4 drops of food coloring per lid, spacing them around the edges.
- Gently spoon 1-2 teaspoons of oil over the glue and colors.
- Take a toothpick or cotton swab and slowly swirl — don’t mix too much!
- Set the lids in a flat, undisturbed space and let dry for 3-5 days.
- Once dry, peel out the suncatchers and punch a hole at the top.
- Thread string through the hole or stick them to windows with suction hooks.