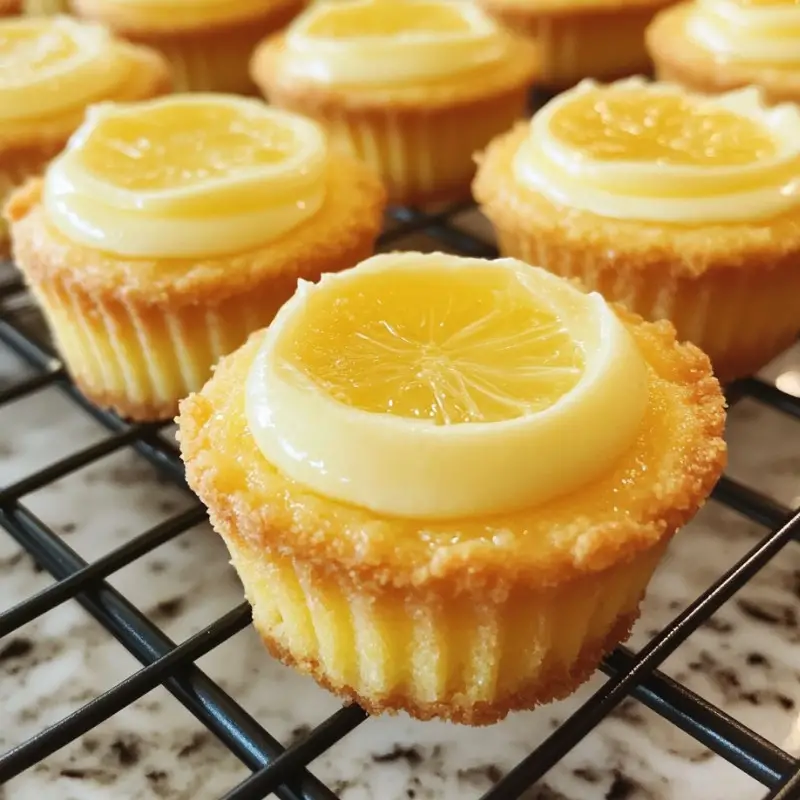
Indulge your senses with Mini Lemon Cheesecakes, tiny bites of creamy bliss that pack a vibrant citrus punch. Each cheesecake embodies the essence of sunny days, making them a perfect treat for any occasion, from festive gatherings to intimate evenings at home. Whether you’re planning a tea party, celebrating a special occasion, or simply treating yourself, these mini cheesecakes deliver a refreshing twist on a classic dessert. Let’s dive into this delightful recipe that will surely brighten your day!
Why You’ll Love This Recipe
Imagine a dessert that balances a creamy, velvety filling with the bright tartness of fresh lemons. Mini Lemon Cheesecakes do just that and more. They’re cute, individual servings that make sharing easier and are perfect for parties or gatherings. The combination of cream cheese and sour cream creates a rich texture, while fresh lemon juice and zest infuse it with the refreshing flavor that screams summer. Moreover, these cheesecakes can be garnished with fresh berries and mint to elevate their presentation and taste.
This recipe is straightforward enough for baking novices but impressive enough to wow guests. Plus, you can customize it with various toppings and flavors. Whether you enjoy slight changes to the ingredient list or simply love the base recipe as is, Mini Lemon Cheesecakes can cater to your preferences.
Ingredients
To create these cheery desserts, you will need the following ingredients:
– 150g digestive biscuits
– 50g unsalted butter, melted
– 300g cream cheese, at room temperature
– 100g granulated sugar
– 1 tsp vanilla extract
– 2 large eggs
– 60ml sour cream
– Zest of 2 lemons
– 3 tbsp fresh lemon juice
– 150ml heavy whipping cream
– Optional: fresh berries and mint leaves for garnish
Necessary Tools
Before you start baking, make sure you have the following tools on hand:
– Muffin tin
– Paper liners
– Mixing bowls
– Electric mixer or whisk
– Measuring cups and spoons
– Rubber spatula
– Food processor or zip-lock bag (for crushing biscuits)
– Cooling rack
Ingredient Swaps and Additions
While the classic lemon cheesecake flavor is adored by many, you can easily adjust the ingredients based on your preferences or pantry availability:
1. Biscuits: If you can’t find digestive biscuits, graham crackers or vanilla wafer cookies work well as alternatives.
2. Butter: Coconut oil can be used in place of unsalted butter for a dairy-free option.
3. Sweeteners: For a healthier option, replace granulated sugar with honey, maple syrup, or a sugar substitute.
4.Flavors: Enhance the cheesecake by adding a teaspoon of lemon extract or your favorite citrus zest for extra flavor.
5. Toppings: Top with a fruit coulis, chocolate sauce, or even a sprinkle of crushed nuts for texture.
Step-by-Step Instructions
Follow these detailed instructions to create perfect mini lemon cheesecakes:
1. Preheat the Oven:
Start by preheating your oven to 160°C (320°F). This is crucial for even cooking.
2. Prepare the Muffin Tin:
Line a muffin tin with paper liners. This makes it simpler to remove the cheesecakes once they are set.
3. Make the Biscuit Base:
In a bowl or food processor, crush the digestive biscuits into fine crumbs. Combine the crumbs with melted butter, mixing until the texture resembles wet sand.
4. Form the Base:
Evenly distribute the mixture into each muffin cup, pressing down firmly to create a solid base. This ensures your cheesecakes hold up during serving.
5. Cream Cheese Mixture:
In a large mixing bowl, beat the cream cheese until smooth. Gradually add the granulated sugar and vanilla extract, blending until well combined.
6. Add Eggs:
Incorporate the eggs one at a time, ensuring each is fully integrated before adding the next. This helps maintain a smooth, creamy filling.
7. Blend in Additional Ingredients:
Add the sour cream, lemon zest, and lemon juice, mixing until smooth and creamy. Take a moment to enjoy the refreshing aroma that wafts from your mixture!
8. Fill the Muffin Cups:
Spoon the cream cheese mixture over the biscuit bases, filling each muffin cup about three-quarters full.
9. Bake:
Bake in your preheated oven for 20-25 minutes. The cheesecakes should be set but will still have a slight jiggle in the center.
10. Cool and Chill:
After baking, allow the cheesecakes to cool at room temperature. Once cool, transfer them to the refrigerator to chill for at least 2 hours. This step lets the flavors meld beautifully.
11. Whip the Heavy Cream:
Just before serving, whip the heavy cream until soft peaks form. Use this to decorate each cheesecake as well as give a lovely contrast to the tangy lemon flavor.
12. Garnish:
Top the cheesecakes with fresh berries and mint leaves if desired. Not only do these toppings add a pop of color, but they also enhance the flavor experience.
Pro Tips for Success
– Room Temperature Ingredients: Ensure all your dairy products are at room temperature to achieve a silky-smooth filling.
– Don’t Overbake: Keep an eye on your cheesecakes towards the end of the baking time. Overbaking can lead to cracks and make the texture less creamy.
– Chill Thoroughly: For the best flavor and texture, allow the cheesecakes ample time to chill. Overnight is often ideal if you’re planning to serve them the next day.
– Use Quality Ingredients: The better the ingredients, the better your cheesecakes will taste. Using fresh lemons for zest and juice makes a significant difference.
– Make Ahead: These cheesecakes can be made a day in advance, making them perfect for busy schedules.
Serving Suggestions
Mini Lemon Cheesecakes shine on their own, but you can enhance their presentation and flavor in various ways:
– Accompany with Beverages: Serve them alongside herbal tea, coffee, or a sparkling lemonade for a refreshingly light meal or dessert course.
– Layered Dessert: Create a parfait by layering cheesecake filling and graham cracker crumbs in a glass, topped with whipped cream and berries.
– Fancy Plating: Place the cheesecakes on a decorative platter and drizzle with a lemon or berry sauce for an elegant look.
– Themed Parties: Incorporate them into a lemon-themed gathering, pairing with lemon bars and lemon meringue pie for variety.
Storing and Reheating
– Storage: These mini cheesecakes are best stored in an airtight container in the refrigerator, where they’ll stay fresh for up to one week.
– Freezing: If you want to make them in advance, they freeze well for up to three months. Just ensure they are well-wrapped in plastic wrap and then stored in an airtight container.
– Thawing: To enjoy frozen cheesecakes, simply transfer them to the fridge overnight to thaw before serving. Avoid using a microwave, as it may alter the texture.
Nutritional Information
Here is a general breakdown of the nutritional content per mini cheesecake (assuming the recipe yields 12):
– Calories: Approximately 220
– Protein: 3g
– Fat: 17g
– Carbohydrates: 16g
– Sugar: 10g
FAQs
1. Can I make these cheesecakes gluten-free?
Yes! Use gluten-free biscuits for the base, and you’d have a delightful gluten-free treat.
2. Can I substitute cream cheese with something else?
For a lighter option, you may use ricotta cheese, but the texture and flavor will vary.
3. Is it necessary to use sour cream?
Sour cream adds creaminess and tang; however, Greek yogurt is a great substitute for a similar effect.
4. What if I don’t have a muffin tin?
You can use ramekins or silicone molds for individual servings.
5. Can I adjust the sweetness?
Absolutely! Adjust the sugar based on your taste preference or substitute with a sweeter alternative.
Conclusion
Mini Lemon Cheesecakes are a delightful, versatile dessert that brings sunshine to your table. With their creamy texture and refreshing citrus flavor, they are easy to make and perfect for any occasion. Brighten your gatherings with these bite-sized treats and share the joy of baking with friends and family. Whether enjoyed as a midday snack or a grand finale to a dinner party, these cheesecakes are sure to steal the show. So, gather your ingredients, whip up a batch, and enjoy a slice of lemony heaven!
Mini Lemon Cheesecakes
Ingredients
Method
- Preheat your oven to 160°C (320°F).
- Line a muffin tin with paper liners.
- In a bowl or food processor, crush the digestive biscuits into fine crumbs.
- Combine the crumbs with melted butter until the texture resembles wet sand.
- Evenly distribute the mixture into each muffin cup, pressing down to create a solid base.
- In a large mixing bowl, beat the cream cheese until smooth.
- Gradually add the granulated sugar and vanilla extract; blend until well combined.
- Add the eggs one at a time, ensuring each is fully integrated before adding the next.
- Mix in the sour cream, lemon zest, and lemon juice until smooth and creamy.
- Spoon the cream cheese mixture over the biscuit bases, filling each cup about three-quarters full.
- Bake in the preheated oven for 20-25 minutes until set but slightly jiggly in the center.
- Allow the cheesecakes to cool at room temperature for a while.
- Transfer to the refrigerator and chill for at least 2 hours.
- Before serving, whip the heavy cream until soft peaks form.
- Decorate each cheesecake with whipped cream and garnish with fresh berries and mint leaves as desired.