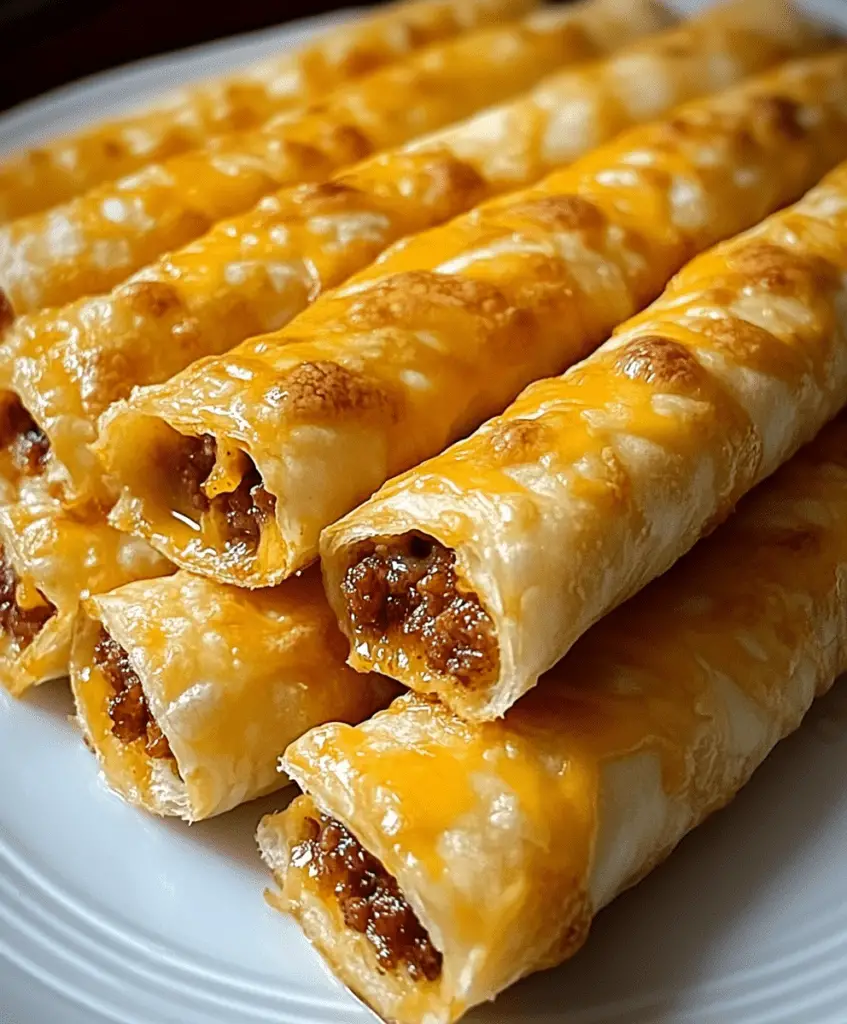
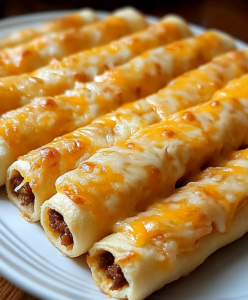
If you’re looking for a fun and flavorful twist on your usual taco night, these Taco-Flavored Breadsticks with a Cheesy Twist are just the thing! Combining the savory goodness of tacos with the comforting appeal of breadsticks, this recipe is perfect for appetizers, snacks, or a deliciously different dinner. Each bite is packed with seasoned beef, melted cheese, and wrapped in a crispy, golden dough—served with salsa and guacamole for dipping, these breadsticks are a surefire hit.
Let’s dive into the recipe so you can whip up these crowd-pleasing breadsticks in no time!
What Makes These Breadsticks So Special?
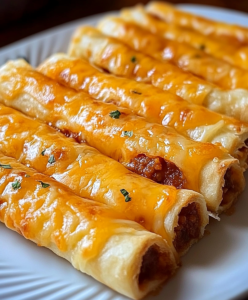
These breadsticks take the classic flavors of tacos—seasoned beef, onions, garlic, and melted cheese—and wrap them in a soft, golden pizza dough. The result is a handheld, cheesy, and utterly delicious snack that’s perfect for any occasion.
Taste and Texture
The breadsticks are crispy on the outside, soft and chewy on the inside, and bursting with the rich, savory flavors of taco-seasoned beef and melted cheese. Each bite offers a satisfying combination of textures, from the crunchy crust to the gooey cheese and tender beef filling.
Why You’ll Love It
- Easy to Make: With just a few simple steps, you can create these tasty breadsticks in under 30 minutes.
- Flavor-Packed: The taco seasoning infuses the beef with bold, delicious flavor, complemented by the melty cheese.
- Perfect for Sharing: These breadsticks are ideal for parties, game nights, or any time you want to impress with minimal effort.
- Customizable: Feel free to add your favorite toppings or fillings to make these breadsticks your own.
Ingredients You’ll Need
- 1 small onion, diced: Adds a sweet, savory base flavor to the beef mixture.
- 1 tablespoon garlic, minced: Enhances the overall flavor with its aromatic touch.
- 1 lb ground beef: The main protein, seasoned to perfection with taco seasoning.
- 2 tablespoons taco seasoning: Infuses the beef with that classic taco flavor.
- 1 lb pizza dough, rolled out into a rectangle: The dough that wraps everything together.
- 1 cup Mexican cheese blend: A mix of cheeses that melts beautifully inside and on top of the breadsticks.
- 1 tablespoon olive oil: Brushed on top to help the breadsticks bake to a golden brown.
- Salsa, for dipping: Adds a tangy, spicy contrast to the breadsticks.
- Guacamole, for dipping: Provides a creamy, cool complement to the cheesy breadsticks.
Tools You’ll Need
- Skillet: For cooking the beef mixture.
- Rolling pin: To roll out the pizza dough.
- Baking sheet: For baking the breadsticks.
- Pastry brush: For brushing the breadsticks with olive oil.
Step-by-Step Instructions
1. Prepare the Beef Mixture
Start by heating a skillet over medium heat. Add the diced onion and minced garlic, sautéing until they are soft and translucent—about 3-4 minutes.
Next, add the ground beef to the skillet. Stir in the taco seasoning and cook the beef until it’s fully browned and no longer pink. This should take about 5-7 minutes. Once cooked, remove the skillet from heat and let the beef mixture cool slightly.
2. Preheat the Oven
Preheat your oven to 425°F (220°C). This high temperature will help the breadsticks bake quickly, ensuring a crispy crust and melty cheese.
3. Assemble the Breadsticks
On a lightly floured surface, roll out the pizza dough into a large rectangle. Cut the dough into 5 even strips—each strip will become one breadstick.
Spoon the cooked beef mixture down the center of each strip of dough. Sprinkle a generous amount of the Mexican cheese blend over the beef.
Fold the edges of the dough over the filling, pinching along the seams to seal the meat and cheese inside. Be sure to pinch the ends closed as well to prevent the filling from leaking out during baking.
4. Bake the Breadsticks
Place the sealed breadsticks on a prepared baking sheet. Brush the tops with olive oil to help them achieve a beautiful golden color as they bake.
Bake in the preheated oven for 10 minutes. After 10 minutes, remove the breadsticks from the oven and top them with additional cheese.
Return the breadsticks to the oven and bake for another 5 minutes, or until the cheese on top is melted and golden brown.
5. Serve
Serve the breadsticks warm, with salsa and guacamole on the side for dipping. The combination of crispy breadsticks, savory beef, and creamy dips is simply irresistible!
Tips for Making the Perfect Taco-Flavored Breadsticks
- Don’t overfill: Be careful not to overstuff the breadsticks, or they may burst open during baking.
- Seal tightly: Make sure to pinch the seams and ends of the dough securely to keep the filling inside.
- Serve immediately: These breadsticks are best enjoyed fresh from the oven while the cheese is still melty and the crust is crispy.
- Get creative with toppings: Feel free to add jalapeños, black olives, or even a sprinkle of cilantro to customize the flavor.
Storage Instructions
If you have any leftovers (though they’re so good, that might not happen!), store them in an airtight container in the refrigerator for up to 2 days. To reheat, simply place them in a preheated 350°F (175°C) oven for about 5-7 minutes, or until warmed through.
Frequently Asked Questions
Can I use a different type of meat?
Yes, you can substitute ground beef with ground turkey, chicken, or even a plant-based meat alternative for a different twist.
What if I don’t have pizza dough?
You can use crescent roll dough or even make your own pizza dough from scratch if you prefer.
Can I add other toppings inside the breadsticks?
Absolutely! Feel free to add extras like sautéed peppers, onions, or even a sprinkle of chili flakes for some heat.
Conclusion
These Taco-Flavored Breadsticks with a Cheesy Twist are the ultimate comfort food, perfect for any occasion. Whether you’re serving them as an appetizer, snack, or part of a fun dinner, they’re sure to be a hit with everyone. The combination of taco-seasoned beef, melty cheese, and crispy dough, all dipped in salsa and guacamole, is simply irresistible.
For more delicious recipes, check out my Stuffed Garlic Knots or Spicy Beef Quesadillas. And if you make these breadsticks, I’d love to see your creations—tag me on Pinterest with your photos!
Nutritional Information (per serving)
- Calories: 400 kcal
- Protein: 18g
- Carbohydrates: 35g
- Fat: 20g
- Saturated Fat: 8g
- Cholesterol: 60mg
- Sodium: 600mg
- Fiber: 2g
- Sugar: 3g
Enjoy every cheesy, taco-flavored bite!