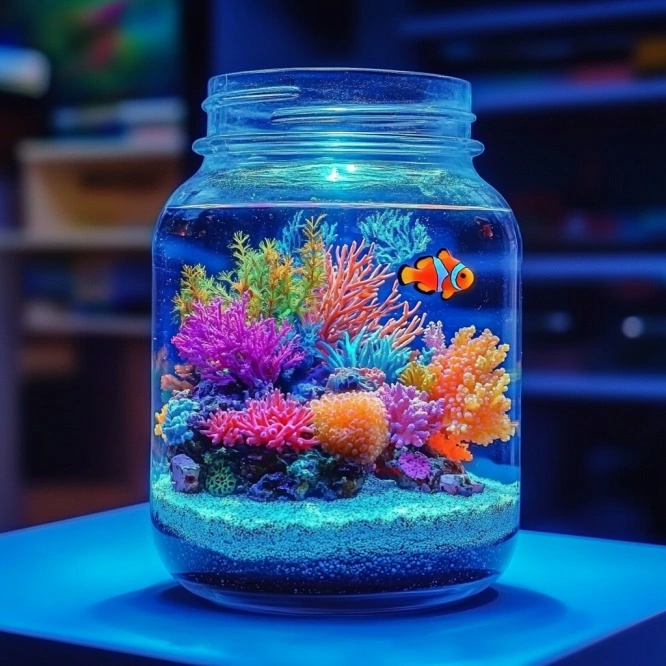
Children love anything magical, colorful, and hands-on, so it’s no surprise that creating an Ocean in a Jar has become a favorite craft among families, teachers, and DIY lovers alike. Whether you’re looking for a rainy-day activity, a unique science project, or a calming sensory tool, this visually stunning ocean jar is an excellent choice. Because it’s simple enough for toddlers yet captivating enough for older kids, this craft easily becomes a cherished keepsake or thoughtful gift.
Although it’s easy to make, this jar is so beautiful and therapeutic that many adults also love to display it on their desk or shelf for a calming visual escape. So, whether you’re an educator, a parent, or a DIY enthusiast, this project offers both fun and function in one clear container.
Why You’ll Love This Craft
First and foremost, creating an Ocean in a Jar is a simple activity that sparks creativity, encourages mindfulness, and teaches basic scientific concepts all at once. Because it mimics the ocean’s colors, textures, and movement, it becomes an enchanting way to connect with nature even when you’re indoors.
Moreover, this craft offers a rich sensory experience, combining visual stimulation with a hands-on building process. Not only does it keep children engaged and focused, but it also doubles as a calming tool that can help ease anxiety and restlessness.
Additionally, the versatility of this craft allows for plenty of customization, so you can tailor each jar to suit different themes, lessons, or personal preferences. Since the process uses common household or craft items, it’s budget-friendly and accessible as well.
Ingredients You’ll Need
To create your very own Ocean in a Jar, gather the following ingredients. Because this is a sensory craft, feel free to substitute based on what you have on hand.
- 1 mason jar with lid (pint or quart size, depending on your preference)
- 1–2 drops blue food coloring or blue watercolor paint (for the ocean color)
- 1 cup filtered or distilled water (adjust based on jar size)
- 1–2 tsp glycerin (optional, helps slow the movement of glitter)
- 2–3 small plastic sea figurines (fish, turtles, dolphins, etc.)
- 1–2 pieces of plastic aquarium plants (adds realism)
- 2 tbsp aquarium gravel or colored pebbles (for the ocean floor)
- 1 pinch glitter or iridescent confetti (optional, for sparkle)
- Hot glue gun (optional, for sealing the lid)
Every item here contributes to the sensory and visual appeal of the finished jar, making it not just fun to build but mesmerizing to observe as well.
Necessary Tools for the Craft
To ensure the process is smooth and enjoyable, here’s a list of the tools you’ll need. Since the setup is minimal, this project works perfectly even in smaller spaces.
- A spoon or small stick (for mixing the water and coloring)
- A funnel (optional but helpful for pouring water)
- A clean workspace with newspaper or a plastic mat
- Paper towels or wipes (for quick cleanup)
- A hot glue gun (if you’re sealing the lid permanently)
- A small bowl or measuring cup (for mixing the water and color)
Because these tools are simple and widely available, you can set up this craft in minutes without needing to purchase anything extra.
Ingredient Swaps and Additions
Because creativity knows no bounds, there are plenty of fun ways to personalize your Ocean in a Jar and make it truly your own. For example, if you don’t have blue food coloring, you can use a tiny bit of blue tempera paint, liquid watercolor, or even blue ink.
Additionally, instead of aquarium gravel, you can use colored sand, small shells, or even glass beads for a different texture. If you’d like a more gel-like movement, consider replacing some of the water with clear hair gel or corn syrup, which will slow down the motion of any floating elements.
Moreover, you can use essential oils like lavender to make it a calming aromatherapy jar. And for educational fun, try creating different “ocean zones” by layering items or adding labels to the outside of the jar.
Step-by-Step Instructions
Creating your Ocean in a Jar is as easy as following these detailed steps. Because kids often enjoy being involved in each stage, you can turn the process into a collaborative activity filled with learning moments.
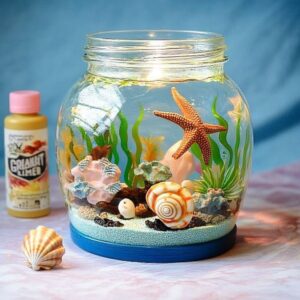
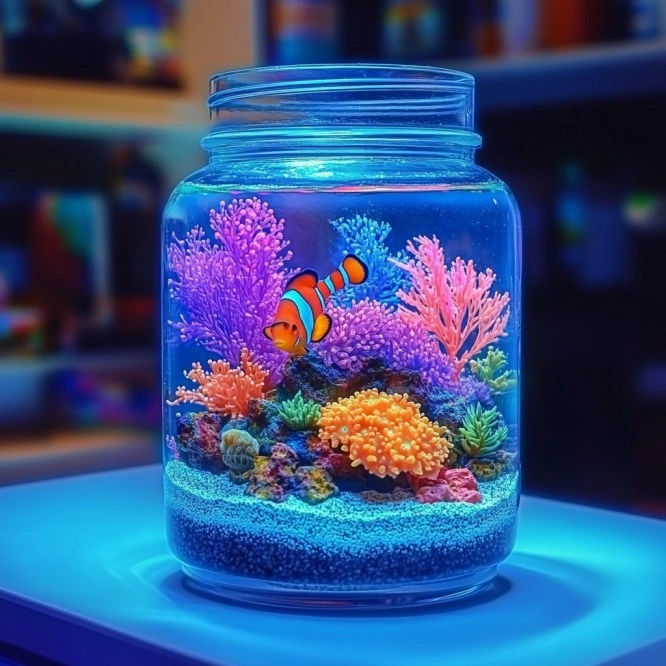
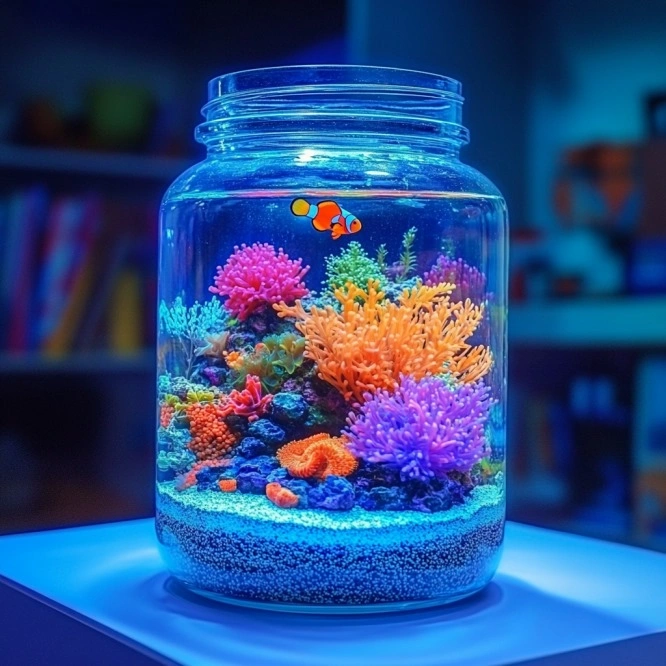
- Start with the Ocean Floor
Begin by pouring about an inch of aquarium gravel or colored pebbles into the bottom of your clean mason jar. Because this forms the foundation of your ocean, it helps set the scene. - Add the Marine Life
Next, gently place your plastic sea figurines and aquarium plants on top of the gravel. Since children love storytelling, ask them to imagine where their sea creatures live and how they interact with the plants. - Prepare the Water Mixture
In a separate container, combine 1 cup of distilled water with 1–2 drops of blue food coloring and 1–2 teaspoons of glycerin (if using). Stir slowly until the color is evenly mixed. Because glycerin adds weight to the water, it helps glitter and confetti move more slowly, mimicking the slow dance of ocean particles. - Fill the Jar
Carefully pour the colored water into the mason jar using a funnel or steady hand. Leave about 1 inch of space at the top to allow room for movement and to avoid spills. If needed, top off with more water. - Add Sparkle (Optional)
Sprinkle a pinch of glitter or iridescent confetti over the water. Because these tiny flecks catch the light, they enhance the magical feel of the ocean scene. - Seal the Jar
If you want to ensure the jar stays sealed (especially if it will be shaken often), apply hot glue around the lid’s rim before screwing it on. Otherwise, just twist the lid tightly and make sure it’s secure. - Shake and Enjoy!
Now, your Ocean in a Jar is ready to be admired! Because the contents gently swirl when the jar is shaken, it makes a perfect tool for calming the senses or decorating a child’s room.
Pro Tips for Success
Because small details can make a big difference in how your jar turns out, here are a few professional tips:
- Use distilled water to prevent cloudiness over time.
- Avoid overfilling the jar, as this can cause spills when shaking.
- Choose lightweight figurines, as heavy ones may sink too quickly.
- Seal the lid if your child is under age 4 or tends to open containers.
- Use high-quality glitter, as craft glitter may clump or fade in water.
- Test the color intensity before pouring it into the jar; it’s easier to darken than lighten.
- Layer your items strategically, putting heavier items near the base and lighter ones floating above.
These little adjustments ensure your craft looks vibrant and lasts a long time.
Creative Ways to Display or Gift
Although this jar is a fun craft, it also doubles as a beautiful display item. Therefore, consider these fun ideas:
- Place it on a sunny windowsill where light can make the glitter dance.
- Use it as a calm-down jar in a sensory corner or classroom.
- Wrap it in cellophane and gift it as a homemade present for birthdays or teacher appreciation.
- Create multiple jars with themed oceans—tropical reef, deep sea, or Arctic sea.
- Label each jar with a fun fact about marine life, turning it into a mini science project.
Because these jars are reusable and customizable, they offer lasting educational value as well as visual delight.
How to Store and Maintain Your Ocean Jar
To keep your Ocean in a Jar looking its best over time, follow these easy storage and care tips:
- Store upright on a stable shelf away from heat or direct sunlight.
- Avoid shaking too vigorously, as this may loosen the lid or cloud the water.
- If water starts to evaporate over time, top off with more distilled water.
- If algae or cloudiness forms, you can replace the water mixture while keeping the decorations.
- For long-term use, seal the lid permanently with waterproof glue or silicone.
Because this craft is relatively low-maintenance, it remains a durable and delightful keepsake with just a little care.
Nutritional Information
While this craft isn’t edible, here’s a quick reference to what’s inside:
- Calories: 0
- Allergens: None (unless glue or glitter contains additives)
- Materials: Plastic, water, glycerin, coloring
- Eco-Friendliness: Reusable jar, low-waste
- Safety: Safe with supervision for kids ages 3+
Because safety is always a priority, ensure that small parts are not accessible to unsupervised children under age 3.
Frequently Asked Questions (FAQs)
1. Can I use tap water instead of distilled water?
Yes, although distilled water helps keep the jar clear over time. Tap water may contain minerals that lead to cloudiness.
2. Is glycerin necessary?
No, but it does enhance the movement of glitter and adds a thicker, more ocean-like texture.
3. How long does an Ocean in a Jar last?
With proper sealing and care, it can last for years. Just be sure to keep it away from extreme temperatures and sunlight.
4. Can I reuse the contents if I want to make a new jar?
Yes, simply pour out the water, rinse the decorations, and refill with a new mixture.
5. Is this safe for toddlers?
Yes, but only under adult supervision, especially if glitter or small figurines are involved. Always ensure the lid is tightly sealed.
Conclusion
In conclusion, crafting an Ocean in a Jar is a magical, hands-on activity that combines creativity, sensory play, and educational value in a single, stunning display. Because it encourages both imaginative storytelling and scientific curiosity, this DIY project is perfect for children of all ages, whether at home, in the classroom, or during special events. Moreover, its calming visual effect makes it a thoughtful tool for mindfulness and emotional regulation.