If you’re looking for a vibrant and educational hands-on activity that will leave your little ones wide-eyed with wonder, the Melting Rainbow Science Experiment is the perfect choice. Combining simple household ingredients, bright colors, and an exciting chemical reaction, this experiment engages children in early STEM learning while sparking creativity and sensory exploration. Whether you’re a parent, teacher, or homeschooler, this rainbow-themed activity promises a magical experience.
Why You’ll Love This Experiment
There are few things more delightful than watching colors fizz and bubble in front of your eyes—and even better when kids get to be the scientists behind the magic! This Melting Rainbow Science Experiment is beloved by families and educators alike for several key reasons:
- Simple ingredients: You likely have everything on hand already.
- Safe and mess-friendly: This experiment is non-toxic and relatively easy to clean up.
- Educational: Teaches kids about chemical reactions (acid + base = fizz!) and sensory play.
- Colorful and creative: Kids love mixing and arranging their rainbow balls.
- Interactive and engaging: Using a pipette promotes fine motor skills and encourages curiosity.
Whether for a rainy afternoon, a preschool science day, or a homeschool enrichment activity, this fizzy rainbow fun fits right in!
Ingredients You’ll Need
Here’s a clear list of what you’ll need to bring your melting rainbow to life:
- 6 tablespoons baking soda (1 tbsp per rainbow color)
- Dish soap (a small squirt per color)
- Food coloring: red, orange, yellow, green, blue, and purple
- White vinegar (enough to fuel lots of fizz!)
- Optional: a few tablespoons of water (to adjust consistency)
Tools Required
To set up this experiment successfully, you’ll need the following tools:
- 6 small bowls or containers (for mixing each color)
- Measuring spoons
- Fork or spoon (for mixing)
- Pipette, dropper, or small spoon (for applying vinegar)
- A large plate or tray (for arranging rainbow balls)
- Paper towels (for easy cleanup)
Ingredient Swaps and Additions
Want to adapt the experiment based on your available materials or add even more learning value? Here are some fun swaps and additions:
- No pipette? Use a spoon or even a straw to drizzle vinegar.
- Allergic to food coloring? Try natural colorants like turmeric (yellow), beet juice (red), or spinach powder (green).
- Add glitter for extra sparkle (just make sure it’s kid-safe and biodegradable if possible).
- Add essential oils (like lavender or citrus) to incorporate scent into the sensory experience.
- Use cookie cutters to mold shapes instead of round balls.
These tweaks keep the activity fresh and fun no matter how many times you try it.
Step-by-Step Instructions
Follow these simple steps for a successful and dazzling science adventure:
- Prepare the Base:
- Place one tablespoon of baking soda in each of the six containers.
- Add Color:
- Add several drops of food coloring to each bowl, using a different color for each. Stir well.
- Add Dish Soap:
- Squirt a small amount (around 1/2 teaspoon) of dish soap into each bowl.
- Mix and Mold:
- Use a fork to thoroughly combine each mixture. If it’s too dry, add a tiny bit of water until it’s moldable.
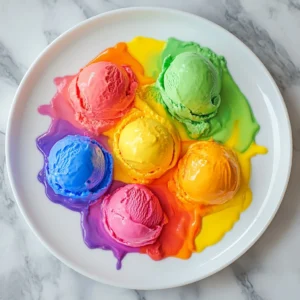
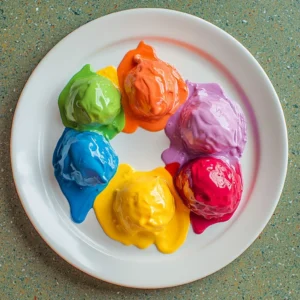
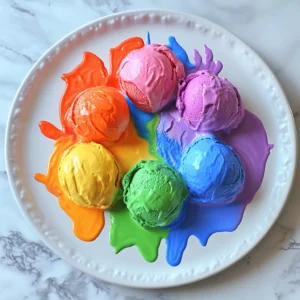
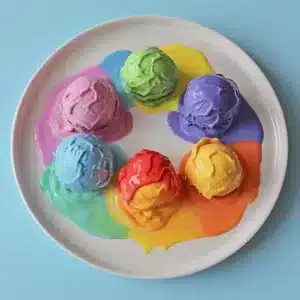
- Form Rainbow Balls:
- Mold each colorful mixture into a small ball and arrange the six balls in rainbow order on a plate or tray.
- Introduce the Scientist!
- Present the colorful plate to your child and ask them to make a prediction: “What do you think will happen when we add vinegar?”
- Add Vinegar and Watch the Magic:
- Help your child use the pipette to squirt vinegar over each ball. Stand back and watch the fizzy, foamy rainbow reaction unfold!
Repeat as many times as your young scientist desires.
Pro Tips for Success
- Prep in advance: Pre-mix colors for younger kids to minimize mess.
- Use a tray: It contains the reaction and keeps your surfaces clean.
- Start with small vinegar squirts: This prolongs the bubbling fun.
- Supervise toddlers: While the ingredients are safe, ensure nothing is eaten.
- Double the batch: Kids always want to do this more than once!
Creative Serving Suggestions (for the Experience)
This isn’t food—but you can serve the experience creatively:
- Use muffin tins for each color section.
- Create a rainbow path on a large tray and let kids squirt vinegar to follow the rainbow.
- Add plastic figurines to create a magical fizzy fairy garden.
- Use black paper underneath to make the colors pop even more.
Storing and Reusing the Experiment
While the magic is best experienced fresh, you can store the pre-made baking soda balls:
- Refrigerator: Store in a sealed container for up to 2 days. They may dry slightly.
- Freezer: Freeze balls for up to a week for a new icy texture experiment.
- Reuse: Leftover fizzed pieces can be dried out and crumbled into sensory bins.
Nutritional Information
This activity is not edible, but here’s a breakdown of what you’re working with:
- Baking soda: Non-toxic, reacts with acids
- Vinegar: Safe and edible in small amounts
- Food coloring: Water-soluble, safe for craft use
- Dish soap: Small quantities used, child-safe brands preferred
Frequently Asked Questions (FAQs)
1. Is this experiment safe for toddlers?
Yes, with supervision. All ingredients are non-toxic, but not meant for ingestion.
2. Can I do this experiment outdoors?
Absolutely! It’s a great outdoor summer activity and easier to clean up.
3. What age is best for this activity?
Ideal for ages 3 to 8, but even older kids enjoy the chemical reaction.
4. Why does the mixture fizz?
It’s a reaction between the baking soda (a base) and vinegar (an acid), which releases carbon dioxide gas and causes fizzing.
5. Can I turn this into a science lesson?
Definitely! Use it to explain acids, bases, chemical reactions, and even introduce color mixing.
Conclusion
The Melting Rainbow Science Experiment is a fantastic blend of color, fizz, and fun that teaches important scientific concepts while keeping kids entertained. Whether you’re looking for a rainy-day activity or a clever way to introduce chemistry basics, this vibrant experiment checks every box. Try it today and watch curiosity explode—literally!
Melting Rainbow Science Experiment
Ingredients
Method
- Place one tablespoon of baking soda in each of the six containers.
- Add several drops of food coloring to each bowl, using a different color for each. Stir well.
- Squirt a small amount of dish soap into each bowl.
- Use a fork to thoroughly combine each mixture. If it’s too dry, add a tiny bit of water until it’s moldable.
- Mold each colorful mixture into a small ball and arrange the six balls in rainbow order on a plate or tray.
- Present the colorful plate to your child and ask them to make a prediction: 'What do you think will happen when we add vinegar?'
- Help your child use the pipette to squirt vinegar over each ball. Stand back and watch the fizzy, foamy rainbow reaction unfold!