As the holiday season rolls around, there’s no better way to spread cheer than with a batch of homemade treats! These Oreo Truffle Snowballs are one of my absolute favorites—they’re easy to make, deliciously rich, and oh-so-festive. With just a handful of ingredients, you can transform classic chocolatey Oreos and cream cheese into snowball-shaped truffles that look beautiful and taste incredible. They’re an instant hit with everyone who tries them, and trust me—these will disappear fast!
📧 Want more holiday treats in your inbox? Subscribe for all the latest recipes and baking inspiration!
Why You’ll Love These Oreo Truffle Snowballs
These truffles aren’t just visually stunning; they’re the perfect balance of creamy, chocolatey, and just the right amount of sweet! Here’s why these Oreo Truffle Snowballs deserve a place in your holiday baking lineup:
- Easy to Make: No baking required—just crush, mix, and dip.
- Rich and Creamy: The combo of Oreos and cream cheese creates a melt-in-your-mouth experience.
- Versatile Decorations: Customize them with sprinkles, crushed candy canes, or edible glitter for extra holiday flair.
- Perfect for Gifting: Pop these in a festive tin or bag, and you’ve got a delightful homemade gift!

Taste Profile
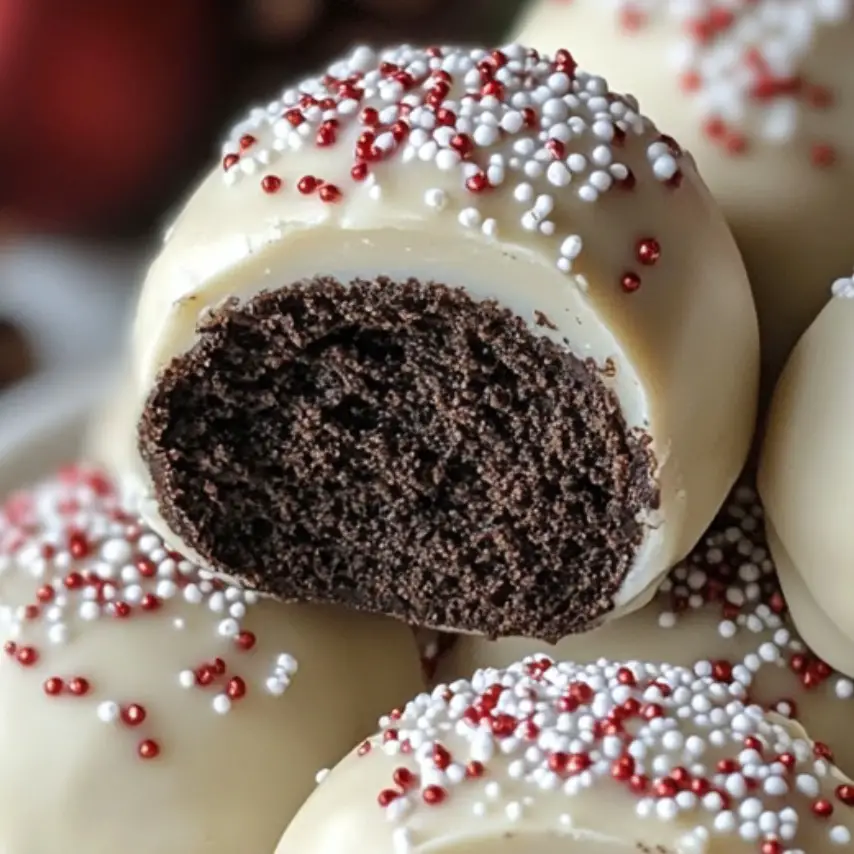
Imagine the familiar chocolatey goodness of an Oreo, elevated by creamy, tangy cream cheese and a smooth white chocolate coating. Each bite is rich, decadent, and impossible to resist! They’re indulgent yet surprisingly light, making them the ideal sweet treat for your holiday gatherings.
Ingredients for Oreo Truffle Snowballs
- 1 package (36) Oreo cookies 🍪
- 8 oz cream cheese, softened 🧀
- 16 oz white chocolate or white candy coating 🍫
- Optional decorations: Sprinkles, crushed candy canes, or edible glitter 🌟🍬
Tools You’ll Need
- Food processor or rolling pin for crushing the Oreos
- Mixing bowl and spatula for blending ingredients
- Parchment paper-lined baking sheet
- Microwave-safe bowl (if melting chocolate in the microwave)
- Fork for dipping truffles into the chocolate
Step-by-Step Guide to Making Oreo Truffle Snowballs
Step 1: Crush the Oreos 🍪
In a food processor, pulse the Oreos until they’re a fine, crumb-like consistency. If you don’t have a processor, simply place them in a sealed bag and crush with a rolling pin until they’re finely ground.
Step 2: Mix in Cream Cheese 🧀
In a large bowl, combine the Oreo crumbs and softened cream cheese. Mix thoroughly until everything is well combined and forms a thick, moldable dough.
Step 3: Shape into Balls ✋
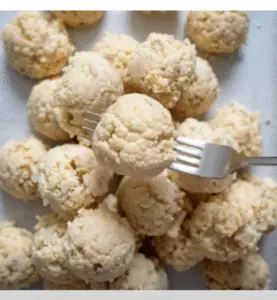
Roll the mixture into 1-inch balls and place them on a baking sheet lined with parchment paper. Once all balls are formed, pop the tray into the fridge for at least 30 minutes to firm up.
Step 4: Melt the White Chocolate 🍫
Using either the microwave or a double boiler, melt the white chocolate or candy coating. Stir until smooth and silky.
Step 5: Dip the Truffles 🕊️
Using a fork, dip each Oreo ball into the melted white chocolate, allowing any excess to drip off. Place the coated truffles back on the parchment paper.
Step 6: Decorate 🎉
While the chocolate is still wet, add your festive toppings—sprinkles, crushed candy canes, or edible glitter. Get creative with colors and textures to match the holiday spirit!
Step 7: Chill 🥶
Refrigerate the decorated truffles for about 15 minutes or until the chocolate coating is set.
Step 8: Serve and Enjoy 🎅🍬
Keep these truffles stored in the fridge until you’re ready to serve. They’re best enjoyed cold, straight from the fridge!

Tips for Perfect Oreo Truffle Snowballs
- Switch Up the Decorations: Add red and green sprinkles for an extra holiday vibe!
- Gifting Made Easy: Pack the truffles in a festive tin, wrap with a bow, and you’ve got a beautiful homemade holiday gift.
- Flavor Variations: Try mint Oreos for a peppermint twist or golden Oreos for a milder taste.
Storing Oreo Truffle Snowballs
These truffles keep well when stored in an airtight container in the refrigerator for up to one week. For longer storage, you can freeze them (without decorations) for up to a month. Just let them thaw in the fridge for a few hours before decorating and serving.
Frequently Asked Questions (FAQ)
Can I use different types of chocolate for the coating?
Absolutely! You can use milk or dark chocolate for a richer flavor, though white chocolate adds to the snowy aesthetic.
Do I have to use a food processor to crush the Oreos?
Not at all! You can place the Oreos in a sealed bag and crush them with a rolling pin. It’s a great way to skip an extra appliance.
Can I make these truffles ahead of time?
Yes! Make them a few days in advance, store them in the fridge, and decorate right before serving.
What’s the best way to make these look festive?
Get creative with toppings! Red and green sprinkles, crushed candy canes, or edible glitter give them a festive touch. You can even add a tiny edible bow for a gift-like appearance.
Final Thoughts: A Festive Treat You’ll Make Year After Year
These Oreo Truffle Snowballs are everything you want in a holiday dessert—delicious, easy, and visually stunning. They’ll be the highlight of any dessert table or holiday gift exchange. Plus, the simple ingredients and minimal prep time make them ideal for busy holiday schedules. With just a few steps, you’ll have a batch of delectable treats that capture the magic of the season!
🍪 Looking for More Holiday Treats? Check Out These Recipes!
- Peppermint Bark Fudge – For those who love a minty treat with a chocolatey twist.
- Classic Gingerbread Cookies – A holiday staple that’s as fun to decorate as it is to eat.
- Cranberry Bliss Bars – A fruity, festive dessert bar with a touch of white chocolate.
💬 Don’t Forget to Share Your Creations!
If you make these Oreo Truffle Snowballs, snap a photo and share it on Pinterest or Instagram! Tag us so we can see your holiday masterpieces.
Nutritional Information (approx. per truffle)
- Calories: 150
- Carbohydrates: 16g
- Protein: 1g
- Fat: 9g
- Sugars: 10g
