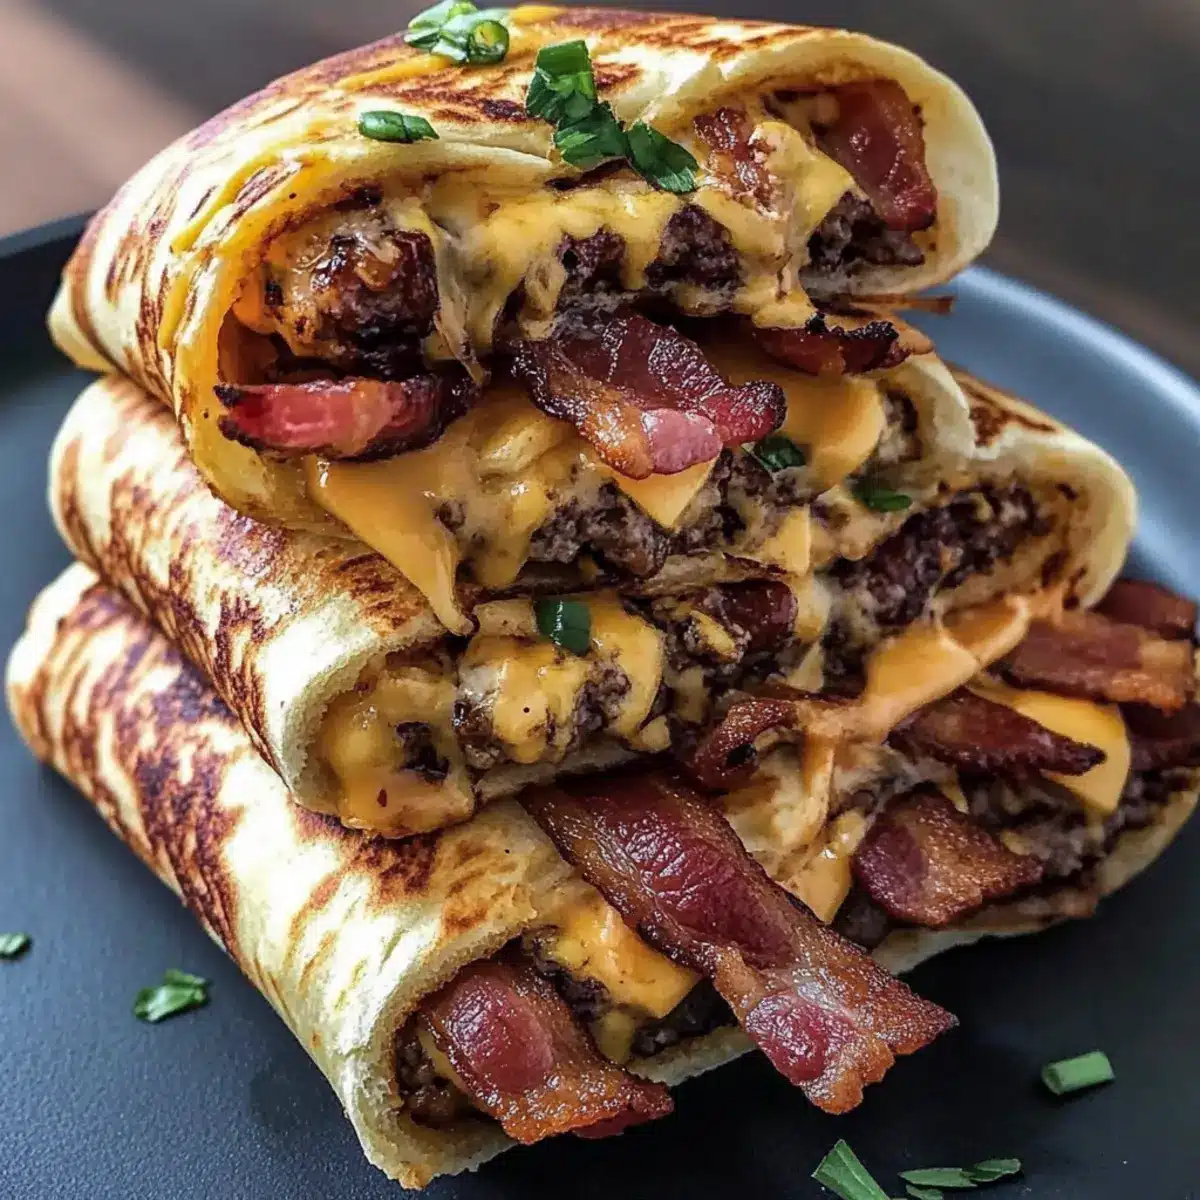
When I first took a bite of these Garlic Butter Bacon Cheeseburger Rollups, it felt like a delightful food hug. Imagine biting into a crunchy tortilla filled with sizzling bacon, gooey cheese, and that irresistible garlic aroma wafting through the kitchen. As simple as they are satisfying, these rollups transform the classic flavors of a cheeseburger into an easy, finger-friendly snack.
Perfect for a cozy family night or as a standout party appetizer, they’re the go-to fix for anyone tired of mundane fast food. What’s better? You can customize these rollups to fit your cravings or dietary needs—swap in turkey bacon or try a plant-based alternative, and play around with cheese options for added flair!
Get ready to impress your friends or simply treat yourself with this cheesy goodness! With just a few simple steps, you’ll have a plate of golden, crispy rollups ready to share—or not! Let’s dive into this recipe and experience the deliciousness together.

Why Love Garlic Butter Bacon Cheeseburger?
Irresistibly, you’ll fall for these rollups that perfectly combine savory flavors of bacon and cheeseburger goodness into a finger food delight. Customizable to your taste, swap bacon for turkey or vegan options without sacrificing flavor. Quick to make, they only require a few simple steps to whip up in your kitchen. Impressive presentation makes them a standout at parties, while crowd-pleasing flavors ensure everyone will come back for more. So gather your ingredients and let’s make a snack that’s sure to wow!
Garlic Butter Bacon Cheeseburger Ingredients
These delectable rollups are as simple to assemble as they are flavorful.
For the Garlic Butter
• Unsalted Butter – Adds richness and flavor; substitute with olive oil for a lighter option.
• Garlic – Provides essential aromatic flavor; fresh garlic is preferred, but garlic powder works in a pinch.
• Dried Parsley – Adds color and freshness; fresh herbs can elevate the taste.
• Salt – Enhances the flavors in every bite.
• Black Pepper – Adds mild heat and depth.
For the Rollups
• Flour Tortillas – Main component; ideal for wrapping the filling, while corn tortillas may crack unless warmed.
• Bacon – Offers crunch and classic cheeseburger flavor; perfect for those who love a savory snack, and turkey or plant-based options work well too!
• Shredded Cheddar Cheese – Contributes sharpness and melt; Monterey Jack or Pepper Jack adds creaminess or spice.
• Shredded Mozzarella Cheese – Provides stretch and additional melt.
• Chopped Fresh Chives (optional) – Adds garnish and extra flavor; can be substituted with green onions or omitted.
Ready to roll up some magic? Let’s proceed to the fun part!
How to Make Garlic Butter Bacon Cheeseburger Rollups
Preheat your oven to 190°C (375°F). This ensures a perfect bake, helping the rollups turn crispy and golden.
Mix the melted butter, minced garlic, dried parsley, salt, and black pepper in a small bowl. Use this fragrant blend to elevate the flavors of your rollups.
Lay out the flour tortillas on a clean surface and generously brush each tortilla with your garlic butter mixture. This creates a luscious base for all that cheesy goodness.
Sprinkle the crumbled bacon, shredded cheddar, mozzarella cheese, and chopped chives evenly over the tortillas. Make sure to cover every inch to achieve that ooey-gooey texture.
Roll each tortilla tightly into a spiral, placing the seam-side down on a baking sheet lined with parchment paper. This keeps everything snug and contained.
Brush the tops of the rolled tortillas with the remaining garlic butter. Bake them for about 12-15 minutes, or until they’re golden brown and crispy.
Cool the rollups slightly before slicing them into bite-sized pieces. Serve warm and watch your family and friends dive in!
Optional: Pair these rollups with your favorite dipping sauces for an extra layer of flavor.
Exact quantities are listed in the recipe card below.
What to Serve with Garlic Butter Bacon Cheeseburger Rollups?
Elevate your snack game by pairing these cheesy rollups with delicious sides that balance their rich flavors.
- Creamy Ranch Dip: The cool, tangy ranch complements the savory rollups and adds an extra layer of flavor. Perfect for dipping!
- Crispy Sweet Potato Fries: Sweetness meets savory in this crunchy side, contrasting beautifully with the buttery, cheesy rollups.
- Loaded Nacho Salad: This includes layers of fresh lettuce, diced tomatoes, and zesty toppings to balance the richness of the rollups. A delightful twist on nachos!
- Garlic Pickles: Bright and tangy, pickles provide a refreshing crunch that cuts through the indulgence of the rollups.
- Coleslaw: A crunchy, creamy slaw can add a refreshing element, providing a delightful contrast to the warm, gooey rollups.
- Iced Tea with Lemon: Whether sweetened or unsweetened, this refreshing drink enhances the entire meal with its cool flavor.
- Chocolate Chip Cookies: For a sweet finish, serve these warm, gooey cookies. The contrast of warm and cold is pure bliss!
- Fruit Skewers: A colorful mix of fresh fruits adds a burst of sweetness and juiciness, balancing the savory aspects beautifully.
- Classic Caesar Salad: Crisp romaine with caesar dressing gives a refreshing counterpoint and adds elegance to this casual meal.
Expert Tips for Garlic Butter Bacon Cheeseburger Rollups
Make Ahead Magic: Assemble the rollups ahead of time and refrigerate them. Bake just before serving for perfectly crispy results.
Cooling Cues: Let rollups cool slightly after baking before slicing. This helps maintain their structure and prevents a cheesy mess.
Oven Reheat: To revive leftover rollups, reheat them in the oven at 350°F for about five minutes. This enhances their crispiness!
Tortilla Tactics: Use flour tortillas for best results. If you prefer corn tortillas, warm them before filling to prevent cracking.
Flavor Finesse: Don’t hesitate to experiment with different cheese and bacon options. Customize these Garlic Butter Bacon Cheeseburger Rollups to suit your taste!
Garlic Butter Bacon Cheeseburger Variations
Feel free to unleash your creativity and customize these rollups to fit your palate!
- Turkey Bacon: Swap out traditional bacon for turkey bacon for a lighter option that still maintains great flavor.
- Plant-Based Bacon: Choose vegetarian or vegan bacon for a deliciously guilt-free twist. These alternatives bring flavor without meat!
- Cheddar Alternatives: Use gouda or smoked cheese for a unique flavor profile; the smokiness adds depth every bite.
- Spicy Kick: Add sliced jalapeños or a touch of cayenne pepper to the garlic butter for an extra kick that packs a punch.
- Herb Infusion: Experiment by incorporating fresh basil, oregano, or rosemary into the garlic butter blend for an aromatic boost.
- Cream Cheese Blend: Spread a layer of cream cheese inside before adding the fillings for an ultra-creamy inside that complements the crunch.
- Sweet Surprise: Drizzle a little honey or add caramelized onions for a sweet contrast that elevates the savory elements.
- Loaded Style: amp up the flavor by adding other favorite toppings like diced pickles, BBQ sauce, or sautéed mushrooms for a true loaded burger experience!
How to Store and Freeze Garlic Butter Bacon Cheeseburger Rollups
Fridge: Store cooled rollups in an airtight container for up to 3 days. This keeps them fresh and ready for snacking throughout the week.
Freezer: If you want to keep them longer, freeze the rollups before baking. Wrap them tightly in plastic wrap and place them in a freezer-safe bag for up to 1 month.
Reheating: When ready to enjoy, baked rollups can be reheated in the oven at 350°F for about 5 minutes. If frozen, bake directly from the freezer for 15-20 minutes until heated through.
Serving Tips: Serve these delicious Garlic Butter Bacon Cheeseburger Rollups warm for the best taste and texture, paired with your favorite dipping sauces for added flavor!
Make Ahead Options
These Garlic Butter Bacon Cheeseburger Rollups are perfect for meal prep enthusiasts looking to save time on busy weeknights! You can assemble the rollups up to 24 hours in advance by preparing them all the way to step 5, then tightly wrapping them in plastic wrap and refrigerating. This keeps them fresh and ready to bake when you need them. When you’re ready to enjoy, simply brush the tops with garlic butter, bake at 190°C (375°F) for 12-15 minutes, and they’ll come out just as delicious—golden and crispy! To maintain the best quality, avoid pre-baking and refrigerate them until the last minute; your friends and family will be impressed with restaurant-worthy results!
Garlic Butter Bacon Cheeseburger Rollups Recipe FAQs
How do I choose the right tortillas?
Absolutely! For the best results, I recommend using flour tortillas as they hold together beautifully without cracking. If you prefer corn tortillas, make sure to warm them slightly before filling to prevent them from breaking.
How do I store leftovers and for how long?
Cooled rollups can be stored in an airtight container in the refrigerator for up to 3 days. This keeps them fresh and ready for quick snacking. Just remember to reheat them in the oven at 350°F for about 5 minutes to regain their crispy texture.
Can I freeze Garlic Butter Bacon Cheeseburger Rollups?
Yes, you can! To freeze, I suggest wrapping each unbaked rollup tightly in plastic wrap and placing them in a freezer-safe bag. They can be frozen for up to 1 month. When you’re ready to enjoy, bake them straight from the freezer at 350°F for 15-20 minutes until heated through.
What if my rollups are soggy after baking?
Very! If your rollups turn out soggy, don’t worry. The next time you make them, make sure to cool them slightly before slicing, and always bake them until golden brown and crispy. You can also try baking on a wire rack to allow for better air circulation, promoting a crunchier texture.
Are these rollups suitable for dietary restrictions?
Absolutely! These Garlic Butter Bacon Cheeseburger Rollups can be easily adapted to fit different dietary needs. You can swap traditional bacon for turkey bacon or a plant-based alternative without sacrificing flavor. Feel free to play around with different cheeses, too—it’s all about making them work for you!
How do I know when my rollups are ready?
Great question! You’ll know the rollups are done when they turn a beautiful golden brown, indicating that those tortillas are crispy and the cheese is wonderfully melted. Keep an eye on them while they bake, as oven times can vary slightly. Enjoy the scrumptious aroma filling your kitchen!
Recipe FAQs
Irresistibly Cheesy Garlic Butter Bacon Cheeseburger Rollups
Ingredients
Equipment
Method
- Preheat your oven to 190°C (375°F). This ensures a perfect bake, helping the rollups turn crispy and golden.
- Mix the melted butter, minced garlic, dried parsley, salt, and black pepper in a small bowl.
- Lay out the flour tortillas on a clean surface and generously brush each tortilla with your garlic butter mixture.
- Sprinkle the crumbled bacon, shredded cheddar, mozzarella cheese, and chopped chives evenly over the tortillas.
- Roll each tortilla tightly into a spiral, placing the seam-side down on a baking sheet lined with parchment paper.
- Brush the tops of the rolled tortillas with the remaining garlic butter. Bake them for about 12-15 minutes, or until golden brown.
- Cool the rollups slightly before slicing them into bite-sized pieces. Serve warm.