Welcome, friend! I’m so glad you’re here. If you’re on the hunt for a low-mess, high-fun sensory activity that sparks creativity and calms busy hands, you’re going to fall in love with Moon Sand. This recipe is simple, safe, and totally satisfying to make. It’s a little slice of tactile magic—and it all starts with just flour and baby oil!
💌 Want more hands-on play recipes like this? Subscribe now and I’ll send you this recipe (and more sensory fun) straight to your inbox!
What Is Moon Sand?
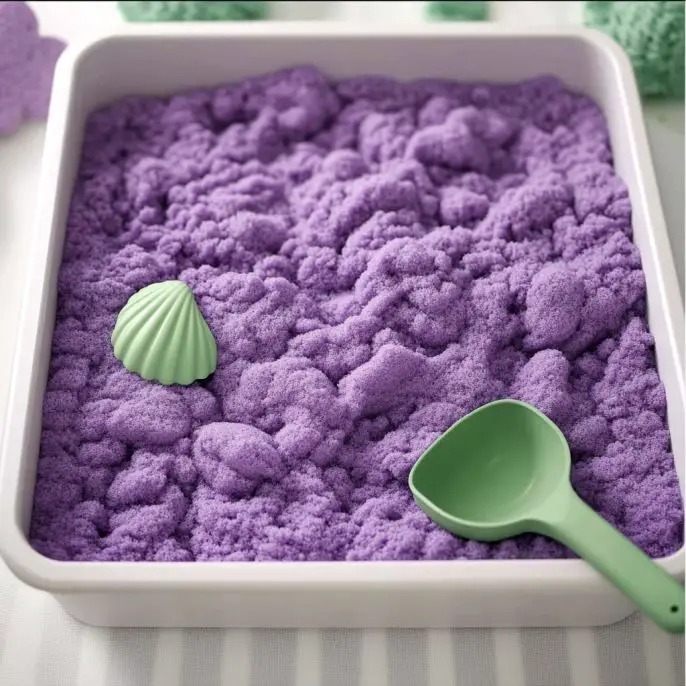
Moon Sand—sometimes called “cloud dough”—is a soft, moldable, and wonderfully crumbly play material that feels like sand but sticks together like dough. It’s dry to the touch, but press it in your palm or into a mold, and it holds its shape beautifully. Think of it as DIY kinetic sand’s fluffier cousin, and it’s perfect for sensory bins, pretend baking, or simply digging and building.
Why You’ll Love This DIY Moon Sand
🧂 Only 2 main ingredients!
🖐️ No-cook, no-heat, and safe for little hands
💸 Budget-friendly sensory play
🧠 Promotes creativity, calm, and fine motor skills
🌈 Easily customizable with colors and scents
What It Feels Like
Moon sand is light, silky, and moldable. You can press it into shapes like play dough, but when you crumble it, it falls apart like sand. The texture is soft and fluffy, making it incredibly satisfying to play with. It’s the kind of stuff you’ll want to run your fingers through over and over again!
Benefits of Playing with Moon Sand
Calms and focuses busy minds
Develops hand strength and coordination
Supports creative thinking and imaginative play
Encourages sensory exploration in a low-mess format
Works beautifully in themed sensory bins (beach, construction, dinosaur, baking!)
DIY Moon Sand
Ingredients
Equipment
Method
- Measure out 4 cups of flour and pour it into a large mixing bowl.
- Measure and add 1/2 cup of baby oil to the flour.
- Mix thoroughly with hands or a tool until texture resembles moldable wet sand.
- Optional: Add a few drops of food coloring and stir or knead until evenly colored.
- Once desired texture and color are reached, moon sand is ready to play with. Store in an airtight container.
Notes
🛠️ Tools You’ll Need
Large mixing bowl
Measuring cups
Mixing spoon or your hands
Airtight container (for storage)
Optional: gloves if adding food coloring
🌙 Step-by-Step Instructions
1. Measure and Pour
In a large mixing bowl, add 4 cups of flour.
2. Add the Oil
Pour in ½ cup of baby oil. This is what gives the moon sand its soft, moldable feel.
3. Mix It Together
Use your hands or a mixing spoon to combine the flour and oil. Mix until the texture resembles wet beach sand—it should hold its shape when pressed, but fall apart when crumbled.
4. Add Color (Optional)
To color your moon sand, add a few drops of food coloring. Start small and knead well to distribute the color evenly. You can also add the food coloring to the oil before mixing for easier blending.
5. Add Scent (Optional)
Want a delicious-smelling batch? Add a few drops of vanilla, almond, or lemon extract to the oil before combining. The result? A sensory dream!
6. Time to Play!
Once your moon sand is soft, smooth, and moldable, it’s ready to go! Use cups, cookie cutters, spoons, or just fingers for endless creative play.
✨ Tips & Fun Variations
Rainbow Moon Sand: Divide your base recipe into smaller bowls and tint each with a different color. Great for color mixing fun!
Scented Themes: Try lavender + purple for calming play, or lemon + yellow for a sunny day bin.
Sensory Bin Ideas: Add construction vehicles, shells, toy animals, or baking tools for themed play.
Add Glitter: For a sparkly twist, mix in a little glitter for extra shine!
🧺 Storage Tips
Store your moon sand in an airtight container or large zip-top bag to keep it fresh and soft.
It will stay good for weeks or even months if stored in a cool, dry place.
If it starts to dry out, knead in a tiny splash of baby oil to revive it.
🧪 A Quick Science Note
Moon sand works thanks to the way oil coats the flour, creating a substance that resists water and binds just enough to stick together when pressed. It’s a cool intro to non-Newtonian materials and texture science—all while keeping it fun and mess-minimal.
🙋 FAQ
Can I use vegetable oil instead of baby oil?
You can, but the scent and texture will be different. Baby oil gives a smoother, silkier finish and a clean scent.
Is this safe for toddlers?
Yes, under supervision! While it’s non-toxic, it’s not edible, so keep an eye on younger children who may be tempted to taste.
Can I make it gluten-free?
Yes! Substitute flour with gluten-free flour or a mix of cornstarch and baking soda. The texture may vary, but it still works wonderfully.
🧁 Conclusion
This DIY Moon Sand is a go-to recipe for calm, creative play that’s as fun to make as it is to enjoy. It’s simple, safe, and oh-so-satisfying—perfect for playdates, quiet afternoons, or adding a magical sensory station to your day.
Once you’ve made it once, you’ll want to keep a batch on hand for whenever the mood strikes.
🌟 More DIY Sensory Play Ideas
📸 Share Your Moon Sand Creations!
Tried this recipe? I’d love to see your colorful sand and play setups!
Tag me on Pinterest or Instagram so we can spread the sensory inspiration far and wide!
🍬 Nutritional Info?
Nope—this one’s not for snacking! But it’s full of sensory satisfaction and creativity. 💖
Thanks for stopping by! Until next time—stay playful, stay inspired, and keep building magic one scoop at a time. 🌙


