Imagine witnessing the creation of a cloud right before your eyes, and then watching it rain down as if you were observing a real-life storm inside your home. This exciting and simple experiment allows kids to see science in action as they create their own rain cloud using basic household items. Whether you’re a parent looking to spark your child’s curiosity or a teacher planning an engaging classroom activity, this “Create Your Own Rain Cloud” experiment is perfect for hands-on learning and rainy-day fun!
Why You’ll Love This Experiment
This rain cloud experiment is not just fun, it also provides an incredible opportunity to explore important scientific concepts like precipitation, cloud formation, and the water cycle. It allows children to engage with these concepts in an interactive and memorable way. By creating a cloud and watching it “rain,” kids gain a visual understanding of how moisture builds up in the atmosphere and eventually falls to the ground.
Moreover, this experiment makes a fantastic introduction to the world of weather science. The beauty of the activity lies in its simplicity—requiring only a few easily accessible materials—and its ability to engage kids in creative exploration.
From mixing different colors to experimenting with different cloud textures, the possibilities for variation are endless. This is an experiment that not only sparks learning but invites imaginative twists!
Ingredients for the Experiment
The best part about this experiment is that you don’t need to run out to buy any fancy or complicated supplies. Here’s everything you’ll need to create your very own rain cloud:
Supplies Needed:
Large Clear Glass Jar: This represents the “sky” of the experiment, allowing kids to see the cloud form and the rain fall.
Water: This will fill the jar and represent the atmosphere or air in which clouds form.
Shaving Cream (Foamy kind, not gel): This creates the cloud. The foamy texture holds the colored water (rain) just like real clouds hold moisture.
Blue Food Coloring: This will be used to color the rain. You can experiment with different colors to create a more colorful storm.
Small Bowl: For mixing food coloring and water.
Spoon or Dropper: To carefully release the “rain” onto the shaving cream cloud.
Necessary Tools
To make this rain cloud experiment come to life, you’ll need a few basic tools:
Measuring Spoons or Cups: For precise measurement of the water and food coloring.
Dropper or Spoon: To gently release the colored water (rain) onto the cloud.
Measuring Cups: Optional, but helpful if you want to be more precise with your water measurements.
Flat Table or Surface: A clean, flat surface is ideal for the experiment, especially for easy clean-up.
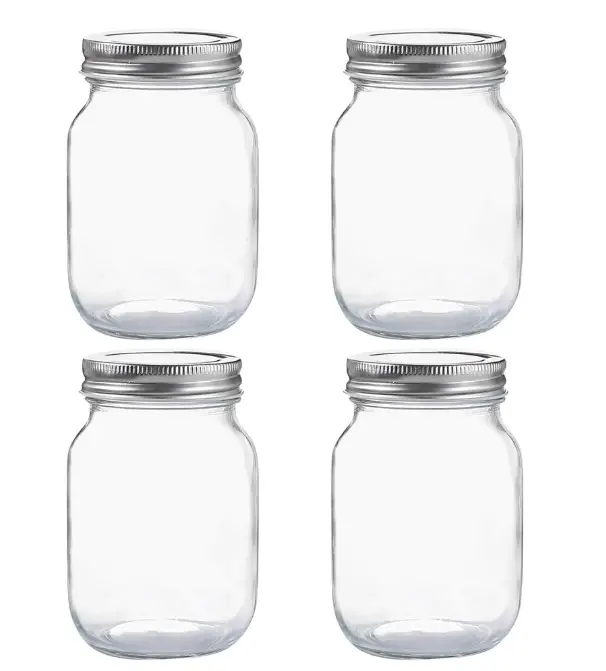
Clear Glass Jar
The classic, transparent finish of these canning jars adds a touch of elegance and rustic charm to your cupboards, shelves, or refrigerator, making it easy to identify their contents. They’re a versatile, practical addition to your kitchen, home, office, or studio.
Ingredient Swaps and Additions
Looking to take your rain cloud experiment to the next level? Here are some ideas for adding a personal twist or experimenting further:
Different Colored Clouds: Swap out the blue food coloring for other vibrant colors like green, purple, or even a mix of different colors. Creating a rainbow storm could be a fantastic visual addition.
Cloud Texture: While shaving cream is ideal for its fluffy, cloud-like consistency, you can experiment with other materials. For example, cotton balls will create a lighter, fluffier cloud.
Add Glitter or Sparkles: For an added touch of magic, you can mix in a little glitter with the colored water. This creates a sparkling rainstorm that’s visually captivating.
Make a Tornado: After the rain cloud releases its rain, you can create a mini tornado by gently swirling the water. This simulates the motion of a rotating storm, providing a fun and interactive twist to the experiment.
Step-by-Step Instructions
Let’s break down the experiment into clear steps so you and your child can create your very own rain cloud.
Step 1: Fill the Jar
Start by filling your clear glass jar about three-quarters full with water. This represents the atmosphere or air that surrounds the cloud. Make sure to leave some space at the top of the jar so the shaving cream cloud can float and expand. You want enough room for the cloud to form and the rain to fall.
Step 2: Make the Cloud
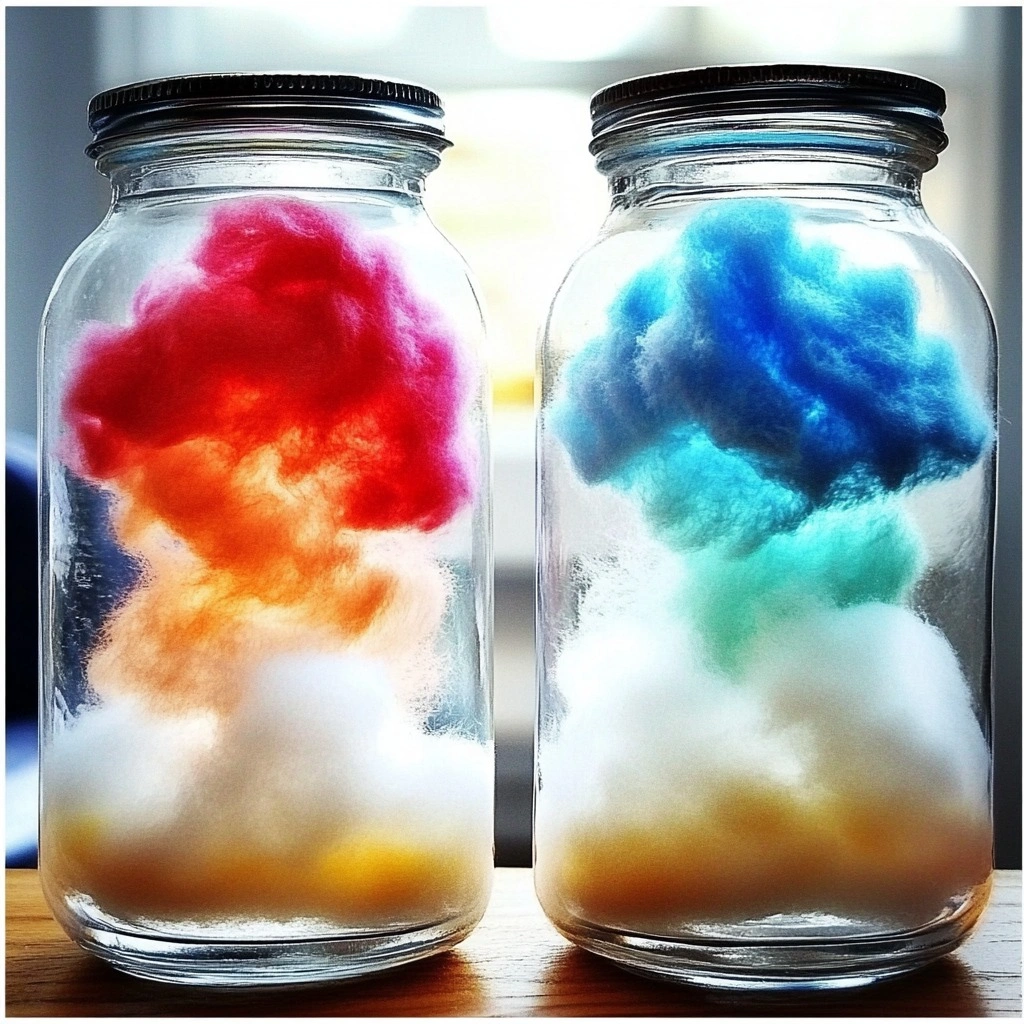
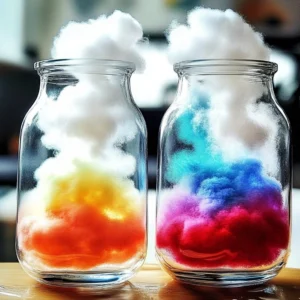
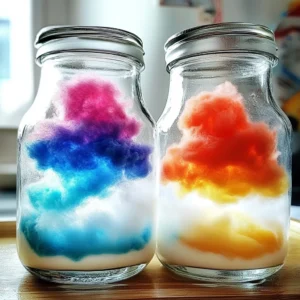
Next, take the shaving cream and spray a generous amount over the surface of the water. You’ll want to completely cover the water with a thick, fluffy layer of shaving cream. This creates the “cloud” that will eventually release the “rain.” The cloud should look puffy and light, similar to the clouds you see in the sky!
Step 3: Prepare the Rain
In a small bowl, add a few drops of blue food coloring to some water. Stir the mixture well so the water is evenly colored. The more food coloring you add, the deeper the shade of blue your rain will be. You can even use different food colors to create multi-colored rain for added fun!
Step 4: Start the Rain
Now it’s time to make it rain! Take a spoon or a dropper and carefully drip the colored water (rain) onto the shaving cream cloud. Watch closely as the colored water begins to seep through the cloud and fall into the water below. As the cloud becomes saturated, you’ll start to see it rain. The moisture is released, simulating real-world precipitation!
What’s Happening: The Science Behind It
This experiment is an excellent demonstration of precipitation. Shaving cream mimics a cloud, and the colored water represents the moisture that clouds hold. In nature, clouds are made up of tiny water droplets or ice crystals that gather together. As more moisture collects, the cloud gets heavier, and when it becomes saturated, the water falls to the ground as rain.
In your experiment, the shaving cream holds the colored water until it becomes too heavy. Once it reaches its limit, the “rain” begins to fall into the jar. It’s a perfect hands-on visual for explaining how rain is formed and how clouds release precipitation.

Pro Tips for Success
Here are some expert tips to ensure the rain cloud experiment is a success:
Use Warm Water: Warm water helps the colored water seep through the shaving cream cloud more quickly. This can speed up the process, allowing kids to see the rain fall faster.
Add More Shaving Cream: If you use more shaving cream, the cloud will hold the colored water for a longer period before it starts to rain. This can make the experiment last longer, giving kids more time to observe the process.
Let Kids Take Over: Encourage kids to take control of the amount of water, food coloring, and the timing of the rain. This hands-on involvement will help them learn better and make the experiment more interactive and fun.
Vary the Colors: Try using different colors of food coloring to create a rainbow rainstorm. This can be especially fun and visually engaging for children!
Use a Dropper for Precision: Using a dropper allows for more controlled drops of water. This makes the experiment feel more scientific and precise.
Serving Suggestions
Though this is not a traditional recipe, it can certainly be part of a larger weather-themed event. Pair the rain cloud experiment with fun activities, books, or movies related to weather. You could even have kids create their own weather reports or design drawings of their rainstorm!
Storing and Reheating
Since this is a one-time experiment, there’s no need for storage. However, if you’d like to repeat the activity, it’s best to dispose of the water after each use. Make sure to clean up the shaving cream from the jar so it’s ready for the next experiment. Store the materials separately for easy setup in future experiments.
Nutritional Information
Although this activity doesn’t involve food, it certainly provides nourishment for the brain! Through the experiment, kids will gain an understanding of important scientific concepts, like the water cycle, precipitation, and cloud formation. It’s an enriching experience that combines learning and fun!
FAQs
Can I use different colors of food coloring? Absolutely! Feel free to experiment with various food coloring options to create a rainbow storm. Kids will love the vibrant colors.
Can I make the cloud with something else besides shaving cream? Shaving cream works best for creating fluffy clouds, but you could experiment with cotton balls. They create a lighter cloud effect.
What happens if I add too much water to the jar? If you overfill the jar, the shaving cream cloud may sink, so be sure to leave some space at the top for the cloud to float and form.
How can I make the rain fall faster? Use warm water for the colored water. Warmth helps the water seep through the shaving cream more quickly.
Can I do this experiment with older kids? Definitely! Older children can dive deeper into the science behind clouds, precipitation, and the water cycle, making the experiment a perfect learning opportunity for various age groups.
Conclusion
Creating your very own rain cloud is an exciting and educational way to introduce kids to the wonders of weather science. With just a few household items, you can teach them about clouds, precipitation, and the water cycle in an engaging and memorable way. Whether you’re homeschooling, planning a fun rainy-day activity, or incorporating this into a classroom lesson, this experiment is a fantastic way to spark curiosity and foster learning about the natural world.
By making science interactive and fun, you’ll help kids develop a love for learning and inspire them to ask even more questions about the world around them!

Create Your Own Rain Cloud
Ingredients
Method
- Fill the clear glass jar about three-quarters full with water to represent the atmosphere.
- Spray a generous amount of shaving cream over the surface of the water to create the cloud.
- In a small bowl, mix a few drops of blue food coloring with some water.
- Use a spoon or dropper to carefully drip the colored water onto the shaving cream cloud.