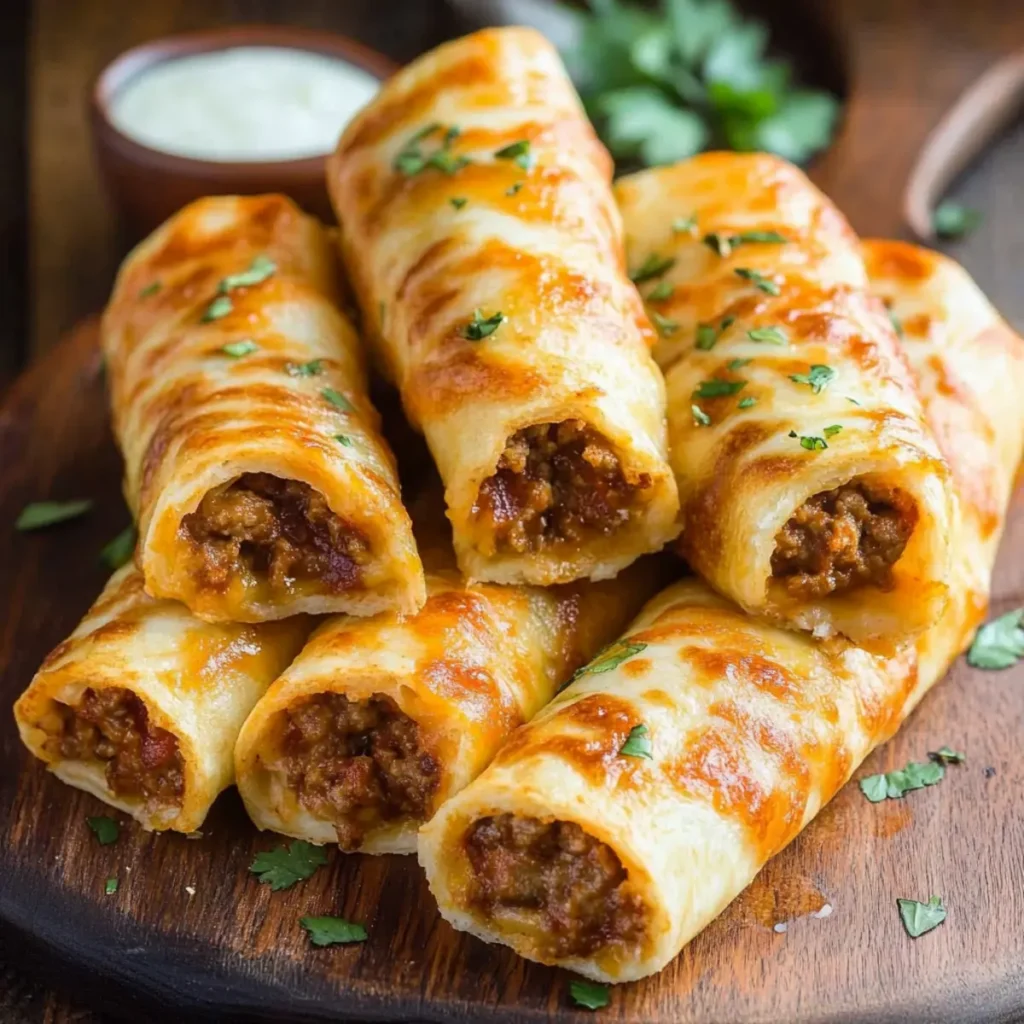
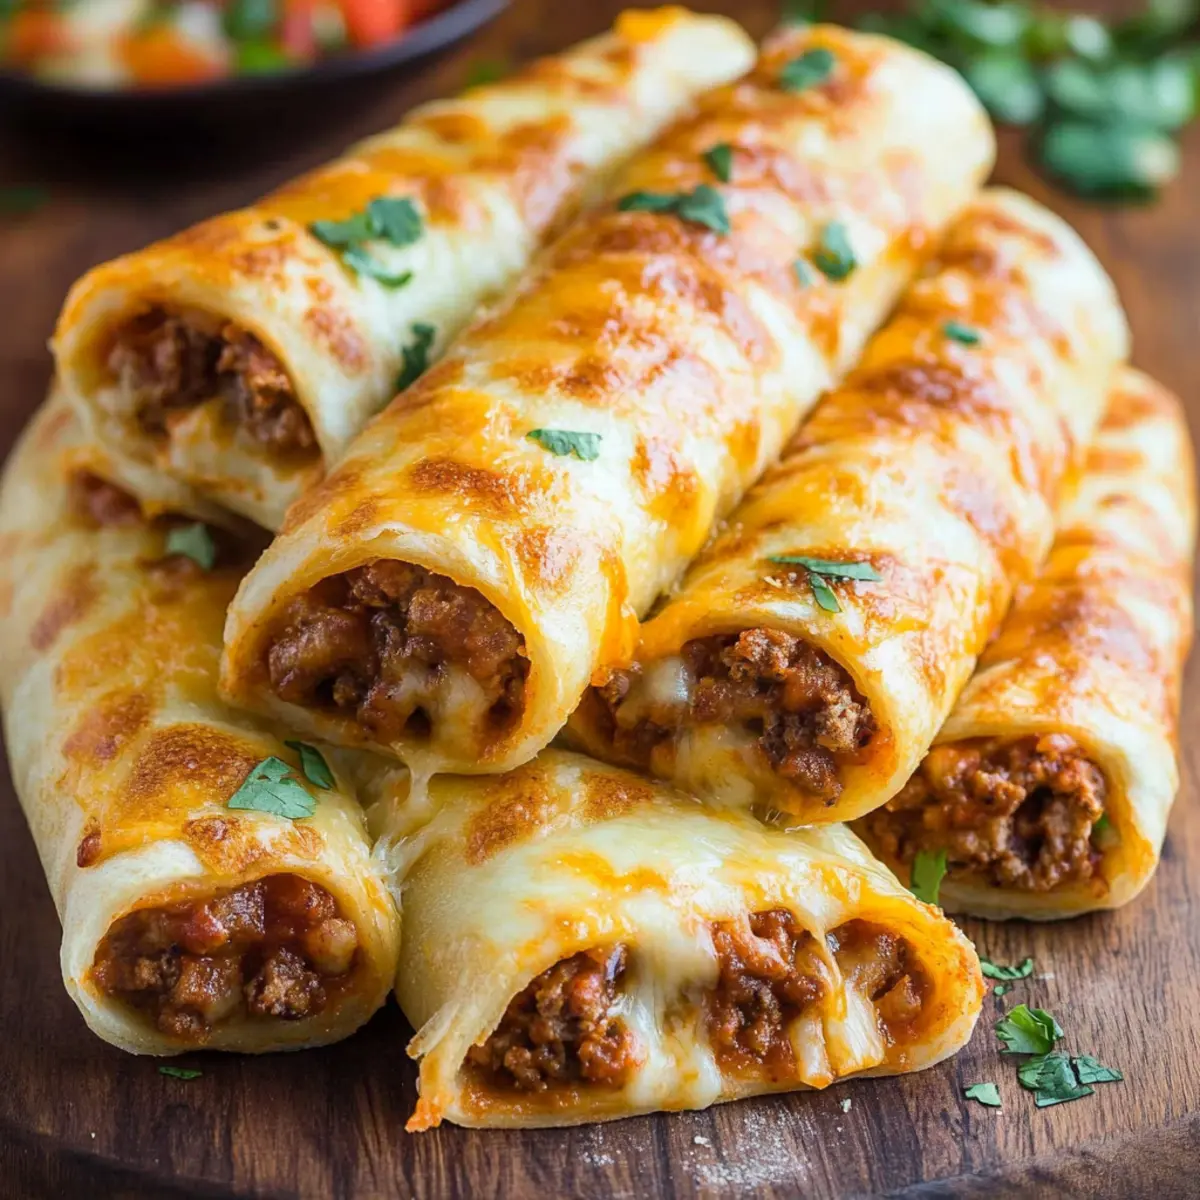
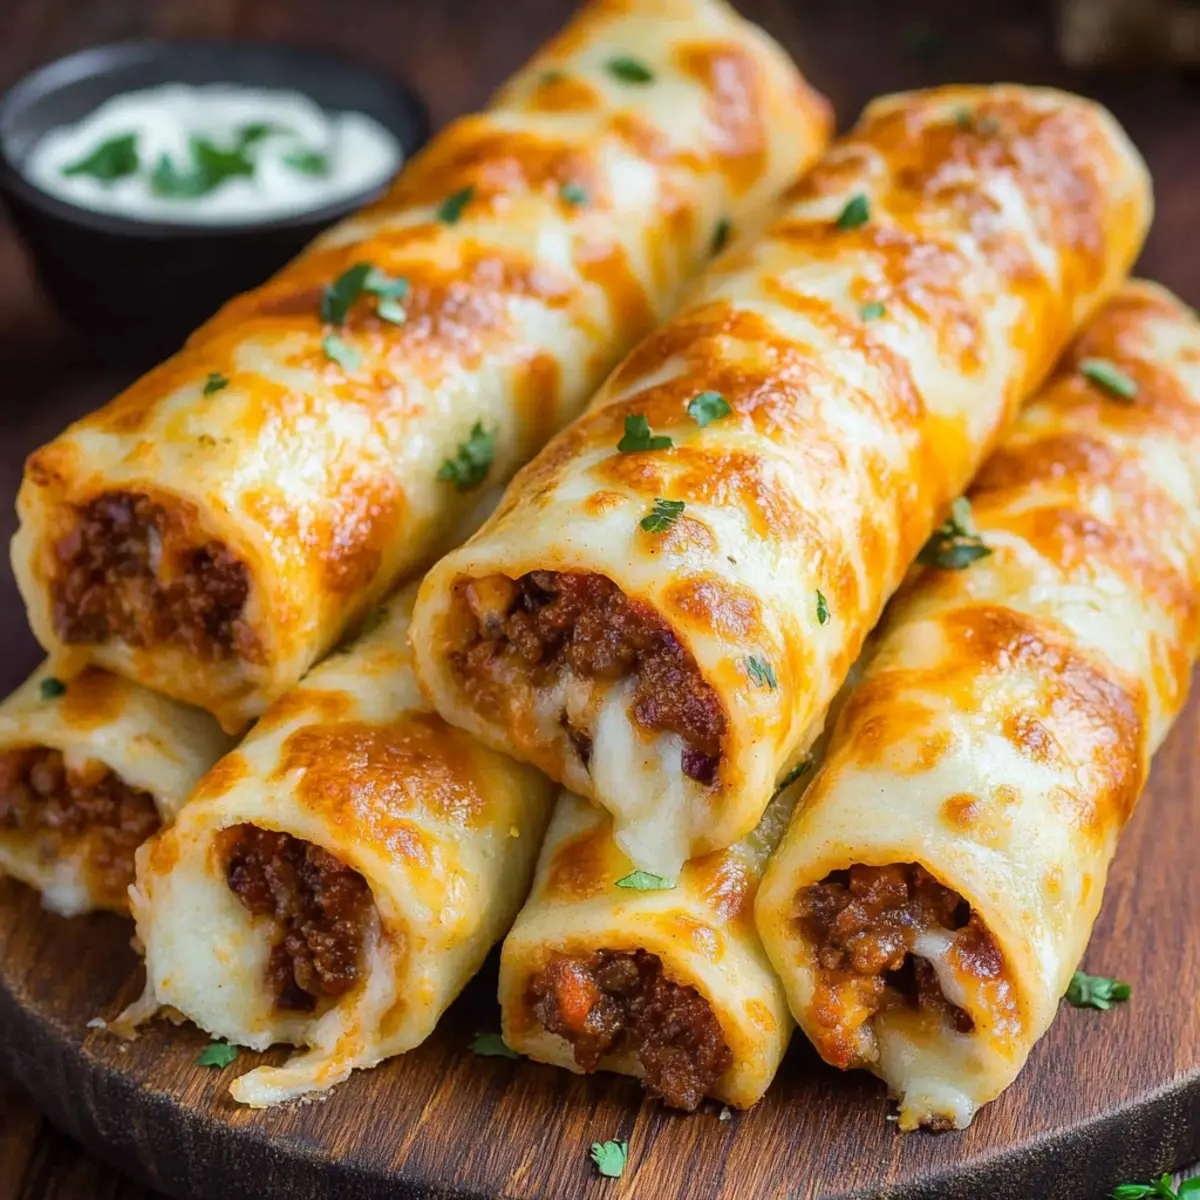
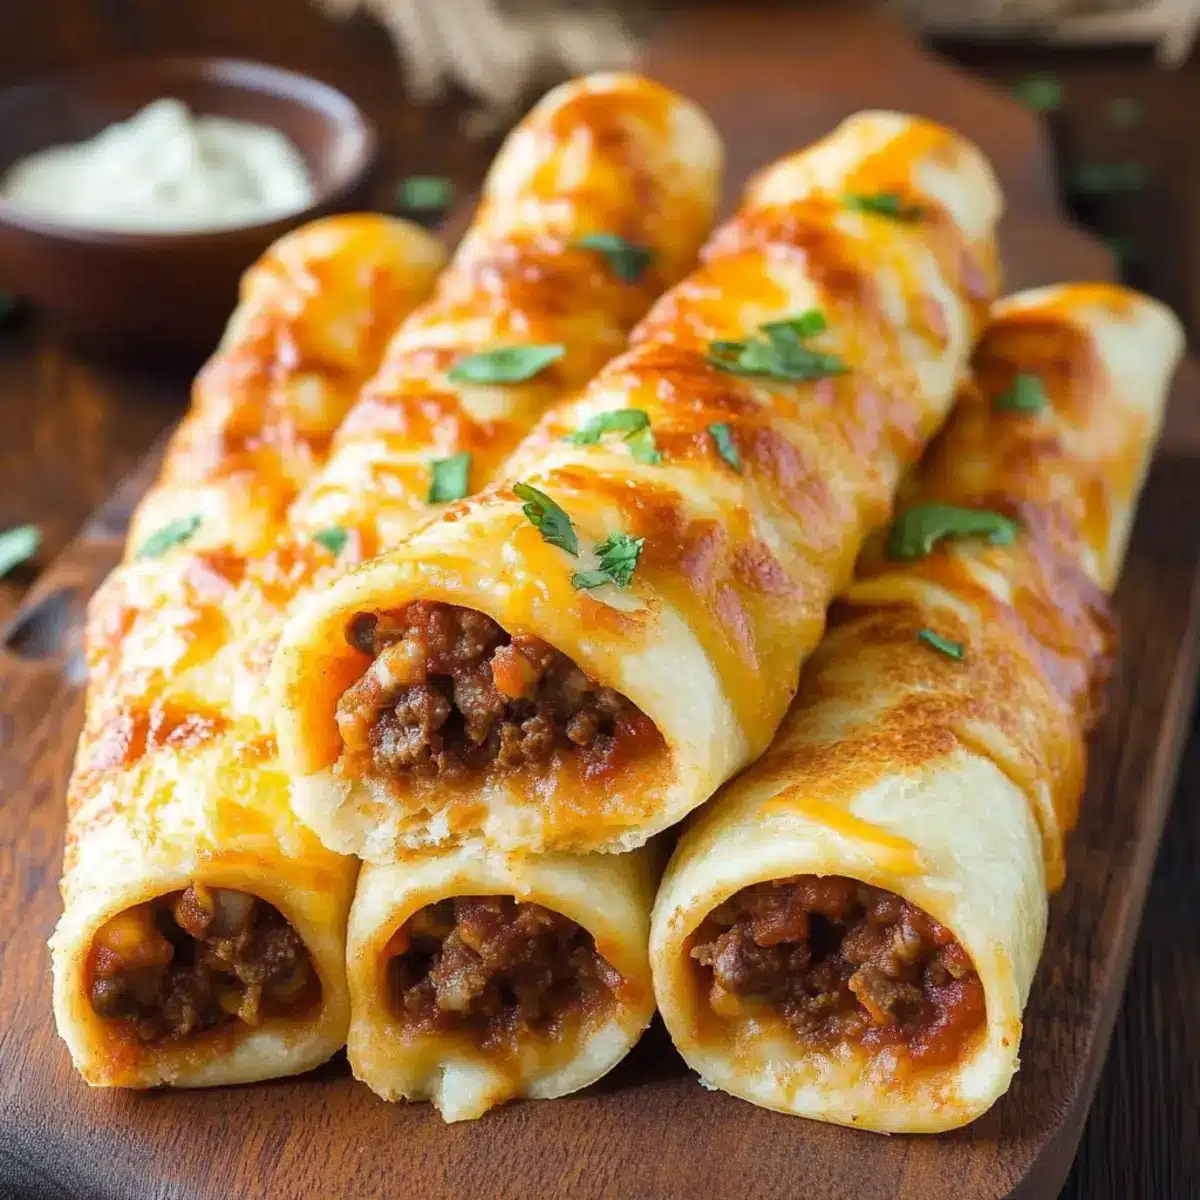
Sometimes, the perfect snack arrives just when you need it most. Picture a cozy evening with friends or family gathered around for a movie night, and someone brings out a tray of warm, golden Cheesy Taco Sticks. The enticing aroma of garlic butter wafts through the air, coaxing even the fussiest of eaters to join the fun. As I pulled these delicious bites from the oven, I was amazed at how effortlessly they transformed a regular night into a memorable occasion.
These Cheesy Taco Sticks are a delightful fusion of savory ground beef, gooey cheese, and soft pizza dough, making them ideal for parties or simply satisfying those late-night cravings. The best part? You can easily customize them with your favorite meats, cheeses, and toppings. Whether you’re hosting a casual get-together or just need a quick meal, these bite-sized treasures promise to impress everyone at the table. Join me as we dive into the simple steps to create this fun and flavorful treat!
Why are Cheesy Taco Breadsticks so appealing?
Warm, Golden Goodness: Freshly baked, these taco sticks are an irresistible sight that will have everyone reaching for seconds.
Kid-Friendly Fun: Perfect for picky eaters, the cheesy filling is sure to delight children and adults alike.
Quick to Make: In just 30 minutes, you can whip up a batch—ideal for busy weeknights or spontaneous gatherings!
Fully Customizable: Tailor these sticks with different meats, cheeses, or sides like salsa and guacamole for a personalized touch.
Party Perfect: These crowd-pleasers make a fantastic addition to any appetizer spread, encouraging everyone to dig in and enjoy!
Cheesy Taco Breadsticks Ingredients
For the Filling
• Ground Beef – The primary filling that brings savory richness; feel free to swap for ground turkey or crumbled plant-based meat for a lighter option.
• Taco Seasoning Mix – Enhances flavor; consider making a homemade version for tailored spice and lower sodium.
For the Dough
• Pillsbury Pizza Dough – Perfect for wrapping; can use homemade dough or kitchen staples like biscuit dough as a tasty alternative.
For the Cheesy Flavor
• Colby Jack and Cheddar Cheese Sticks – Deliver creamy goodness; mozzarella can be used for a milder taste, while pepper jack adds a spicy kick.
• Butter (melted) – Adds richness and helps the topping stick; it’s essential for achieving that golden, appetizing finish.
• Garlic Powder – Enhances the flavor profile; fresh minced garlic can elevate the taste with a bolder kick.
• Dried Parsley – Provides freshness to the garlic butter topping.
With these simple ingredients, you can create the ultimate Cheesy Taco Breadsticks that are sure to become a favorite at your next gathering!
How to Make Cheesy Taco Breadsticks
- Preheat the oven to 425°F (220°C), ensuring a hot and ready environment for baking your Cheesy Taco Breadsticks. Lightly grease a baking sheet with non-stick spray so they don’t stick during baking.
- Cook the Beef: In a skillet over medium-high heat, brown the ground beef thoroughly, stirring occasionally. Once cooked, drain the excess fat, mix in taco seasoning, and allow it to cool to room temperature for easy handling.
- Prepare Dough: Roll out the Pillsbury pizza dough on a clean surface and cut it into 10 small rectangles. Keep the pieces uniform for even baking!
- Assemble: Take each rectangle and add approximately 1 tablespoon of the cooled taco meat along with a halved cheese stick. Roll the dough tightly and pinch all seams closed to ensure the filling stays intact.
- Brush: In a small bowl, combine melted butter, garlic powder, and dried parsley. Generously brush this mixture over the tops of each stuffed stick, ensuring they’re coated for that rich flavor.
- Bake: Place the assembled taco sticks on the prepared baking sheet and bake for about 10-12 minutes or until they are golden brown and crispy. Serve them hot with your favorite taco toppings like salsa or guacamole!
Optional: Sprinkle with extra parsley for a pop of color and freshness.
Exact quantities are listed in the recipe card below.
Tips for the Best Cheesy Taco Breadsticks
• Seal Well: Ensure all seams are tightly pinched closed when rolling the dough. This prevents the delicious filling from leaking out while baking.
• Customize to Taste: Feel free to swap the ground beef for your choice of ground turkey or a plant-based alternative to suit dietary preferences.
• Don’t Rush Cooling: Always allow the Cheesy Taco Breadsticks to cool slightly before serving. This helps the cheese set a bit, preventing a messy stretch when biting into them.
• Freezer Friendly: For easy meal prep, these sticks can be frozen unbaked. Just remember to add a few extra minutes to the baking time when cooking from frozen.
• Serving Suggestions: Pair with an array of toppings like salsa, guacamole, or sour cream to elevate your taco breadsticks and cater to everyone’s taste!
What to Serve with Cheesy Taco Sticks?
Create a fun and delicious meal that everyone will enjoy, pairing these tasty treats with wonderfully complementary sides.
- Fresh Salad: A crisp salad adds a refreshing crunch, balancing the cheesy richness of the taco sticks perfectly.
- Spanish Rice: This savory side brings a touch of warmth and flavor, catering to the Mexican-inspired theme of your meal.
- Guacamole: Creamy and smooth, fresh guacamole enhances the taco experience, begging to be scooped with each delightful bite.
- Sour Cream: A drizzle or dollop of tangy sour cream elevates the flavors, offering a cooling contrast to the spices in the filling.
- Corn on the Cob: Sweet, juicy corn adds texture and a pop of sweetness, rounding out your meal wonderfully with vibrant flavors.
- Taco Bar: Set up a taco bar with various toppings like salsa, jalapeños, and chopped cilantro, allowing guests to customize and join in on the fun.
- Margaritas: Pair with a delicious margarita, adding a refreshing and zesty touch that truly complements the flavors of the cheesy taco sticks.
Cheesy Taco Breadsticks Variations
Feel free to cater these Cheesy Taco Breadsticks to your taste buds for an even more delicious experience.
- Meat Swap: Use shredded chicken, pulled pork, or turkey instead of ground beef for varied flavors.
- Dairy-Free: Substitute vegan cheese and plant-based ground meat for a delightful, dairy-free twist that everyone can enjoy.
- Flaky Crescent Dough: Swap out pizza dough for crescent roll dough for a flaky, buttery flavor that’s simply irresistible.
- Veggie Boost: Mix in black beans, corn, or diced bell peppers for a delightful textural contrast, adding both nutrition and flavor.
- Spicy Kick: Add jalapeños or crushed red pepper flakes into the filling for an extra punch of heat that will wake up your palate.
- Pesto Infusion: Spread a thin layer of basil pesto on the dough before adding the filling to introduce a fresh, aromatic twist.
- Herbed Butter: Infuse your melted butter with fresh herbs like thyme or rosemary for an aromatic finish that elevates the taste.
- Cheesy Burst: Try using a combination of cheeses, like gouda or fontina, for a rich and complex cheesy experience that will have everyone raving.
Make Ahead Options
These Cheesy Taco Breadsticks are perfect for making ahead, saving time on busy weeknights! You can prepare the filling (ground beef mixed with taco seasoning) and assemble the sticks up to 24 hours in advance. Just store them tightly wrapped in plastic wrap or a covered baking dish in the refrigerator until you’re ready to bake. To maintain the quality, avoid brushing them with butter until right before baking; this ensures they stay crisp and delicious. When it’s time to serve, simply brush with the melted garlic butter and bake at 425°F (220°C) for 10-12 minutes, delivering freshly baked perfection with minimal effort!
How to Store and Freeze Cheesy Taco Breadsticks
Fridge: Store leftovers in an airtight container for up to 3 days. This helps maintain their delicious taste and texture.
Freezer: Freeze unbaked Cheesy Taco Breadsticks individually on a baking sheet, then transfer to a freezer-safe bag for up to 3 months. This makes meal prep a breeze!
Reheating: When ready to enjoy, bake from frozen at 425°F (220°C) for about 15-18 minutes or until heated through and golden. Avoid sogginess by reheating in the oven rather than the microwave.
Cooling: Allow Cheesy Taco Breadsticks to cool completely before storing. This prevents condensation inside the container and keeps them crispy.
Cheesy Taco Breadsticks Recipe FAQs
How do I know if my ingredients are ripe or fresh?
Absolutely! For the ground beef, choose meat that is bright red, with no gray or brown spots. When picking cheese sticks, look for freshness dates on the packaging; they should be well within the expiration date. If you’re using vegetables, opt for those that are firm and vibrant in color, avoiding anything with dark spots or unusual soft spots. A little care goes a long way in enhancing your dish!
How should I store leftover Cheesy Taco Breadsticks?
Very good question! Let the Cheesy Taco Breadsticks cool completely before placing them in an airtight container. They can be stored in the fridge for up to 3 days. I often recommend layering a paper towel between the breadsticks to absorb moisture, helping maintain their crispy texture.
Can I freeze Cheesy Taco Breadsticks?
Absolutely, these delightful snacks are freezer-friendly! To freeze unbaked Cheesy Taco Breadsticks, place them on a baking sheet lined with parchment paper in a single layer. Freeze them until firm, about 1-2 hours, then transfer them to a freezer-safe bag. They can be stored for up to 3 months. When ready to bake, preheat your oven to 425°F (220°C) and add an additional 5-7 minutes to the baking time.
What if my taco sticks break open while baking?
Don’t worry, it happens to the best of us! If your Cheesy Taco Breadsticks break open in the oven, it usually means the seams weren’t sealed tight enough. Ensure to pinch all seams securely when rolling. If they do split, you can still enjoy them! Just serve the filling alongside, or sprinkle some extra cheese on top as they bake to make them even cheesier!
Are Cheesy Taco Breadsticks safe for my pets?
It’s great that you’re considering your pets! While the ingredient primarily focuses on ground beef and cheese (which can be safe in moderation), it’s best to avoid giving them directly, especially due to the garlic and seasonings. These can be harmful to pets in significant amounts. Stick to unseasoned foods like cooked beef or plain bread as occasional treats for your furry friends!

Irresistibly Cheesy Taco Breadsticks for Your Next Party
Ingredients
Equipment
Method
- Preheat the oven to 425°F (220°C) and lightly grease a baking sheet.
- In a skillet over medium-high heat, cook the ground beef until browned, then drain excess fat and mix in taco seasoning. Allow to cool.
- Roll out the pizza dough and cut it into 10 small rectangles.
- Place about 1 tablespoon of cooled taco meat and a cheese stick on each rectangle. Roll tightly and seal seams.
- Combine melted butter, garlic powder, and dried parsley in a bowl. Brush this mixture over the tops of each stick.
- Bake for 10-12 minutes or until golden brown. Serve hot with toppings like salsa or guacamole.