Introduction
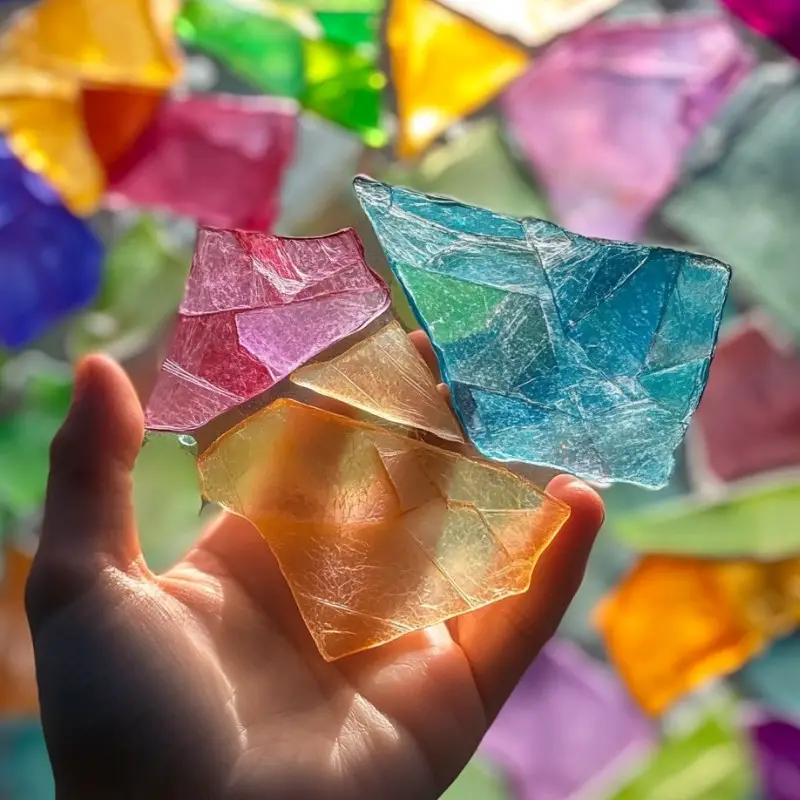
With sustainability in mind, crafting bioplastic suncatchers offers an eco-friendly way to harness the beauty of sunlight. This fun DIY project not only promotes creativity but also encourages environmentally responsible crafting. Let’s dive into creating these colorful, biodegradable ornaments to brighten up any window.
Detailed Ingredients with measures
Cornstarch: 120 grams
Water: 250 ml
Glycerin: 5 ml
Vinegar: 5 ml
Natural food coloring: as needed
Essential oils (optional): a few drops
Prep Time
20 minutes
Cook Time, Total Time, Yield
Cook Time: 10 minutes
Total Time: 30 minutes (plus drying time)
Yield: 5-10 suncatchers, depending on size and thickness
Crafting bioplastic suncatchers is not only a delightful activity but also a step towards a more sustainable lifestyle. Enjoy the process and the vibrant results!
Detailed Directions and Instructions
Step 1: Prepare the Mixture
In a saucepan, combine 120 grams of cornstarch with 250 ml of water. Stir well until the cornstarch is completely dissolved, creating a smooth base for your bioplastic.
Step 2: Add Additional Ingredients
Add 5 ml of glycerin and 5 ml of vinegar into the mixture. Stir continuously to ensure that these ingredients are evenly distributed throughout the cornstarch mixture.
Step 3: Heat Until Thickened
Place the saucepan on low heat. Continue stirring the mixture as it warms, until it thickens into a gel-like consistency. This process should take about 5-10 minutes, so be patient and keep stirring for an even texture.
Step 4: Divide for Coloring
Once the mixture has thickened, remove it from heat. Divide the thickened bioplastic into separate bowls, depending on how many colors you plan to create.
Step 5: Add Color
In each bowl, add a few drops of natural food coloring. Stir the mixture until the color is well incorporated. Feel free to adjust the amount of coloring to achieve your desired vibrancy.
Step 6: Enhance with Aroma (Optional)
If you wish to add a pleasing scent, drop a couple of drops of essential oils into each bowl. Mix well to ensure the aroma is evenly distributed.
Step 7: Mold Your Suncatchers
Pour the colored bioplastic onto a flat surface lined with parchment paper or silicone baking mats. Use molds or cookie cutters to shape them creatively, letting your imagination flow.
Step 8: Drying Time
Allow the suncatchers to dry completely, which could take anywhere from 24 to 48 hours. Drying time can vary depending on the thickness of your creations and the humidity levels in your environment.
Step 9: Prepare for Hanging
Once fully dried, use a small hole punch to create holes at the top of each suncatcher for hanging.
Step 10: Display Your Art
Hang your beautiful suncatchers in windows where they will catch sunlight, casting lovely colored reflections that will brighten your space.
Notes
– Ensure the cornstarch is fully dissolved to avoid clumps in your mixture.
– Experiment with layering colors for a unique design.
– Consider using cookie cutters in various shapes for added fun and creativity.
– Suncatchers can vary in thickness, with thinner ones drying faster than thicker ones. Keep this in mind during the drying process.
– Store any unused mixture in an airtight container for future projects.
Cook techniques
Mixing Ingredients
Ensure the cornstarch is fully dissolved in water before adding other ingredients to achieve a smooth mixture.
Heating the Mixture
Heat gently on low heat while stirring continuously for even thickening to a gel-like consistency.
Coloring Your Bioplastic
Add natural food coloring gradually and mix thoroughly to reach the desired color intensity.
Molding Suncatchers
Use molds or cookie cutters to create unique and intricate shapes for your suncatchers.
Drying Process
Allow suncatchers to dry in a well-ventilated area; drying times may vary based on thickness and humidity.
Punching Holes for Hanging
Carefully punch holes at the top of the dried suncatchers to facilitate hanging.
FAQ
What type of food coloring is best for bioplastic suncatchers?
Natural food coloring is recommended for an eco-friendly approach.
Can I use regular plastic molds?
Yes, but ensure they can withstand heat if you choose to use them in the molding process.
How long do the suncatchers last?
Bioplastic suncatchers are biodegradable and will slowly break down over time, especially if exposed to moisture.
Can I add glitter for extra sparkle?
While not biodegradable, if you choose to add traditional glitter, consider its environmental impact.
Are essential oils safe to use?
Generally, yes; however, ensure any essential oils used are safe if children or pets will be around.
Conclusion
Crafting bioplastic suncatchers is an enjoyable and sustainable activity that not only brings vibrant colors to your home but also promotes eco-consciousness. By utilizing simple ingredients, you can create beautiful ornaments that brighten your space while reducing your carbon footprint. These biodegradable suncatchers are perfect for anyone looking to add a touch of creativity and sustainability to their decor.
Colorful Sunburst Suncatchers
Experiment with different shapes to create a series of sunburst designs that radiate color and light.
Seasonal Themes
Craft suncatchers reflecting seasonal motifs, such as snowflakes for winter or flowers for spring, to celebrate the changing seasons.
Nature-Inspired Designs
Incorporate shapes like leaves, butterflies, or fish to create nature-inspired suncatchers that can enhance the natural beauty of your home.
Personalized Name Tags
Make customized suncatchers with initials or names for a personal touch, perfect for gifts or room decor.
Layered Colors
Try pouring different colored layers into your molds to create stunning multi-colored effects that catch the light beautifully.
Fragrant Suncatchers
Add essential oils to your bioplastic for aromatic suncatchers that not only look great but also provide a pleasing scent in your space.
Bioplastic Suncatchers
Ingredients
Method
- In a saucepan, combine cornstarch with water. Stir well until the cornstarch is completely dissolved.
- Add glycerin and vinegar into the mixture. Stir continuously.
- Place the saucepan on low heat and stir until the mixture thickens into a gel-like consistency.
- Remove from heat and divide the thickened bioplastic into separate bowls.
- Add natural food coloring into each bowl and stir until well incorporated.
- If desired, add essential oils into each bowl and mix well.
- Pour the colored bioplastic onto a flat surface lined with parchment paper or silicone baking mats.
- Use molds or cookie cutters to shape the bioplastic.
- Allow the suncatchers to dry completely for 24 to 48 hours.
- Once fully dried, use a small hole punch to create holes at the top of each suncatcher.
- Hang your beautiful suncatchers in windows to catch sunlight.