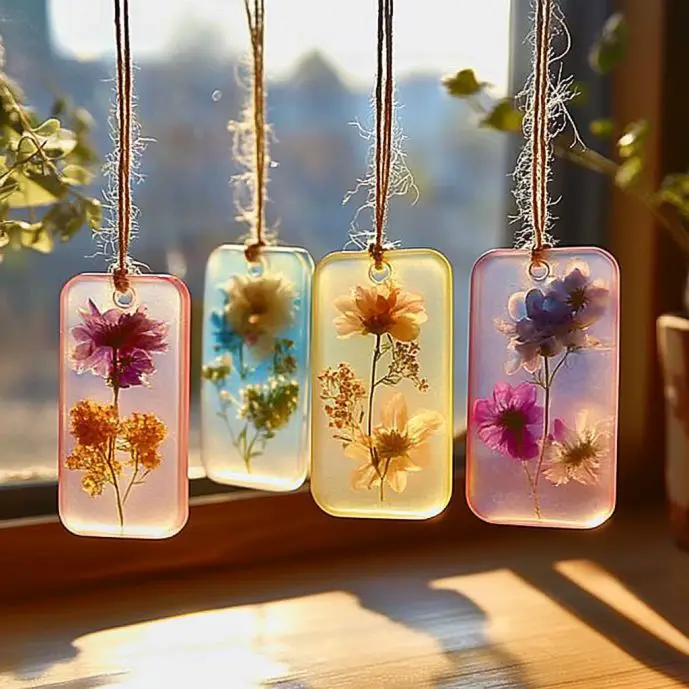
Hello, sunshine! ☀️ I’m so excited to share today’s craft with you because it’s the perfect mix of eco-friendly, colorful, and creative. We’re turning something simple—old plastic lids—into beautiful, glowing suncatchers that dance with color when the light hits just right.
Whether you’re looking for a rainy day activity, a summer art project, or just a way to use up those random lids from yogurt or peanut butter jars (we all have them!), this Plastic Lid Glue Suncatcher Craft is a joyful project that’s fun for all ages.
And bonus? It’s also a little nod to reducing waste and turning the everyday into something extraordinary.
💌 Want more bright and beautiful crafts like this? Be sure to subscribe so the inspiration keeps shining through your inbox!
What Is This Craft?
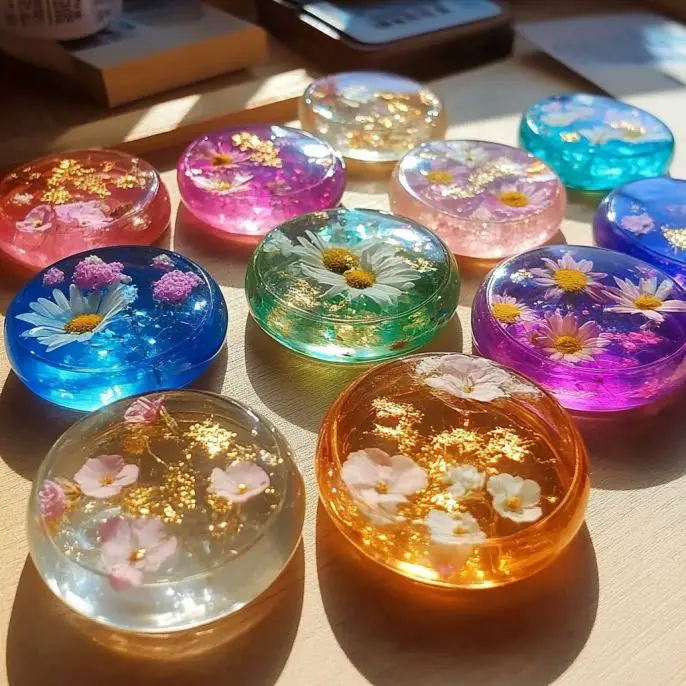
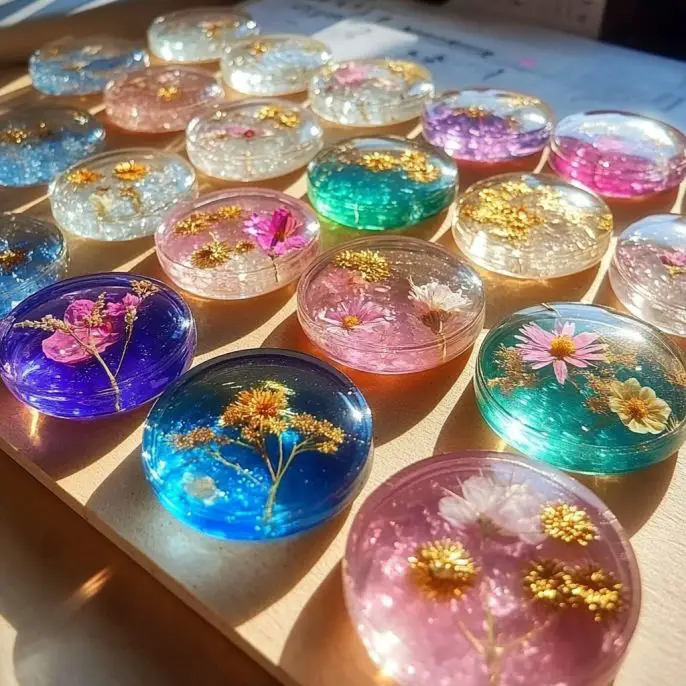
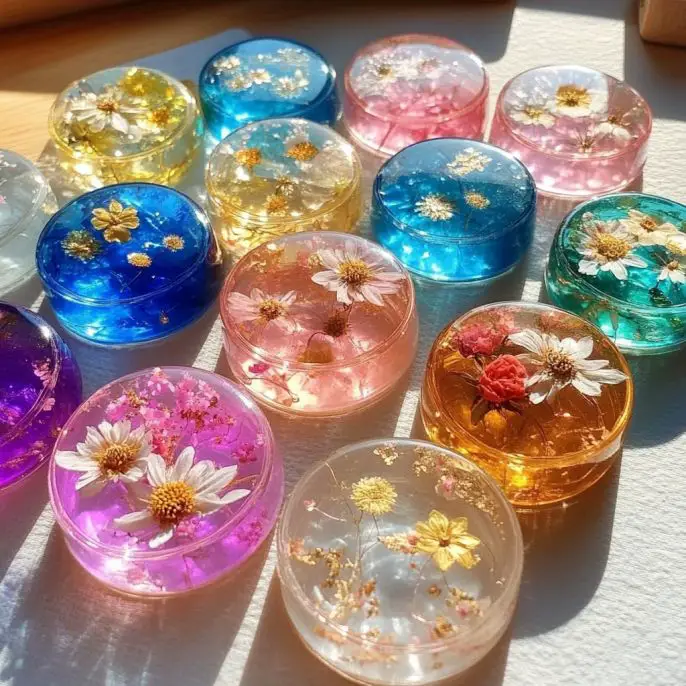
This is a DIY suncatcher made by pouring clear glue into plastic lids, swirling in color, and letting it dry into a thin, translucent disc. Once removed and hung in a window, it sparkles with sunlight—like a homemade stained-glass circle!
It’s simple, sensory, and so satisfying to create. No fancy tools, just creativity and a bit of patience while the glue dries.
Why You’ll Love This Craft
-
Uses recycled plastic lids = low-cost and eco-conscious
-
Encourages color play and creativity
-
Great for fine motor skills and sensory exploration
-
Fun for kids, classrooms, or craft nights
-
Leaves you with gorgeous, light-catching art
Materials You’ll Need
-
Clean plastic lids (from yogurt, sour cream, juice bottles, etc.)
-
Clear school glue or clear craft gel glue
-
Liquid food coloring or acrylic paint
-
Toothpicks or skewers (for swirling)
-
Glitter, sequins, tiny beads (optional)
-
Wax paper or a tray (for drying)
-
Hole punch or thumbtack
-
String, ribbon, or clear thread for hanging
Step-by-Step Instructions
1. Prep Your Workspace
Place wax paper or a tray on your work surface. Set the plastic lids face up—these will be your “frames” for the glue suncatchers.
2. Pour the Glue
Fill the center of each lid with a generous layer of clear glue. Spread evenly, but don’t overfill—you want it thick enough to hold its shape but not spill over.
3. Add Color
Drop small dots of food coloring or acrylic paint into the glue. Less is more—you can always add more later!
4. Swirl & Design
Use a toothpick or skewer to gently swirl the colors into marbled patterns. Watch the colors blend and dance together—this part is mesmerizing!
5. Add Some Sparkle (Optional)
While the glue is still wet, sprinkle in glitter, sequins, or even tiny beads for extra dimension and shimmer. Press gently so they stay in place.
6. Let It Dry
Set your lids aside in a safe, undisturbed space and let them dry for 12–24 hours, or until fully clear and firm to the touch.
Pro tip: Dry time can vary depending on thickness, humidity, and glue type—just be patient, and check on them the next day.
7. Remove & Trim
Once dry, carefully peel the suncatcher out of the lid. If any edges are rough or uneven, trim them gently with scissors.
8. Punch & Thread
Use a hole punch or thumbtack to make a small hole near the top. Thread your string, ribbon, or clear thread through the hole and tie a knot.
9. Hang & Enjoy!
Display your suncatchers in a sunny window and admire how they glow and sparkle with every passing ray of light.
Tips & Variations
-
Try color layering: Add glue, let it set a bit, then add more glue and swirl a second layer of color.
-
Mix & match lids: Use different sizes and shapes for a playful window display.
-
Create themes: Try seasonal palettes (blues for winter, pinks and yellows for spring!)
-
Make a mobile: Hang several suncatchers from a stick or hoop for a DIY sun-catching mobile.
-
Use gel food colors for deeper, richer tones—just a tiny amount goes a long way!
Frequently Asked Questions (FAQ)
Can I reuse the lids after making the suncatchers?
Yes! If you’re careful, you can remove the dried suncatcher and reuse the lid for another round.
What type of glue works best?
Clear school glue or clear gel glue gives the best transparency once dried. Avoid white glue, as it dries cloudy.
How long do these last?
They’re durable! Keep them out of water and away from heat, and they’ll last for months—especially indoors.
Are these safe for young kids?
Absolutely! Just supervise during glue and color play to avoid spills, and be cautious with tiny decorations around toddlers.
Conclusion
These Plastic Lid Glue Suncatchers are proof that something simple—like a plastic lid and a bit of glue—can turn into something truly beautiful. They’re the kind of project that makes you pause, play, and appreciate the sunlight dancing through your window.
Whether you’re crafting with your kids, your classroom, or just want to add a handmade touch to your home, these suncatchers are a joyful, eco-friendly way to brighten your day.
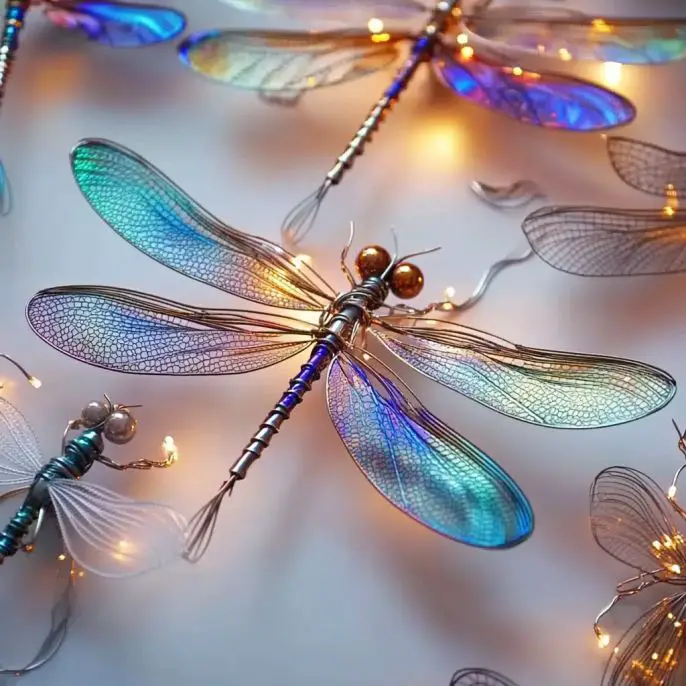
More Colorful Crafts to Try
-
Butterfly Silicone Mold Suncatchers
-
DIY Bioplastic Window Art
-
Melted Bead Suncatchers
-
Marbled Shaving Cream Prints
-
Rainbow Jar Sensory Bottles
Show Off Your Sunlight!
Did you make your own suncatchers? I would love to see them! Share your glowing masterpieces on Pinterest or tag me on social media so we can inspire more sunshine-filled creativity. ☀️
Approximate Cost per Craft
$2–$4 per batch, depending on what materials you already have at home.
Thanks so much for crafting with me today. Until next time—keep creating, keep recycling, and keep catching the light! 🌈🖌️🪟
Want a printable version of this tutorial or a classroom activity guide? Just let me know!

Plastic Lid Glue Suncatcher
Ingredients
Method
- Place wax paper or a tray on your work surface. Set the plastic lids face up.
- Fill the center of each lid with a generous layer of clear glue. Spread evenly, but don’t overfill.
- Drop small dots of food coloring or acrylic paint into the glue.
- Use a toothpick or skewer to gently swirl the colors into marbled patterns.
- While the glue is still wet, sprinkle in glitter, sequins, or tiny beads for extra dimension.
- Set your lids aside to dry for 12–24 hours, or until fully clear and firm.
- Once dry, carefully peel the suncatcher out of the lid. Trim any rough edges with scissors.
- Use a hole punch or thumbtack to make a small hole near the top and thread your string through.
- Hang your suncatchers in a sunny window and enjoy their sparkle.
Notes
Plastic Lid Glue Suncatcher
Ingredients
Method
- Place wax paper or a tray on your work surface. Set the plastic lids face up—these will be your frames for the glue suncatchers.
- Fill the center of each lid with a generous layer of clear glue. Spread evenly, but don’t overfill—you want it thick enough to hold its shape but not spill over.
- Drop small dots of food coloring or acrylic paint into the glue. You can always add more later!
- Use a toothpick or skewer to gently swirl the colors into marbled patterns.
- While the glue is still wet, sprinkle in glitter, sequins, or tiny beads for extra dimension and shimmer.
- Set your lids aside in a safe, undisturbed space and let them dry for 12–24 hours, or until fully clear and firm to the touch.
- Once dry, carefully peel the suncatcher out of the lid. If any edges are rough or uneven, trim them gently with scissors.
- Use a hole punch or thumbtack to make a small hole near the top. Thread your string, ribbon, or clear thread through the hole and tie a knot.
- Display your suncatchers in a sunny window and admire how they glow and sparkle with every passing ray of light.
Notes
More Craft Innovations
- After a Decade Together, She Discovered the True Value of Her Contributions
- My Daughter Disappeared After Prom Night—Almost a Year Later, an Ordinary Beanbag Chair Revealed the Truth
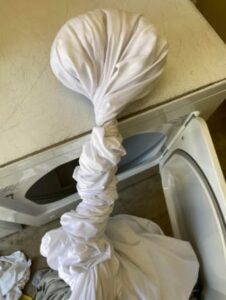
- Stop Your Bed Sheets From Balling Up in the Dryer: Simple Tricks That Actually Work
- Woman Injured While Trying to Separate Fighting Water Buffaloes: A Powerful Reminder About Livestock Safety