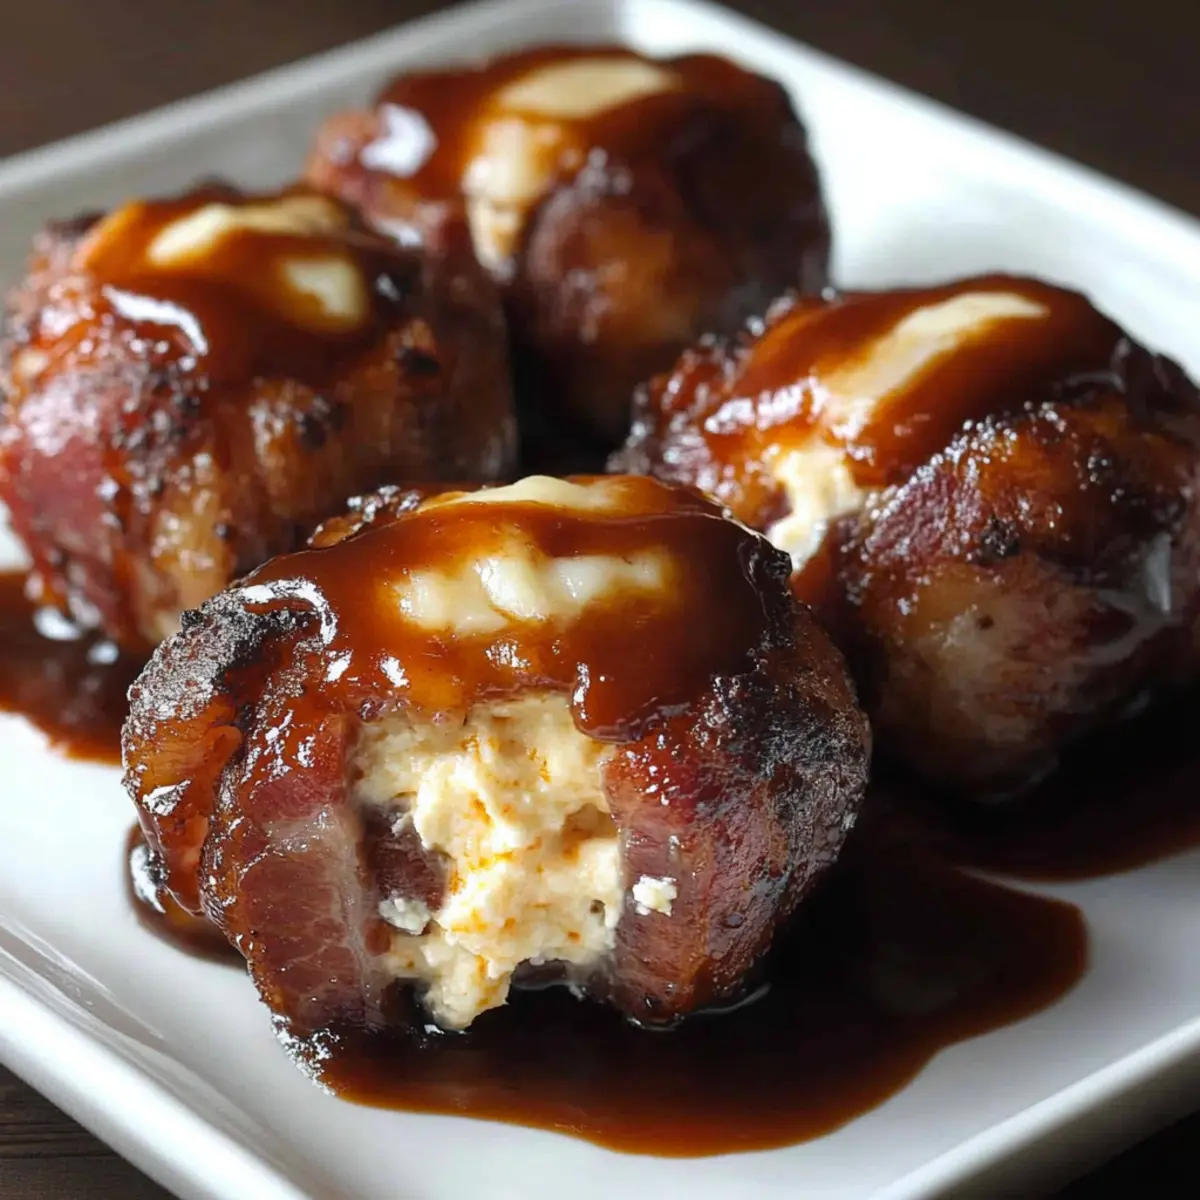
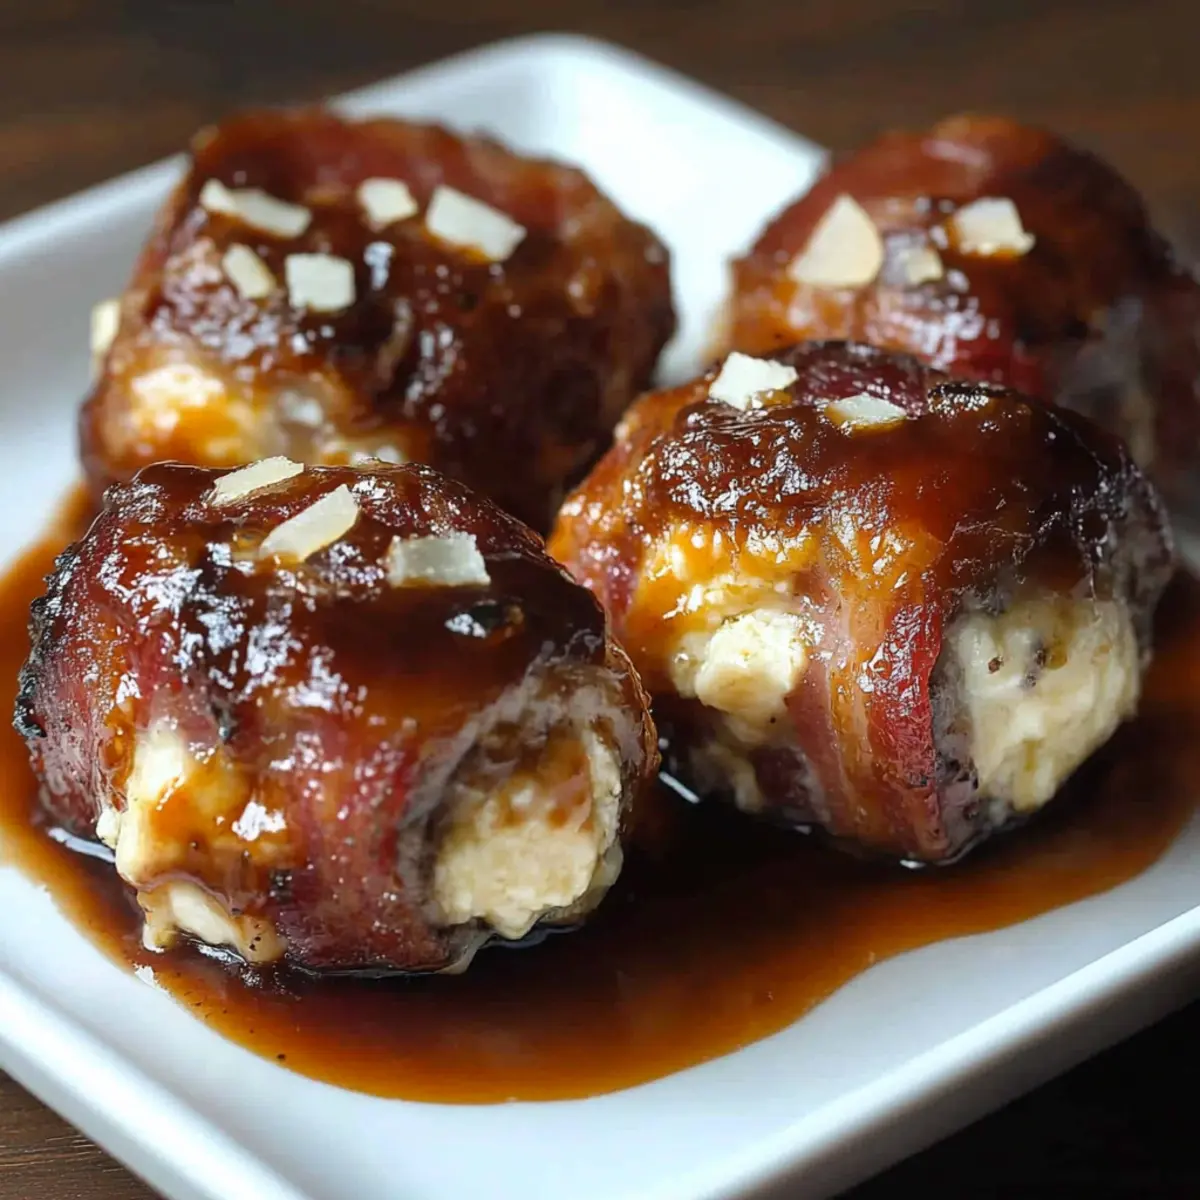
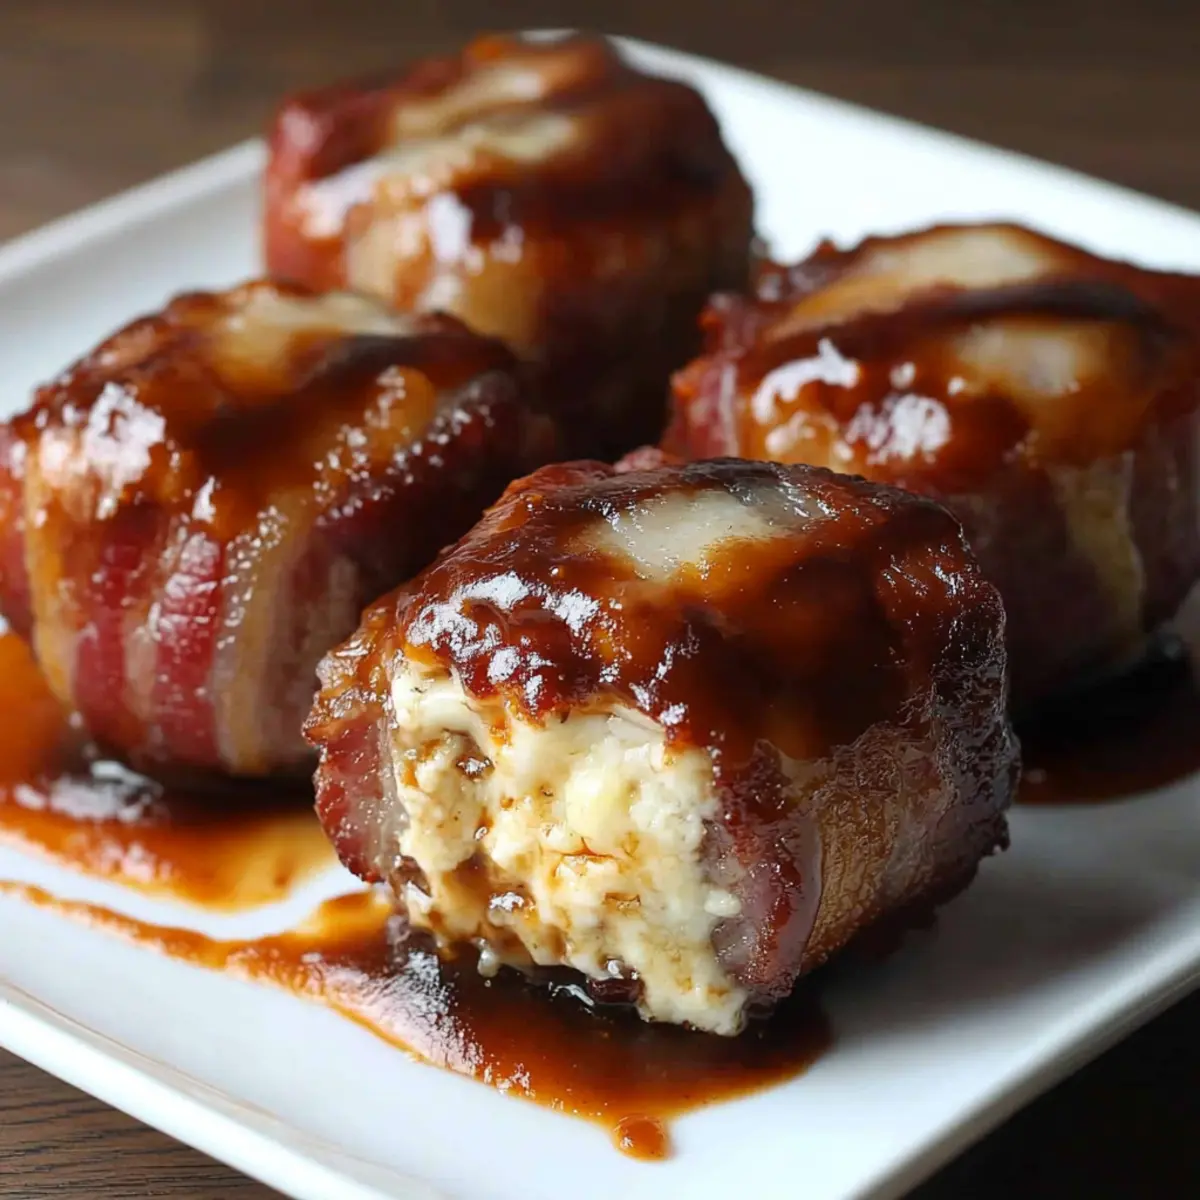
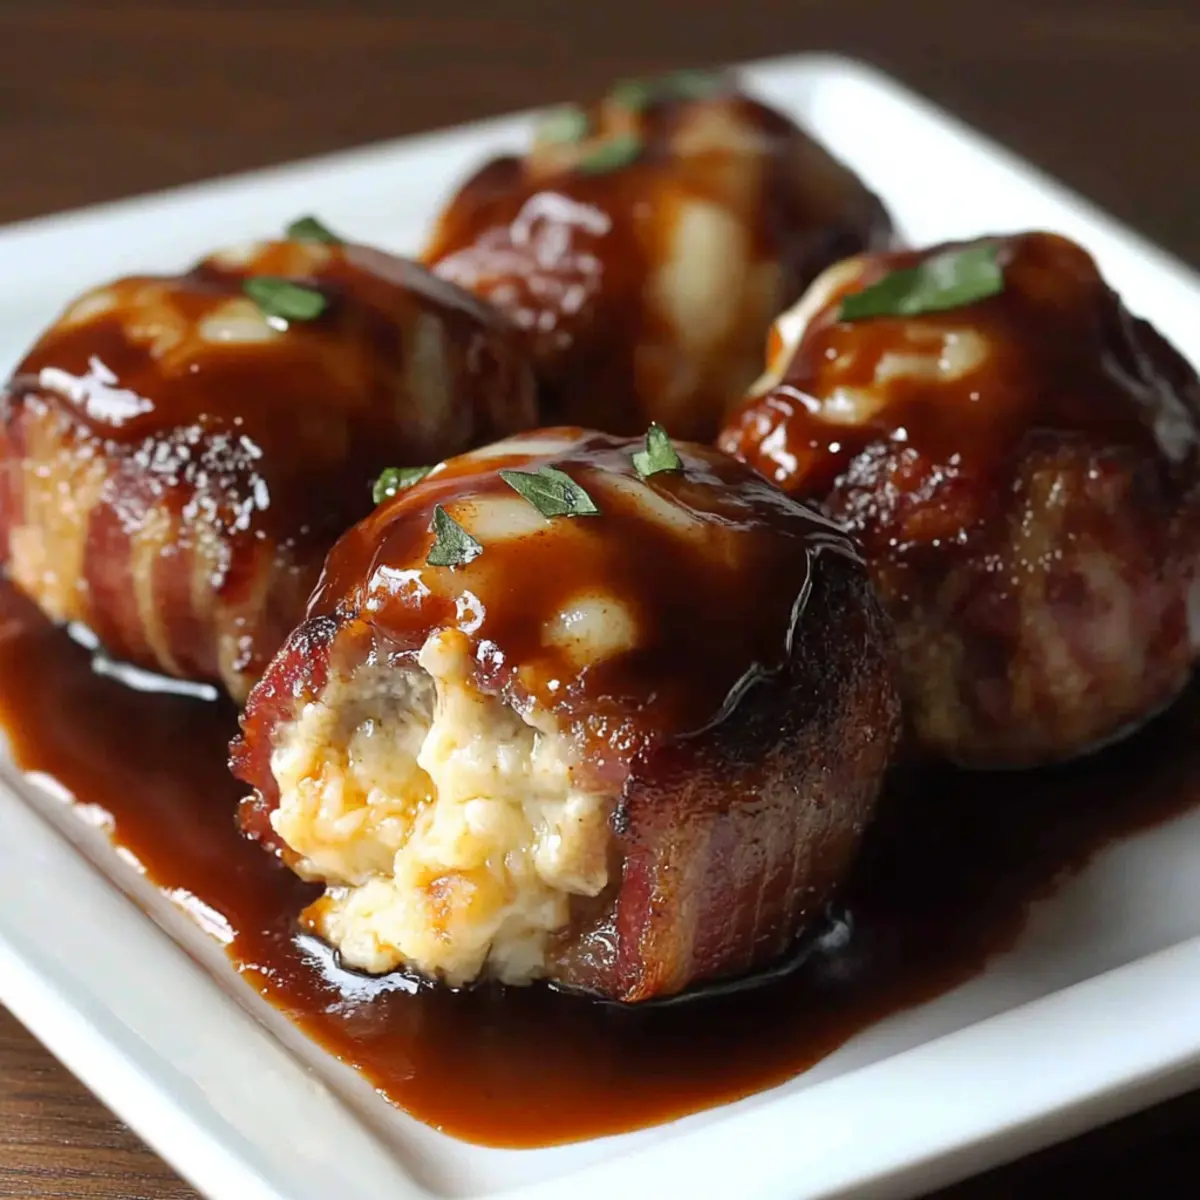
When the grill is out of reach and cravings for smoky, savory flavors hit, I know just the recipe to satisfy! Enter the Cheddar-Stuffed BBQ Bacon Bombs—a delightful fusion of juicy beef, creamy cheddar, and crispy bacon, all wrapped into bite-sized perfection. These little flavor bombs are not only a hit at gatherings but also perfect for a cozy weeknight dinner.
I stumbled upon this recipe while experimenting in my kitchen, and it quickly became a staple for gatherings with family and friends. The beautiful contrast of the crispy bacon and the oozing cheese center offers a unique taste experience that elevates any meal. Plus, they’re incredibly easy to prepare, making them a go-to for anyone looking to impress without spending hours cooking.
What makes these BBQ Bacon Bombs even more thrilling is the flexibility: feel free to swap in ground turkey or chicken, or play with cheese options like pepper jack or smoked gouda. Whether you serve them as appetizers or a hearty main dish, they’re sure to become a new favorite for both the home cook and the culinary enthusiast alike!
Why You’ll Crave Cheddar-Stuffed BBQ Bacon Bombs?
Unforgettable Flavor: The savory combination of beef, cheese, and bacon creates an explosion of taste in every bite.
Versatile Options: Easily switch to ground turkey or chicken for a lighter twist without sacrificing flavor.
Easy to Prepare: This straightforward recipe is perfect for busy nights, allowing anyone to whip up a delightful dish quickly.
Crowd Pleaser: Ideal for gatherings, these little bombs are sure to impress guests and have them coming back for more.
Gooey Goodness: With a cheesy center that oozes as you bite, every mouthful is a delight.
Customizable: Experiment with different cheeses or add jalapeños for a spicy kick to cater to everyone’s preferences!
Cheddar-Stuffed BBQ Bacon Bombs Ingredients
For the Meat Mixture
• Ground Beef – Main protein source; substitute with ground turkey or chicken for a lighter option.
• Breadcrumbs – Provides structure; use gluten-free breadcrumbs if necessary.
• Egg – Acts as a binder to hold everything together.
• Salt – Enhances flavor and balances the dish.
• Black Pepper – Adds mild heat; adjust to taste.
• Garlic Powder – Introduces savory depth; feel free to use fresh garlic for a bolder flavor.
• Onion Powder – Elevates the meat’s flavor profile and adds sweetness.
For the Cheesy Center
• Shredded Cheddar Cheese – Provides a creamy, gooey center; try mozzarella or smoked gouda for different flavors and textures.
For the Wrapping
• Bacon Slices – Adds crispiness and smokiness; thick-cut bacon provides the best results.
For the Finish
• BBQ Sauce – Glaze for adding a smoky, tangy finish to the bacon bombs; choose your favorite brand for a personal touch.
How to Make Cheddar-Stuffed BBQ Bacon Bombs
- Preheat your oven to 375°F (190°C) to ensure it’s ready for these delicious bites. A hot oven guarantees crispy bacon and perfectly cooked beef.
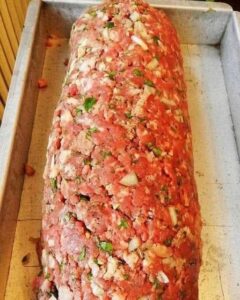
- Mix together in a large bowl the ground beef, breadcrumbs, egg, salt, black pepper, garlic powder, and onion powder. Stir until everything is well combined, forming a hearty meat mixture.
- Shape the mixture into small meatballs, each encasing a piece of shredded cheddar cheese. Make sure to seal them tightly to avoid any fromage leakage during baking.
- Wrap each meatball snugly with a slice of thick-cut bacon. This crispy layer not only adds flavor but also holds the filling together nicely. Place the bacon-wrapped balls on a baking sheet.
- Brush the tops generously with your chosen BBQ sauce. This sweet and tangy glaze will caramelize beautifully as the bombs bake, enhancing their deliciousness.
- Bake in the preheated oven for 25-30 minutes, until the bacon is crispy and the internal temperature of the beef reaches at least 160°F (71°C). You want these bombs to look golden and inviting!
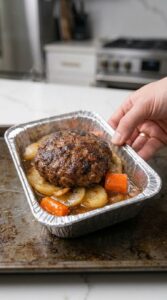
- Serve hot from the oven, ideally with extra BBQ sauce or a sprinkle of sliced green onions to elevate the dish even further.
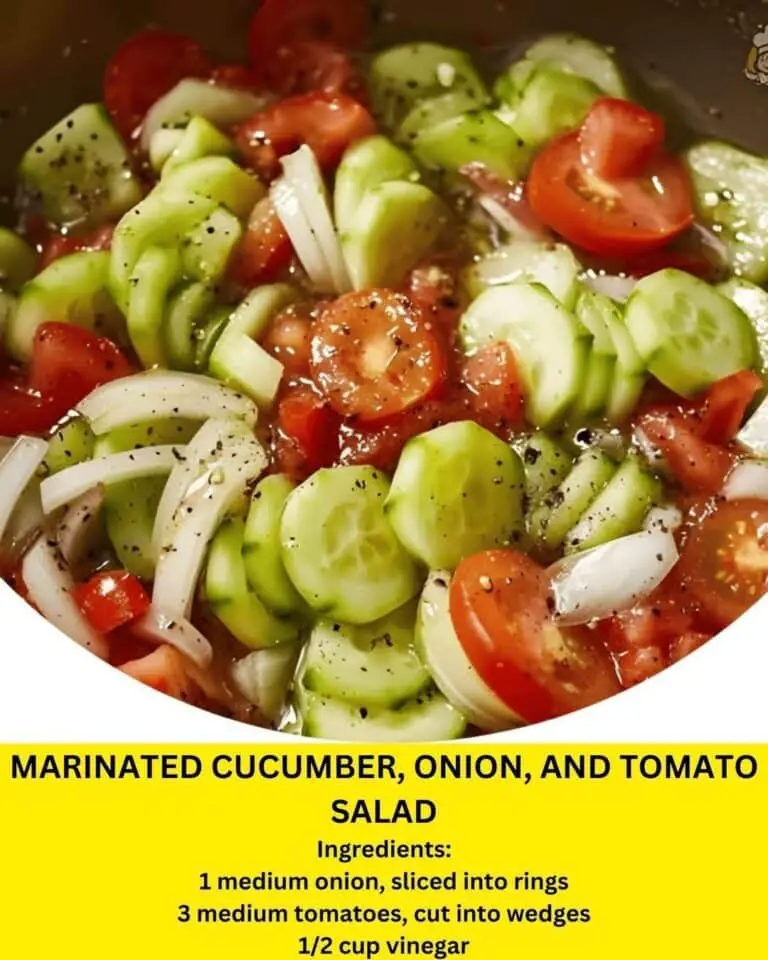
Optional: Serve alongside a refreshing salad for a lovely contrast.
Exact quantities are listed in the recipe card below.
What to Serve with Cheddar-Stuffed BBQ Bacon Bombs?
Pairing these savory bites with complementary dishes will elevate your meal experience to new heights.
- Crispy Roasted Potatoes: Perfectly seasoned and golden, these crunchy potatoes can soak up any extra BBQ sauce for a delightful side.
- Fresh Green Salad: A vibrant mix of greens with a tangy vinaigrette adds a refreshing contrast to the rich flavors of the bacon bombs.
- Coleslaw: Creamy and crunchy, coleslaw provides a cool, crisp element that perfectly balances the smoky, savory bites.
- Corn on the Cob: Sweet and buttery, this classic summertime side brings a natural sweetness that complements the BBQ flavors beautifully.
- Stuffed Jalapeños: For those who crave a little heat, these spicy, cheesy treats can add a kick to your gathering, perfect alongside bacon bombs.
- BBQ Baked Beans: Smoky and sweet, these beans enhance the overall BBQ theme and provide a hearty, comforting element to the meal.
- Craft Beer or Iced Tea: A cold drink can refresh the palate, with beer adding its own rich flavors and iced tea offering a light, hydrating option.
With these suggestions, your Cheddar-Stuffed BBQ Bacon Bombs will shine even brighter on the dining table!
Make Ahead Options
These Cheddar-Stuffed BBQ Bacon Bombs are a fantastic choice for meal prep, saving you time during busy weeknights! You can prepare and assemble the bacon bombs up to 24 hours in advance—simply refrigerate them in an airtight container until you’re ready to bake. This way, the flavors deepen, and they’ll be just as delicious. If you want to prep even further ahead, these bombs can be frozen for up to 3 months; just ensure they are tightly wrapped to prevent freezer burn. When you’re ready to cook, bake them directly from frozen, adding a few extra minutes to the cooking time for that perfect crispy finish!
Expert Tips for Cheddar-Stuffed BBQ Bacon Bombs
- Seal Well: Ensure the meat mixture fully encloses the cheese to prevent leakage while baking. A tight seal is key for a gooey center!
- Chill Before Baking: Refrigerate the assembled bombs for at least 30 minutes if not baking immediately. This helps them hold their shape during cooking.
- Use Thick Bacon: Opt for thick-cut bacon for the best crispiness and flavor. Thin bacon may not render enough fat and could become chewy.
- Check Temperature: Use a meat thermometer to ensure the internal beef temperature reaches at least 160°F (71°C). This guarantees that your cheddar-stuffed BBQ bacon bombs are safe and delicious.
- Experiment with Cheese: Don’t hesitate to swap out the cheddar for other types like pepper jack or smoked gouda to customize your flavor experience!
- Serve Immediately: Enjoy these Cheddar-Stuffed BBQ Bacon Bombs fresh out of the oven for the crispiest texture and oozing cheese.
How to Store and Freeze Cheddar-Stuffed BBQ Bacon Bombs
- Fridge: Keep leftover Cheddar-Stuffed BBQ Bacon Bombs in an airtight container for up to 3 days. Reheat them in the oven for best texture, ensuring they’re warmed through.
- Freezer: For longer storage, freeze the bombs in a single layer until solid. Then transfer to freezer bags, where they can last for up to 2 months.
- Thawing: To prepare from frozen, thaw in the fridge overnight and then reheat in the oven until heated thoroughly.
- Reheating: To maintain crispiness, reheat in the oven at 350°F (175°C) for about 10-15 minutes or until the cheese is gooey and the bacon is crispy.
Variations & Substitutions for Cheddar-Stuffed BBQ Bacon Bombs
Feel free to let your creativity shine and customize these delightful bites just the way you like!
- Ground Turkey: Substitute ground beef for ground turkey or chicken to lighten the recipe while retaining its juicy flavor.
- Cheese Swap: Experiment with different cheeses like mozzarella for a milder taste or pepper jack for an exciting kick.
- Spicy Addition: Add chopped jalapeños to the cheese filling for a fiery twist that will thrill spice lovers.
- Gluten-Free Option: Use gluten-free breadcrumbs to make this dish suitable for those with gluten sensitivities without compromising on taste.
- Vegetarian Version: Try using a plant-based ground meat alternative and cheese to create a vegetarian-friendly version!
- Herb Boost: Mix in fresh herbs like parsley or chives into the meat mixture for a pop of freshness and added flavor.
- BBQ Sauce Variety: Explore different flavors of BBQ sauce, such as sweet and smoky or tangy mustard-based, to find your perfect match.
- Serve with Dips: Pair with an array of dipping sauces like ranch, spicy aioli, or guacamole for an exciting flavor adventure.
Each of these variations will keep your Cheddar-Stuffed BBQ Bacon Bombs fresh and exciting for every occasion!
Cheddar-Stuffed BBQ Bacon Bombs Recipe FAQs
What is the best way to select ripe ingredients for the Cheddar-Stuffed BBQ Bacon Bombs?
Absolutely! When selecting ground beef, choose a high-quality blend with some fat content (about 80/20) for the juiciest result. For the cheese, opt for freshly shredded cheddar rather than pre-packaged shredded cheese, as it melts better. If you’re using breadcrumbs, ensure they are fresh and free from any off odors to enhance the flavor of your dish!
How should I store leftover Cheddar-Stuffed BBQ Bacon Bombs?
Very simply! Place any leftover bacon bombs in an airtight container and store them in the fridge for up to 3 days. To reheat them effectively and retain their delicious crunch, pop them in the oven at around 350°F (175°C) for about 10-15 minutes, keeping an eye on them until heated through.
Can I freeze Cheddar-Stuffed BBQ Bacon Bombs for later use?
Yes, you can! To freeze them, first, place the assembled bombs on a baking sheet in a single layer and freeze until solid—this usually takes about 1-2 hours. Then, transfer the bombs to a freezer-safe bag or container, where they can stay good for up to 2 months. When you’re ready to enjoy them, simply thaw overnight in the fridge, and reheat them in the oven!
What should I do if my bacon bombs leak cheese while baking?
If you experience leakage, it may be due to improperly sealed meatballs. To help future batches, ensure that the meat mixture surrounds the cheese completely. I recommend testing a small piece of meat mixture first to see if it holds the cheese inside before assembling the whole batch. Also, refrigerate assembled bombs for at least 30 minutes before baking to help the shapes hold.
Are there any dietary considerations for the Cheddar-Stuffed BBQ Bacon Bombs?
Indeed! For gluten-free options, simply use gluten-free breadcrumbs and be cautious about your BBQ sauce choice, as some brands may contain gluten. If you’re considering allergens, keep in mind that cheese and bacon can be problematic for lactose-intolerant individuals. A great alternative is using dairy-free cheese options, which can still provide a cheesy texture.
How long can I safely keep Cheddar-Stuffed BBQ Bacon Bombs in the freezer?
You can keep them in the freezer for up to 3 months. Just ensure they are properly sealed in an airtight container or freezer bags to prevent freezer burn. For the best texture, reheat them directly from frozen instead of thawing. This keeps the bacon crispy!
Irresistibly Juicy Cheddar-Stuffed BBQ Bacon Bombs You’ll Love
Ingredients
Equipment
Method
- Preheat your oven to 375°F (190°C) to ensure it's ready for these delicious bites.
- Mix together in a large bowl the ground beef, breadcrumbs, egg, salt, black pepper, garlic powder, and onion powder until well combined.
- Shape the mixture into small meatballs, each encasing a piece of shredded cheddar cheese, sealing tightly.
- Wrap each meatball snugly with a slice of thick-cut bacon and place on a baking sheet.
- Brush the tops generously with BBQ sauce.
- Bake in the preheated oven for 25-30 minutes, until the bacon is crispy and beef reaches at least 160°F (71°C).
- Serve hot from the oven, ideally with extra BBQ sauce.