

If you’re looking for a captivating and creative way to brighten up your windows, this Clear Glue Suncatcher project will charm your inner artist and inspire little hands alike. This DIY craft is not only mesmerizing to look at when the sun shines through, but it’s also incredibly easy to make using simple, affordable materials. Whether you’re a parent searching for a fun rainy-day activity, a teacher planning an art class project, or simply a crafter who loves decorative pieces, this guide will walk you through everything you need to know about making your own colorful glue suncatchers.
Why You’ll Love This Craft
Because this Clear Glue Suncatcher is not only fun to make but also serves as a beautiful piece of window art, you’ll absolutely love how it combines creativity with simplicity. Moreover, this project encourages artistic exploration by letting children play with swirling colors and patterns. Furthermore, it requires very little cleanup, making it a parent-approved favorite. In addition, the finished product makes a wonderful gift or home decoration, adding a pop of color to any space. Finally, this activity fosters sensory development and fine motor skills, making it ideal for toddlers and elementary-aged children.
Ingredients You’ll Need
To get started, gather the following materials:
- 1 plastic lid (such as from a yogurt or sour cream container)
- Clear school glue (enough to cover the bottom of your lid)
- A few drops of food coloring (various colors)
- 1 toothpick (for swirling the colors)
- 1 hole punch (to make a hole for hanging)
- 1 piece of ribbon, string, or fishing line (for hanging)
Necessary Tools for the Project
Although this craft is extremely low-tech, you will still need a few basic tools to bring it to life:
- Plastic lid (shallow and clean, preferably round)
- Bottle of clear-drying school glue
- Food coloring bottles
- A clean toothpick or skewer
- A standard hole punch
- Ribbon or string for hanging
Each of these items plays an essential role in the creative and assembly process, ensuring your suncatcher is both vibrant and durable.
Ingredient Swaps and Additions
Since this project is so flexible, you can easily modify it to suit your preferences or what you have on hand. For instance, you can use glitter glue in place of clear glue if you want a sparkly effect. Alternatively, instead of food coloring, try using liquid watercolors for a softer color blend. Additionally, sequins, glitter, or tiny confetti pieces can be sprinkled into the glue to enhance the design. You could also explore using different lid shapes, like ovals or squares, for unique results. Ultimately, these variations allow every suncatcher to become a one-of-a-kind masterpiece.
Step-by-Step Instructions
- Begin by choosing a plastic lid that will act as the base for your suncatcher. Clean it thoroughly and dry it completely.
- Next, pour clear school glue into the lid until it covers the entire bottom. Gently tilt the lid if needed to spread the glue evenly.
- Afterward, carefully add several drops of food coloring into the glue. You can opt for one color or multiple to create a rainbow-like effect.
- Then, take your toothpick and gently swirl the food coloring through the glue. Be careful not to overmix, so the colors remain distinct and don’t muddy.
- Now, set the lid aside in a safe, level place to dry. Depending on the glue’s thickness and humidity levels, drying could take anywhere from 8 to 24 hours.
- Once fully dry and firm, remove the suncatcher from the lid. It should peel away easily. If it sticks, gently flex the lid to loosen it.
- Use a hole punch to make a hole near the top of your suncatcher.
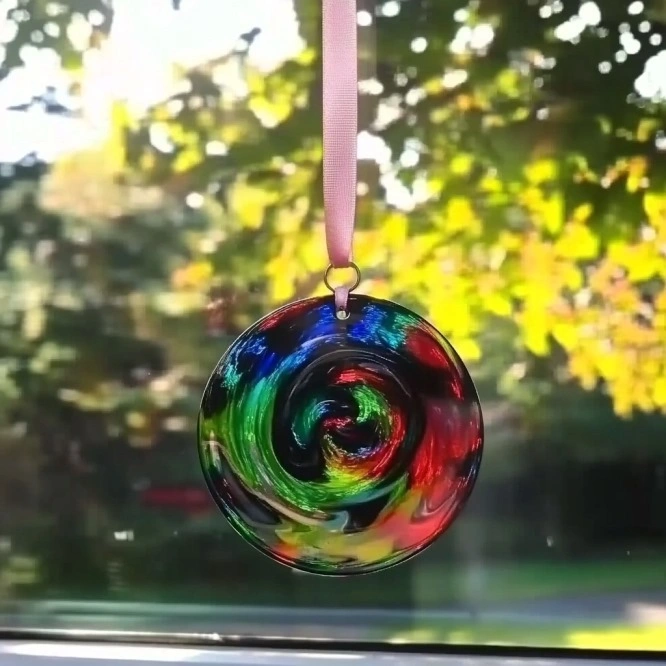
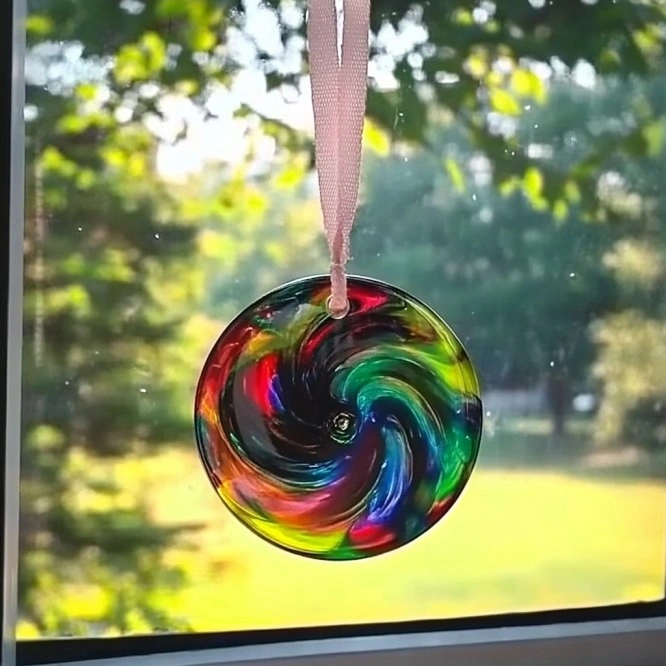
- Finally, thread your ribbon or string through the hole, tie a knot, and hang your suncatcher in a sunny window to admire the vibrant colors shining through!
Pro Tips for Success
To ensure your Clear Glue Suncatcher turns out as beautifully as possible, keep these tips in mind. Firstly, always use a level surface while drying to prevent glue from pooling unevenly. Secondly, don’t add too many food coloring drops—less is more to maintain clear swirls. Thirdly, if you want added sparkle, choose ultra-fine glitter so it mixes more evenly into the glue. Additionally, for easier cleanup, place a piece of parchment paper under your lid during the project. Lastly, if your suncatcher curls slightly after drying, press it between two heavy books for an hour or two to flatten it.

Serving Suggestions (Display Ideas)
Although this isn’t a food recipe, showcasing your suncatchers can be just as rewarding. For instance, hang them in a child’s bedroom window where they’ll catch the morning sun. Or, display them on a porch or balcony to add color to your outdoor space. You can also use them as sunlit ornaments during holidays or birthdays. Another great idea is to turn them into a mobile by hanging several from a coat hanger or embroidery hoop. No matter where you hang them, these suncatchers bring joy and light into any room.
Storing and Reheating (Preserving Your Craft)
While you won’t need to reheat this craft, proper storage is essential. To preserve your suncatcher, keep it out of direct rain or high humidity, which may cause warping. Store flat in a plastic bag or between sheets of paper when not in use. If it becomes dusty, gently clean it with a dry microfiber cloth. You should avoid folding or creasing it, as this can cause permanent damage. With care, these suncatchers can last for years as lovely mementos.
Nutritional Information
As this is a non-edible craft, there is no nutritional information. However, always ensure children understand that this craft is for decoration only and should not be ingested.
Frequently Asked Questions (FAQs)
1. How long does it take for the glue to dry? Depending on the thickness and room conditions, drying can take 8–24 hours.
2. Can I use white glue instead of clear glue? Clear glue is recommended to let the sunlight pass through, but white glue will work for an opaque effect.
3. What if my suncatcher sticks to the lid? Try gently bending the lid or placing it in the freezer for a few minutes to loosen the edges.
4. Is this project safe for toddlers? Yes, with supervision—ensure they don’t ingest glue or food coloring.
5. Can I hang this outside? Yes, but keep it protected from rain and moisture to maintain its integrity.
Conclusion
In summary, making a Clear Glue Suncatcher is a delightful craft that brings color, creativity, and sunlight into your space. With just a few materials and a splash of imagination, you can turn everyday items into stunning window art. Whether you’re crafting solo or with kids, this simple project promises big, beautiful results. So go ahead—gather your supplies and let the sun shine through your handmade masterpiece!


Thanks I’ll try with my class of pensioners. Any other good ideas 30 on group Pat
Great idea will try it with the littles
Great idea for a craft, love it!