Introduction
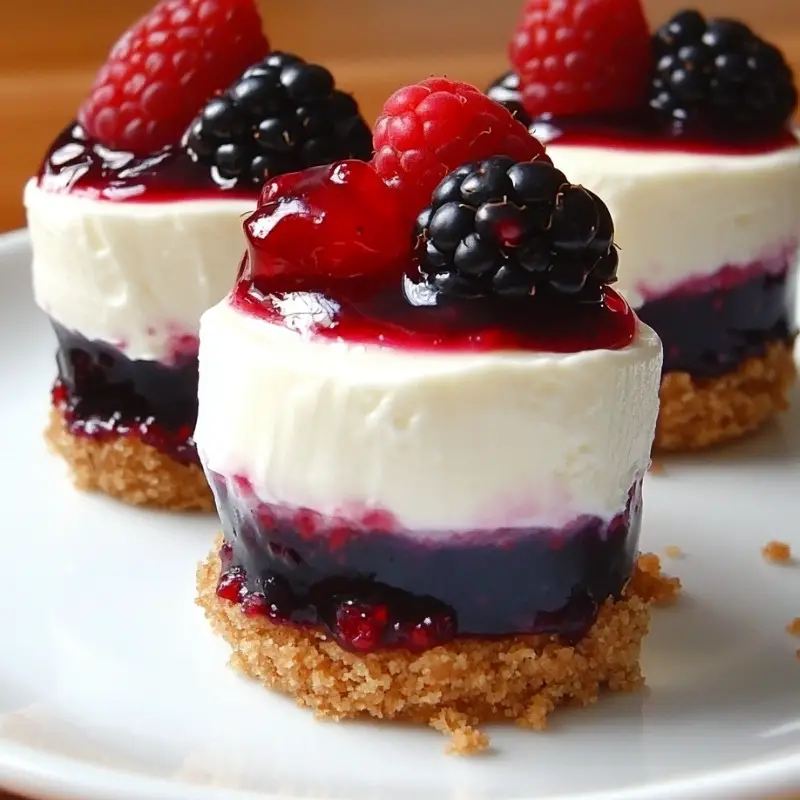
Indulge in these exquisite mini cheesecake tarts, perfect for any occasion. With a creamy filling and a delightful berry topping, they are bound to impress guests with their elegant presentation and delicious taste.
Ingredients
– graham cracker crumbs: 150g
– unsalted butter, melted: 75g
– cream cheese, softened: 400g
– granulated sugar: 100g
– large eggs: 2
– vanilla extract: 1 tsp
– sour cream: 60ml
– all-purpose flour: 30g
– mixed fresh berries (strawberries, raspberries, blueberries): 150g
– berry jam (optional): 50g
Prep Time
20 minutes
Cook Time, Total Time, Yield
Cook Time: 20 minutes
Total Time: 2 hours 40 minutes
Yield: 12 mini tarts
Instructions:
1. Preheat your oven to 160°C (320°F). Line a muffin tin with paper liners.
2. In a bowl, mix the graham cracker crumbs with melted butter until well combined. Press about a tablespoon of the crumb mixture into the bottom of each liner to form the crust.
3. In a large mixing bowl, beat the cream cheese and sugar until smooth. Add eggs, one at a time, beating well after each addition. Stir in vanilla extract and sour cream, mixing until creamy. Add flour and mix until just combined.
4. Spoon the cream cheese mixture over the prepared crusts, filling each liner almost to the top.
5. Bake in the preheated oven for 18-20 minutes, or until the centers are set and slightly jiggle.
6. Remove from the oven and let cool completely in the tin. Refrigerate for at least 2 hours or until firm.
7. Prior to serving, top each cheesecake tart with a spoonful of mixed berries. If desired, warm the berry jam slightly and drizzle over the top for added sweetness.
8. Serve chilled and enjoy your delightful mini cheesecake tarts.
Detailed Directions and Instructions
Step 1: Preheat the Oven
Begin by preheating your oven to 160°C (320°F). This step ensures that your mini cheesecake tarts bake evenly for a perfectly creamy texture.
Step 2: Prepare the Crust
In a mixing bowl, combine the graham cracker crumbs with the melted unsalted butter. Stir until the mixture resembles wet sand. Using about a tablespoon of the crumb mixture, press it firmly into the bottom of each paper-lined muffin tin to create a sturdy crust.
Step 3: Make the Cheesecake Filling
In a large mixing bowl, beat the softened cream cheese with granulated sugar until the mixture is smooth and creamy. Add the eggs one at a time, mixing well after each addition until fully incorporated. Stir in the vanilla extract and sour cream, blending until the mixture is velvety. Gently fold in the all-purpose flour until just combined; this helps prevent overmixing.
Step 4: Assemble the Tarts
Spoon the rich cream cheese filling over the prepared crusts, filling each liner almost to the top. This allows for a generous and satisfying bite.
Step 5: Bake
Place the muffin tin in the preheated oven and bake for 18-20 minutes. The tarts are done when the centers are set but still slightly jiggle when shaken.
Step 6: Cool and Chill
Once baked, remove the muffin tin from the oven and allow the mini cheesecake tarts to cool completely in the tin. After cooling, transfer them to the refrigerator and chill for at least 2 hours, allowing them to firm up and develop flavor.
Step 7: Prepare the Topping
Before serving, delicately top each cheesecake tart with a spoonful of mixed fresh berries for a splash of color and natural sweetness. If desired, warm the berry jam slightly and drizzle it over the berries for an extra touch of sweetness and shine.
Step 8: Serve
Serve the mini cheesecake tarts chilled. They make a visually stunning and delectable dessert that is sure to impress your guests.
Notes
Serving Suggestions
These mini cheesecake tarts pair wonderfully with a light, herbal tea or a glass of sparkling water to cleanse the palate.
Ingredient Substitutions
If you’re in need of alternatives, you can use digestive biscuits instead of graham crackers for the crust. For a lighter option, consider substituting Greek yogurt for sour cream.
Storage Tips
Store any leftover tarts in an airtight container in the refrigerator for up to 3 days. They can also be frozen; however, it is best to add the berry topping fresh before serving.
Texture Notes
The ideal mini cheesecake tart should have a creamy and smooth filling with a slightly crumbly yet buttery crust. The berries add a juicy burst that contrasts beautifully with the richness of the cheesecake.
Common Mistakes to Avoid
Do not overmix the cheesecake filling as this can lead to cracks during baking. Also, ensure that the cream cheese is softened for a smoother batter.
Cook Techniques
Crust Preparation
Combining graham cracker crumbs with melted butter creates a rich, flavorful crust that provides a perfect base for the cheesecakes. Press the mixture firmly into the muffin liners to ensure they hold together during baking.
Mixing the Filling
Beat the cream cheese and sugar until smooth before adding the eggs. This ensures a creamy texture. Make sure to add eggs one at a time, mixing well after each to incorporate air, which contributes to the cheesecake’s lightness.
Baking Process
Bake the tarts at a low temperature to prevent cracking. The cheesecakes should be set but still slightly jiggle in the center, indicating a creamy texture rather than overcooking.
Cooling and Chilling
Allow the tarts to cool in the tin before refrigerating. Chilling them for at least two hours helps the flavors meld and the tarts firm up for easier serving.
Berry Topping
Fresh berries add a refreshing contrast to the rich cheesecake. For added sweetness, you can warm berry jam and drizzle it over the tarts before serving.
FAQ
Can I use a different type of crust?
Yes, you can substitute graham cracker crumbs with other types like digestive biscuits or even a cookie crust for different flavors.
How should I store the mini cheesecake tarts?
Store them in an airtight container in the refrigerator for up to 5 days.
Can I make these tarts in advance?
Absolutely! These mini cheesecakes can be made a day ahead and stored in the refrigerator until serving.
What if I don’t have fresh berries?
You can use frozen berries if fresh ones are unavailable. Just ensure they are thawed and drained before topping the tarts.
Can I add flavorings to the cheesecake filling?
Yes, you can experiment with different extracts or citrus zest for added flavor in the cheesecake filling.
Conclusion
These mini cheesecake tarts with berries are a perfect blend of creamy and fruity goodness, making them an ideal dessert for gatherings, celebrations, or a sweet treat at home. Their elegant appearance and delightful taste are sure to impress your guests, and their small size allows for easy serving and enjoyment. Whether you serve them on special occasions or as an everyday dessert, they are a surefire hit that culinary enthusiasts will adore.
Fruit Variations
Experiment with different fruits to create unique versions of these mini cheesecake tarts. Try using peaches, cherries, or kiwi for a twist on the classic berry topping.
Chocolate Swirl Mini Cheesecakes
Add a rich chocolate flavor by swirling melted chocolate into the cream cheese mixture before baking. Top with chocolate shavings and berries for a decadent dessert.
Citrus Flavor Enhancements
Incorporate citrus zest, such as lemon or orange, into the filling to add a refreshing tang. The zesty flavor pairs beautifully with the sweetness of the berries.
Nutty Crust Alternatives
Instead of graham cracker crumbs, consider using crushed nuts like almonds or pecans for the crust. This will add a crunchy texture and a unique flavor profile.
Cheesecake Topping Options
Beyond berries, try topping your mini cheesecake tarts with caramel sauce, chocolate ganache, or a dollop of whipped cream for added indulgence.
Seasonal Spice Infusion
For a warm touch, sprinkle in some cinnamon or nutmeg to the filling for a seasonal twist, especially during fall and winter gatherings.
Vegan Adaptation
For a vegan version, replace cream cheese with a dairy-free alternative and substitute eggs with flaxseed meal or silken tofu. Adjust sweetness and flavorings to taste.
Enjoy these recipes and variations to enhance your dessert repertoire!
Mini Cheesecake Tarts with Berries
Ingredients
Method
- Preheat your oven to 160°C (320°F). Line a muffin tin with paper liners.
- In a bowl, mix the graham cracker crumbs with melted butter until well combined. Press about a tablespoon of the crumb mixture into the bottom of each liner to form the crust.
- In a large mixing bowl, beat the cream cheese and sugar until smooth. Add eggs, one at a time, beating well after each addition. Stir in vanilla extract and sour cream, mixing until creamy. Add flour and mix until just combined.
- Spoon the cream cheese mixture over the prepared crusts, filling each liner almost to the top.
- Bake in the preheated oven for 18-20 minutes, or until the centers are set and slightly jiggle.
- Remove from the oven and let cool completely in the tin. Refrigerate for at least 2 hours or until firm.
- Prior to serving, top each cheesecake tart with a spoonful of mixed berries. If desired, warm the berry jam slightly and drizzle over the top.
- Serve chilled and enjoy your delightful mini cheesecake tarts.