Introduction
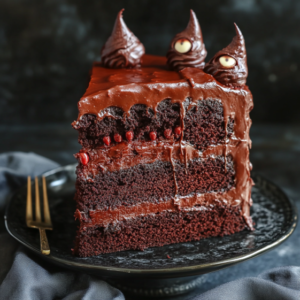
Recreate the classic Dairy Queen Ice Cream Cake at home with this indulgent and delicious recipe. Perfect for any celebration, this dessert combines layers of rich chocolate cake, creamy ice cream, and an irresistible fudge crunch.
Ingredients
500g chocolate cake mix
3 large eggs
120ml vegetable oil
240ml water
1.5L vanilla ice cream
1.5L chocolate ice cream
200g chocolate fudge sauce
150g chocolate sandwich cookies, crushed
250g whipped topping (such as Cool Whip)
50g chocolate sprinkles
Prep Time
30 minutes
Cook Time, Total Time, Yield
Cook Time: 30 minutes
Total Time: 4 hours
Yield: 12 servings
Directions
1. Preheat the oven to 180°C and grease a 23 cm springform pan.
2. Prepare the chocolate cake mix according to package instructions, using the eggs, oil, and water. Pour the batter into the prepared pan and bake for 25-30 minutes or until a toothpick inserted into the center comes out clean. Allow the cake to cool completely.
3. Once the cake has cooled, remove it from the pan. Clean the pan and line the sides with parchment paper.
4. Slice the cooled chocolate cake horizontally to form a thin bottom layer and place it back into the pan.
5. Spread softened chocolate ice cream over the cake layer and smooth it out with a spatula. Freeze for 30 minutes to firm up.
6. Drizzle the chocolate fudge sauce over the chocolate ice cream layer and sprinkle with crushed chocolate sandwich cookies. Freeze for another 30 minutes.
7. Soften the vanilla ice cream and spread it evenly over the fudge and cookie layer. Freeze for at least 2 hours or until completely firm.
8. Carefully remove the cake from the springform pan and peel away the parchment paper.
9. Spread whipped topping over the entire cake and garnish with chocolate sprinkles.
10. Freeze for an additional hour or until ready to serve. Slice and enjoy!
Detailed Directions and Instructions
Step 1: Preheat the Oven
Preheat your oven to 180°C (350°F) and take a moment to grease a 23 cm (9-inch) springform pan. This ensures the cake releases easily after baking.
Step 2: Prepare the Chocolate Cake
In a large mixing bowl, prepare the chocolate cake mix by combining it with 3 large eggs, 120ml of vegetable oil, and 240ml of water. Follow the package instructions for mixing. Once well combined, pour the batter into the prepared springform pan and bake for 25-30 minutes. Check for doneness by inserting a toothpick into the center; if it comes out clean, your cake is ready. Allow it to cool completely on a wire rack.
Step 3: Prepare the Pan for Layering
Once the cake has cooled, carefully remove it from the springform pan. Clean the pan, then line the sides with parchment paper to prevent sticking when you assemble the cake layers.
Step 4: Create the Bottom Layer
Using a serrated knife, slice the cooled chocolate cake horizontally to create a thin bottom layer. Place this layer back into the lined springform pan.
Step 5: Add Chocolate Ice Cream Layer
Take 1.5L of chocolate ice cream and let it soften slightly. Spread it evenly over the chocolate cake layer, using a spatula to smooth it out. Place the pan in the freezer for about 30 minutes to firm up the ice cream.
Step 6: Fudge and Cookie Layer
Once the chocolate ice cream is firm, drizzle 200g of chocolate fudge sauce over the layer. Sprinkle the crushed chocolate sandwich cookies over the fudge. Freeze for another 30 minutes to set.
Step 7: Add Vanilla Ice Cream Layer
Soften 1.5L of vanilla ice cream until easier to spread. Layer it evenly on top of the fudge and cookie layer, smoothing it out with your spatula. Freeze the entire cake for at least 2 hours or until fully firm.
Step 8: Remove the Cake
Once the ice cream layers are fully set, carefully remove the cake from the springform pan. Take off the parchment paper carefully.
Step 9: Top with Whipped Topping
Spread 250g of whipped topping evenly over the entire cake. For a decorative finish, add chocolate sprinkles on top.
Step 10: Final Freezing
Return the decorated cake to the freezer for an additional hour or until ready to serve.
Step 11: Serve and Enjoy
Once ready, slice the cake and enjoy the delightful combination of chocolate cake and creamy ice cream. Each bite offers a satisfying contrast of textures and flavors.
Notes
Storage
Store leftover cake in the freezer, covered tightly with plastic wrap or aluminum foil to maintain freshness.
Make Ahead
This ice cream cake can be made a day in advance. Just ensure it’s well covered in the freezer.
Customization
Feel free to customize the cake with different flavors of ice cream, or add layers of fruit or other toppings to suit your taste.
Serving Size
This recipe yields approximately 12 servings, perfect for gatherings and celebrations!
Cook techniques
Preparation of Cake Mix
Ensure to follow the instructions on the chocolate cake mix package for optimal results, incorporating the eggs, oil, and water thoroughly.
Baking the Cake
Preheat the oven to 180°C and bake the cake for 25-30 minutes or until a toothpick inserted in the center comes out clean. Allow it to cool completely before proceeding.
Layering the Cake
Once cooled, slice the cake horizontally to create a bottom layer. This enables layering with ice cream evenly.
Soften Ice Cream
Let the ice cream soften at room temperature to spread it easily over the cake layers.
Freezing Between Layers
Freeze each layer of ice cream for 30 minutes to allow it to firm up before adding the next layer.
Finishing Touches
Spread whipped topping evenly over the cake and top with chocolate sprinkles. It is essential to freeze the cake again to ensure it holds its shape before serving.
FAQ
Can I use homemade cake instead of a cake mix?
Yes, feel free to use any homemade chocolate cake recipe to substitute the cake mix.
What can I use instead of chocolate ice cream?
You may substitute chocolate ice cream with any other favorite flavor you prefer, such as fudge or mint chocolate.
How long can I store the cake?
The ice cream cake can be stored in the freezer for up to a week. Ensure it is well covered to prevent freezer burn.
Can I make this cake ahead of time?
Yes, you can make this cake a day or two in advance. Just keep it stored in the freezer until ready to serve.
Is there a non-dairy alternative for ice cream?
Yes, you can use non-dairy ice cream alternatives available in most stores for a dairy-free version.
Conclusion
Recreating the beloved Dairy Queen Ice Cream Cake at home is a delightful way to celebrate any occasion. With its layers of rich chocolate cake, creamy ice cream, and the crunch of fudge and cookies, this recipe is sure to impress friends and family alike. It’s a perfect blend of textures and flavors that makes for a show-stopping dessert. Enjoy the satisfaction of crafting this indulgent treat in your own kitchen!
Chocolate Mint Ice Cream Cake
Substitute chocolate ice cream with mint chocolate chip ice cream and add crushed mint cookies for a refreshing twist.
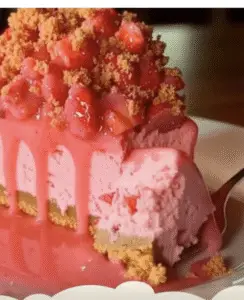
Strawberry Shortcake Ice Cream Cake
Use vanilla cake as the base and layer with strawberry ice cream. Add fresh strawberries and whipped cream for a fruity delight.
Peanut Butter Cup Ice Cream Cake
Incorporate peanut butter ice cream and layer with crushed peanut butter cups mixed into the fudge for a rich, nutty flavor.
Cookie Dough Ice Cream Cake
Replace vanilla ice cream with cookie dough ice cream and add mini chocolate chips in the fudge layer for an extra treat.
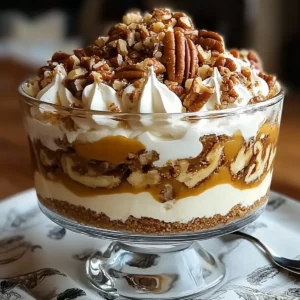
Caramel Pecan Ice Cream Cake
Use caramel ice cream and sprinkle chopped pecans on top of the fudge layer for a luxurious, nutty dessert.
Funfetti Ice Cream Cake
Incorporate vanilla cake and sprinkle colorful funfetti throughout the ice cream layers for a festive, celebratory touch.


