First off—thank you. Truly. For showing up here with your curiosity, your love for hands-on creativity, and your desire to make something magical. Whether you’re a parent, teacher, or a DIY enthusiast like me, you’re in for a treat today. This Salt & Glue Fireworks Painting is an art project that absolutely wows—with color, sparkle, and sensory fun. It’s simple enough for little hands and captivating enough for grown-ups to enjoy just as much!
💌 Want more creative DIYs like this in your inbox? [Subscribe here] and never miss a moment of crafty inspiration.
What is Salt & Glue Fireworks Painting?
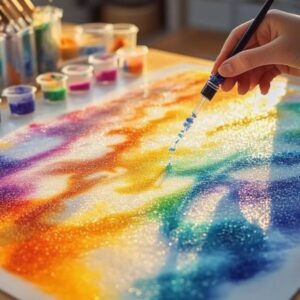
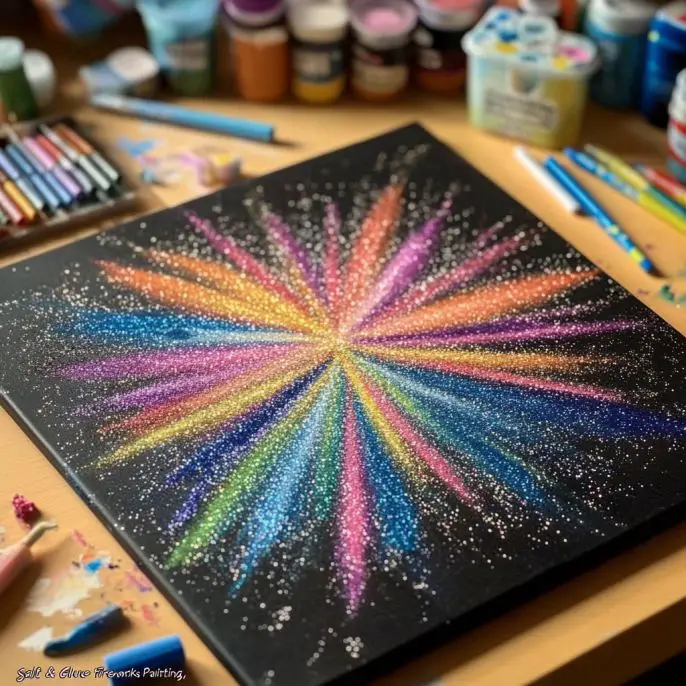
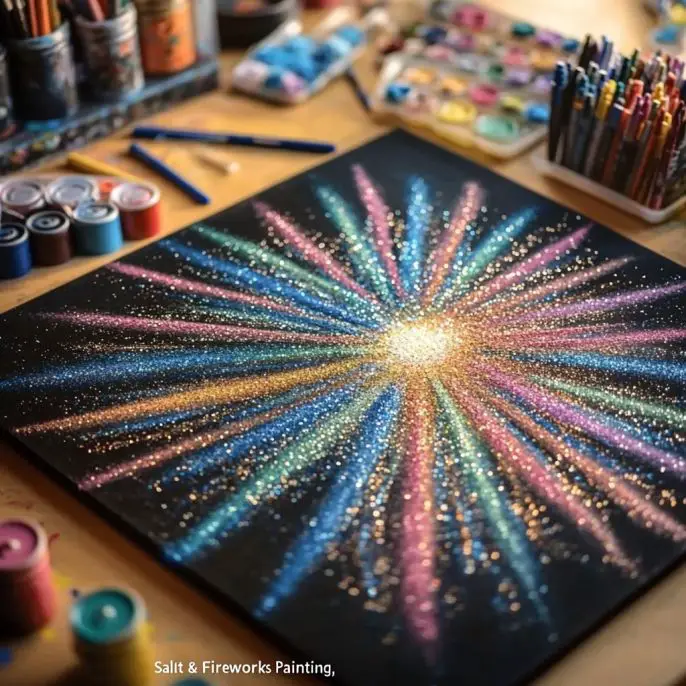
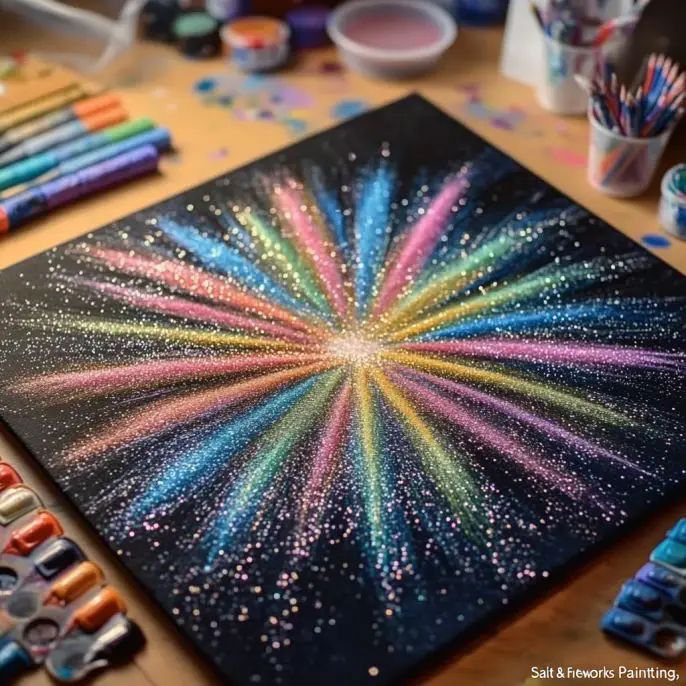
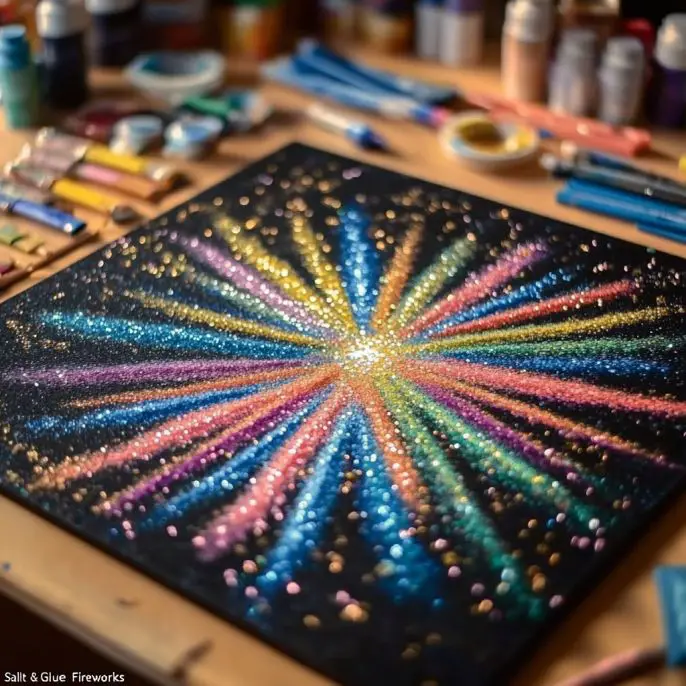
Salt & Glue Fireworks is a playful painting project that uses basic household materials to create stunning, textured art that looks just like fireworks bursting in the night sky. It’s a fabulous way to celebrate the Fourth of July, New Year’s Eve, or just a rainy day with a little extra sparkle!
Why You’ll Love This DIY
- Quick setup and cleanup (yes, really!)
- Perfect for kids of all ages—easy to follow, but still amazing results
- Beautiful results every single time, even if you’re not “artsy”
- Teaches color blending and capillary action in a fun, visual way
What Does It Look and Feel Like?
When finished, your fireworks will shimmer like real ones in the sky—bright, raised lines of color that burst and blend across black paper. The salt adds a frosty, crystalline texture, while the glue provides dimension. Add a pinch of glitter, and these explosions come to life!
Benefits of This Project
- Encourages fine motor skill development
- Explores basic science concepts like absorption and diffusion
- Offers a sensory-rich, calming art activity
- Creates frame-worthy artwork for seasonal décor
Ingredients & Supplies
- 4 sheets black construction paper (9 × 12 in)
- 1 cup white school glue (in a squeeze bottle)
- 1 cup fine-grain table salt
- 1/2 cup liquid watercolors or food coloring (diluted 1:1 with water)
- 4 small paintbrushes or pipettes (one per color)
- 1 tsp edible glitter or silver luster dust (optional sparkle!)
- Plastic tray or rimmed baking sheet (for easy salt cleanup)
- Paper towels and smocks (recommended for mess-free fun)
Optional Additions & Substitutions
- Use metallic watercolors for extra shimmer.
- Swap in colored construction paper for different backdrops.
- Add small pre-drawn stars or planets with white gel pens for a galactic twist.
Step-by-Step Instructions
Step 1: Create the Fireworks
Lay your black paper flat on a tray. Using the glue bottle, draw out your fireworks—radiating bursts, loops, and stars. Go thick with your lines so the salt will stick well.
Step 2: Salt the Glue
Generously sprinkle salt over all the wet glue. Tap and tilt the paper to let the excess fall into the tray. Save that salt for the next sheet!
Step 3: Add Sparkle (Optional)
Dust a pinch of edible glitter over the salted glue to mimic the glittering sky. Let the salt-glue mixture set for about 5 minutes—just long enough to crust slightly but stay damp.
Step 4: Paint the Fireworks
Dip a pipette or brush into a color and gently touch it to the salted line. Watch the color wick and dance through the salt! Repeat with other colors until your fireworks pop with life.
Step 5: Let It Dry
Lay flat to dry for at least 4 hours. Once dry, gently shake off any loose salt to reveal your vibrant, raised designs.
Fun Ideas to Expand the Project
- Paint galaxy backgrounds first using watercolor washes.
- Use glow-in-the-dark glitter for nighttime effects.
- Frame the finished pieces for holiday wall décor or gift them to loved ones!
Tips for Success
- Thicker glue lines = better salt coverage and color spreading.
- Use pipettes for precise color placement with younger children.
- Keep the salt damp, not soaked, to get the best capillary effect.
How to Store Your Masterpieces
Once fully dry, store the artwork flat between cardboard sheets or in a large folder. Avoid stacking directly on top of each other to preserve the texture.
Frequently Asked Questions
Can I use food coloring instead of watercolors?
Yes! Just dilute 1:1 with water for vibrant results.
Is this safe for toddlers?
Absolutely—with supervision. Avoid edible glitter if there’s any risk of it going in mouths.
Can I reuse the salt?
You can reuse the excess salt for other sheets, but don’t store it long-term once it’s touched glue or food coloring.
Final Thoughts
This Salt & Glue Fireworks Painting is more than just a craft—it’s a celebration in color and texture. It brings families together, sparks creativity, and leaves everyone in awe of their own handmade art. Whether for a holiday or just a fun afternoon activity, this DIY never disappoints.
Looking for more hands-on projects? Try:
- Peach-Scented Play Dough
- Watercolor Ice Cube Art
- Cinnamon Stick Painting for Fall
Share Your Fireworks With Us! 🎆
Did you try this DIY? I’d LOVE to see your creations! Share them on Pinterest with #SaltGlueFireworks and don’t forget to leave a comment below with how yours turned out.
Nutritional Information
(This project is not for eating, but it’s packed with sensory nourishment!)
- Creative Energy: 100%
- Mess Potential: Moderate (but worth it!)
- Satisfaction Level: Sky-high
Would you like a printable version for classroom use or activity packets? Just let me know!