First off, thank you so much for stopping by! Whether you’re here because you’re planning a kids’ party, looking for a fun summer activity, or just love a bit of glow-in-the-dark magic (who doesn’t?!), I’m thrilled to share one of my favorite DIY projects with you: homemade glow-in-the-dark chalk.
This project is anything but boring!! It’s hands-on, customizable, and seriously satisfying to make. Whether you want to create chunky sidewalk chalk or eerie glowing paint for nighttime art, this recipe has you covered.
👉 Want this recipe sent straight to your inbox? Subscribe below and never miss a glow-tastic craft again!
Why You’ll Love This DIY Glow-in-the-Dark Chalk
This isn’t just any chalk—it glows in the dark, people!! I promised you versatile, and here’s proof. You can make both solid chalk sticks and luminous chalk paint with the same basic ingredients. It’s perfect for:
Crafty afternoons with kids
Unique party favors
Fun science experiments
Late-night sidewalk art sessions
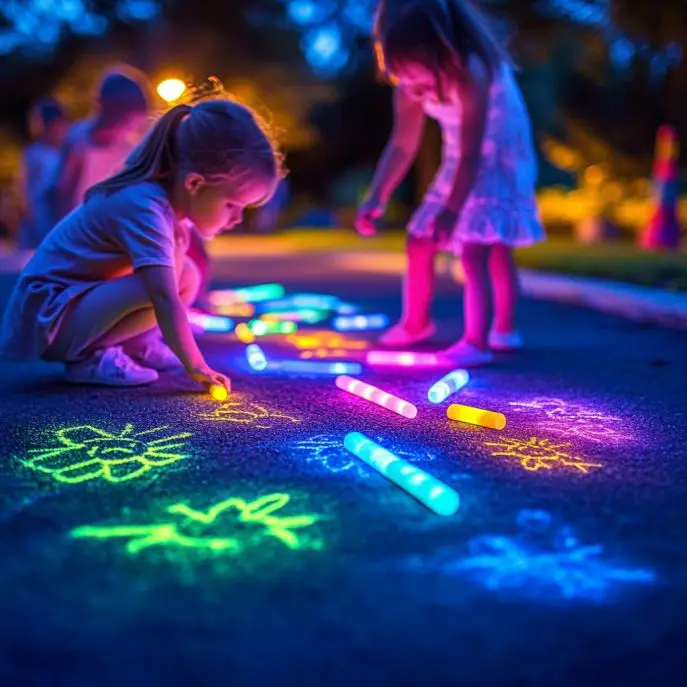
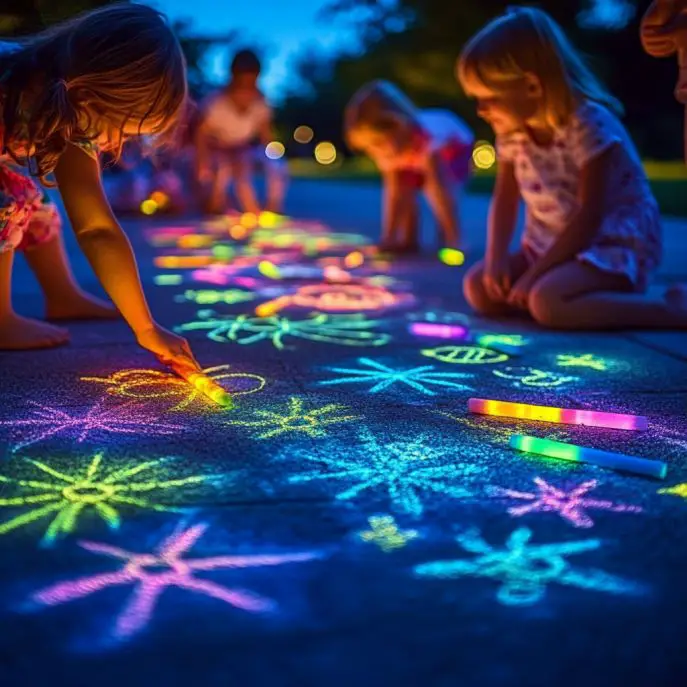
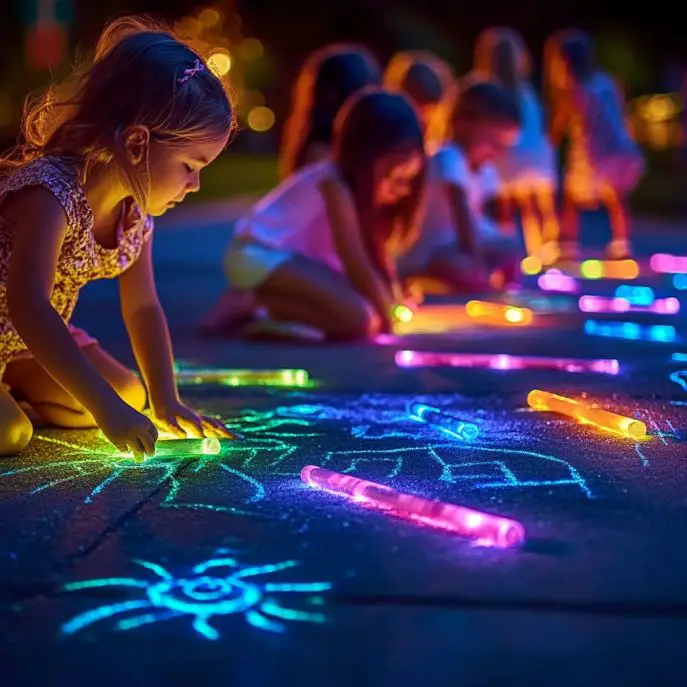
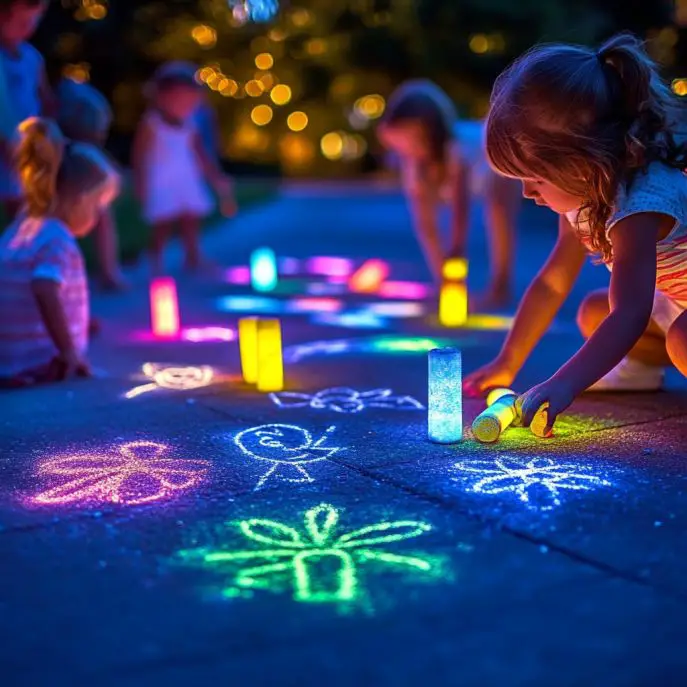
And let me tell you—the glow effect under a black light? Absolutely magical. Your kids (and you!) will be mesmerized.
What Does It Look Like and Feel Like?
When dried, the chalk sticks are smooth, firm, and hold up well to outdoor play. The paint version? It’s creamy and silky, ideal for brush painting on pavement or thick paper. Under black light, both explode with vivid, neon brilliance. You’ve got to see it to believe it!
Benefits of Making Your Own Glow-in-the-Dark Chalk
Completely customizable: colors, shapes, sizes—you name it!
Non-toxic and kid-friendly (with safe materials)
Budget-friendly and uses simple ingredients
Great for STEAM activities (hello, science + art!)
Doubles as an awesome gift or party activity
Ingredients You’ll Need
For Chalk Sticks:
1 cup plaster of Paris
½ cup warm water
2–3 tbsp glow-in-the-dark pigment powder
Optional: food coloring or liquid watercolor
Silicone moulds
For Chalk Paint:
½ cup cornstarch
½ cup tonic water (yes—quinine helps it glow!)
A few drops neon or fluorescent paint
Tools You’ll Need
Mixing bowls
Whisk or spoon
Measuring cups and spoons
Silicone moulds (fun shapes = bonus fun!)
Black light (for ultimate glow effect)
Ingredient Swaps & Additions
No pigment powder? Try UV-reactive paint for a similar glow.
Want more color? Mix in food-safe colors or natural dyes like beet powder or spirulina.
No silicone moulds? Use paper cups or ice cube trays instead!
Step-by-Step: How to Make Glow-in-the-Dark Chalk
🌟 Chalk Sticks
Mix plaster of Paris with glow pigment in a bowl.
Stir in warm water slowly until smooth.
Optional: add color and mix well.
Pour into moulds, tap gently to release air bubbles.
Let dry for 12–24 hours.
Carefully unmould, then cure for another 24 hours before using.
🎨 Chalk Paint
Whisk together cornstarch and tonic water until smooth.
Add neon paint and stir until fully combined.
Use immediately—brush it onto sidewalks or thick art paper.
Shine a black light to see the magic!
What to Pair with This Craft
This chalk goes perfectly with:
A summer night glow party
Glow-in-the-dark scavenger hunts
DIY black light painting sessions
Sidewalk games like tic-tac-toe or hopscotch
Serve up some neon snacks and you’ve got a themed event in the making!
Tips for Perfect Chalk Every Time
Use a mask when handling pigment powder—it can get dusty!
Stir gently to avoid air bubbles.
Let the chalk fully cure before using to avoid crumbling.
Use bright molds to reflect more light and enhance the glow!
How to Store Your Chalk
Sticks: Store in an airtight container in a dry place. Keeps for months!
Paint: Best used fresh. Store leftovers in a jar with a lid for up to 2 days—stir before using.
FAQs
Can I use glow sticks instead of pigment?
Nope! Glow sticks use a chemical reaction—stick to pigment or UV paint for safety and longevity.
Will this work without a black light?
Tonic water + UV paint will still glow in low light, but for best results, use a black light.
Can I make this outdoors?
Absolutely! Just make sure you have shade or indirect light so the mix doesn’t dry too fast while working.
Wrap-Up: Let’s Get Glowing!
There you have it—a super fun, hands-on project that glows, literally! Whether you’re making art, learning science, or just having a blast with your family, this DIY glow-in-the-dark chalk is bound to light up your summer.
🌟 If you make this, I’d LOVE to see your glowing creations—tag me on Pinterest or leave a review below!
Recommended Recipes Featuring Peaches (Because Why Not Keep the Fun Going?)
Nutritional Info
Okay, so maybe this isn’t a snack… but it’s definitely food for the soul!
Want more magical recipes and crafts like this? Sign up for my newsletter and get weekly inspiration straight to your inbox!
Let me know if you’d like this formatted for a blog platform like WordPress or want help adding Pinterest pins or email subscription forms!
Glow-in-the-Dark Chalk
Ingredients
Method
- Mix plaster of Paris with glow pigment in a bowl.
- Stir in warm water slowly until smooth.
- Optional: add color and mix well.
- Pour into moulds, tap gently to release air bubbles.
- Let dry for 12–24 hours.
- Carefully unmould, then cure for another 24 hours before using.
- Whisk together cornstarch and tonic water until smooth.
- Add neon paint and stir until fully combined.
- Use immediately—brush it onto sidewalks or thick art paper.
- Shine a black light to see the magic!
Notes
Glow-in-the-Dark Chalk
Ingredients
Method
- Mix plaster of Paris with glow pigment in a bowl.
- Stir in warm water slowly until smooth.
- Optional: add color and mix well.
- Pour into moulds, tap gently to release air bubbles.
- Let dry for 12–24 hours.
- Carefully unmould, then cure for another 24 hours before using.
- Whisk together cornstarch and tonic water until smooth.
- Add neon paint and stir until fully combined.
- Use immediately—brush it onto sidewalks or thick art paper.
- Shine a black light to see the magic!


