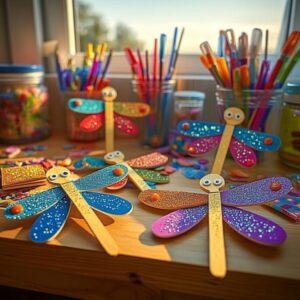
First off—thank you so much for stopping by! It means the world to me that you’re here, looking for something creative and meaningful to do with your little ones. I have a special place in my heart for simple crafts that light up both a child’s face and the room—and this one absolutely delivers.
This DIY Kids Lantern Craft is more than just a rainy-day activity; it’s an opportunity to create glowing memories together. Whether you’re upcycling a milk jug or turning a mason jar into a masterpiece, these homemade lanterns are all about imagination, recycling, and that magical moment when the lights go off and the glow begins!
💌 Want more crafty fun in your inbox? Don’t forget to subscribe to receive new projects and printable guides directly!
What Is This Craft All About?
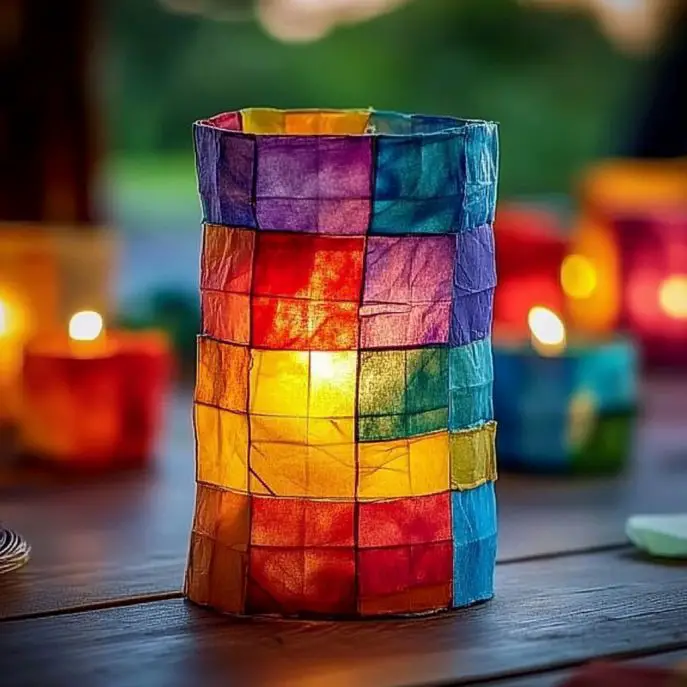
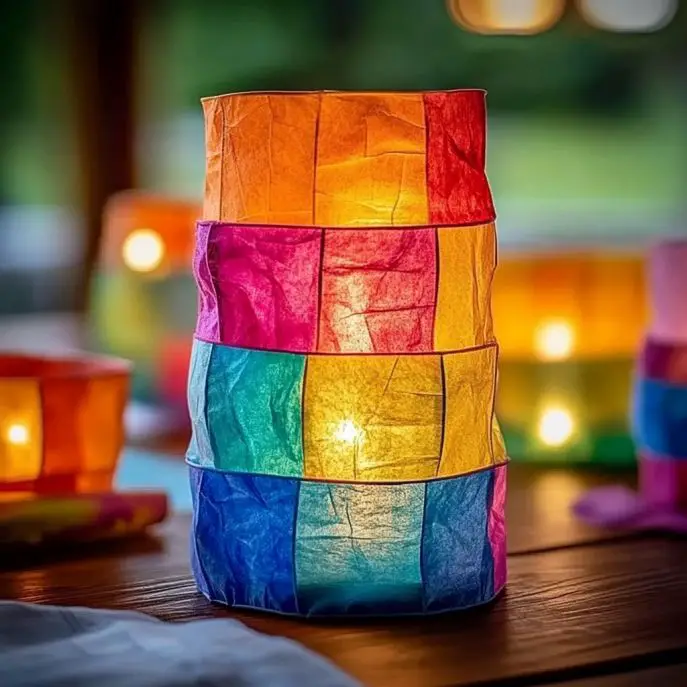
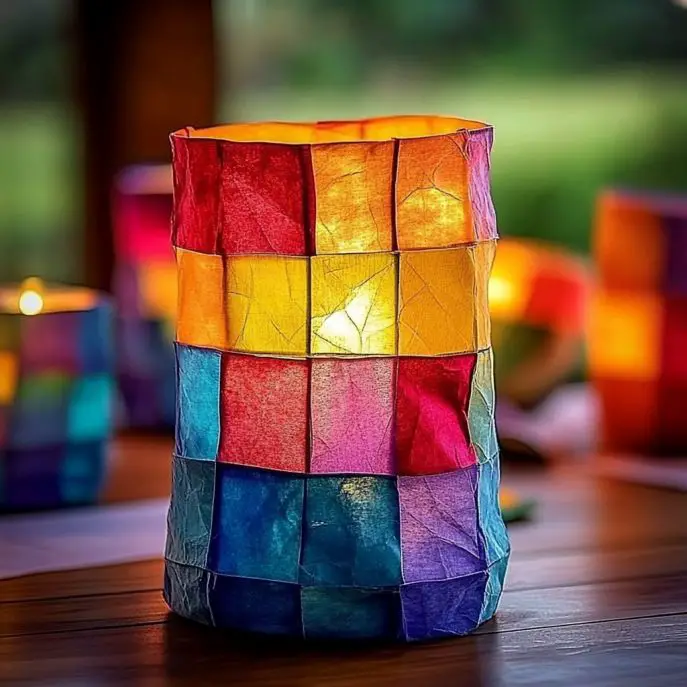
This is a super fun, low-mess lantern-making project that turns everyday containers into charming stained-glass-style lanterns. Using tissue paper, glue, and a little creativity, kids can transform recycled items into radiant keepsakes.
Perfect for holiday decorations, nighttime walks, or just brightening up a shelf—these lanterns are as functional as they are adorable.
Why You’ll Love This DIY Lantern Project
- Budget-friendly: Uses materials you already have at home.
- Kid-approved: Easy, safe, and so much fun.
- Eco-conscious: Teaches kids about upcycling and reducing waste.
- Totally customizable: From stickers to glitter to pressed flowers—anything goes!
The Look and Feel of These Lanterns
Imagine soft, glowing light shining through layers of colorful paper like a stained-glass window. Whether your child creates a bright rainbow lantern or a whimsical fairy jar, the result is always warm, cozy, and magical. They look incredible on windowsills, porches, or lined up for a backyard night walk.
Benefits of This Craft
- Boosts fine motor skills and creativity
- Encourages storytelling and design thinking
- Promotes eco-friendly habits through reusing materials
- Creates keepsakes you’ll cherish for years!
Ingredients (A.K.A. What You’ll Need)
- 1 clean, empty plastic container (milk jug, water bottle, yogurt tub, or mason jar)
- 1 battery-operated tealight or glow stick
- Tissue paper, scrap paper, or old magazines
- White glue or Mod Podge
- Paintbrush or sponge
- Scissors
- Hole punch
- String or pipe cleaner for handle
- Optional: stickers, washi tape, glitter, nature bits (like leaves or pressed flowers)
Tools You’ll Want Handy
- Scissors (kid-safe, if little hands are involved)
- Paintbrush or foam sponge
- Hole punch (standard is fine)
- A tray or newspaper to protect your work surface
Optional Additions and Variations
- Add sparkle: A sprinkle of glitter or shimmer paint adds that fairytale finish.
- Nature-inspired: Pressed flowers and dried leaves bring an earthy, woodland vibe.
- Go themed: Use Halloween colors, winter snowflakes, or rainbow pride designs!
How to Make a DIY Kids Lantern
Step-by-Step Instructions
- Prep your container
Wash and dry it thoroughly. If you’re using a jug or bottle, carefully cut off the top to create an open mouth. Leave mason jars whole and just remove the lid. - Decorate with paper
Tear tissue or scrap paper into small pieces. Apply glue or Mod Podge to the outside of the container and press the paper pieces down like a collage. Cover the whole surface, then seal with a final glue layer. - Add a handle
Punch two holes near the top and thread string, ribbon, or pipe cleaner through. Tie it tightly to form a carrying loop. - Light it up
Place a glow stick or battery tealight inside. Never use open flames! Close the lid (if using a jar), or leave the top open for more glow. - Enjoy the glow
Turn off the lights, head outside, or snuggle in a dark room and admire the magic!
What to Pair This Craft With
- A DIY storytime where kids narrate tales inspired by their lantern’s “theme”
- A mini lantern parade in the backyard or living room
- Hot cocoa + cozy blankets after a night-time lantern walk
Tips for Crafting Success
- Let kids layer different papers to explore how light changes through colors.
- Keep baby wipes nearby for gluey fingers!
- Pre-cut paper for toddlers and younger crafters.
- Use Mod Podge for a more polished, longer-lasting finish.
How to Store or Display
- Keep lanterns indoors when not in use to protect the paper.
- Display on windowsills, bookshelves, or hang them in kids’ rooms.
- Store in a dry box if you plan to reuse them for holiday or seasonal decorations.
Frequently Asked Questions (FAQ)
Can I use real candles inside?
Please don’t! Always use flameless tealights or glow sticks to keep this kid-safe.
What containers work best?
Sturdy plastic containers or mason jars work beautifully. Thin plastic bottles may collapse with too much glue.
Can this be a group activity?
Absolutely! It’s perfect for classrooms, birthday parties, or family crafting nights.
How long will they last?
With care, they can last for months! Just keep them dry and avoid rough handling.

Wrapping It Up
This DIY Kids Lantern Craft is one of those rare projects that’s fun, affordable, and filled with pure magic. It teaches kids to reuse, imagine, and create—and gives you a glowing little piece of that day to keep.
Crafts like this remind us that wonder doesn’t need to come from a screen or a store—it can come from a milk jug, a tealight, and a child’s joyful hands.
More Crafts to Explore
- Homemade Suncatchers with Recycled Plastic
- Pressed Flower Bookmark DIY
- Glow-in-the-Dark Puffy Paint Recipe
Let’s Share the Glow!
Tried this lantern craft? I’d be over the moon to see your creations!
✨ Tag your lanterns on Pinterest or Instagram
🖍️ Drop a comment below and tell me what materials you used!
📬 Subscribe to get future crafts and printables sent straight to you!
(Just for Fun) Nutritional Facts of Crafting
- Creativity: 100%
- Mess: Medium (but worth it!)
- Glow factor: ⭐️⭐️⭐️⭐️⭐️
- Kid joy: Off the charts
Let me know if you want a printable PDF version of this craft or a bundle of glow-themed kids activities to go with it!