First of all, I just want to say thank you. Whether you’re a parent looking to brighten up an afternoon, a teacher seeking a no-fail art project, or just someone chasing a little creative calm—thank you for being here. You’re in for a treat! This Sugar Water Painting Activity is equal parts magic and mess-free creativity. It’s soothing, sensory, and so visually satisfying.
And yes, it involves sugar, so your little artists are guaranteed to be intrigued from the get-go.
Want more simple and inspiring activities like this? 💌 Subscribe now and I’ll send you this full activity (plus more hands-on fun) straight to your inbox!
What Is Sugar Water Painting?
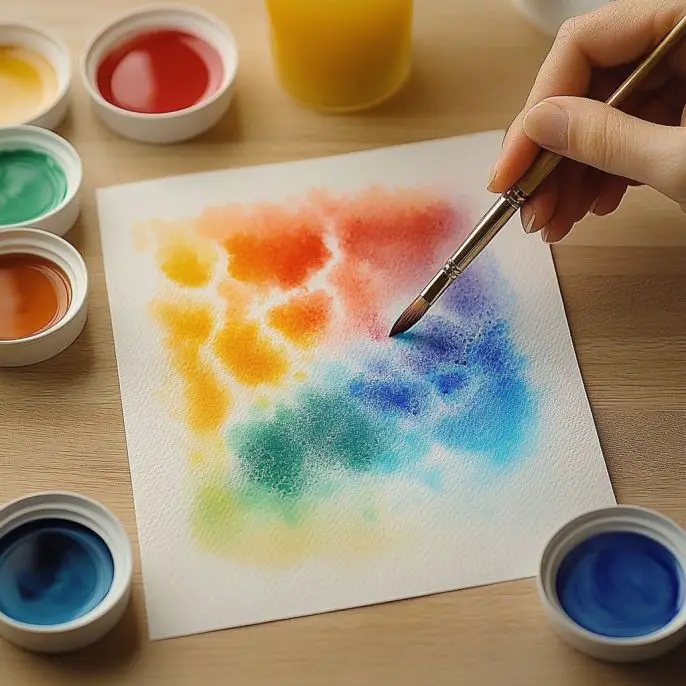
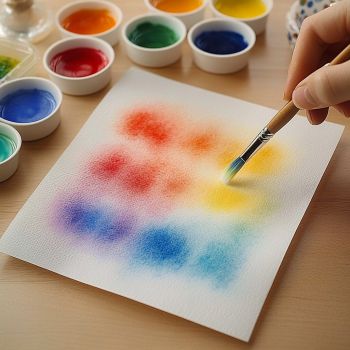
It’s art with a twist! Instead of just painting with regular watercolors, we add sugar to the mix—literally. When you brush sugar water onto paper and then drop in watercolor or food coloring, the color swirls, blooms, and leaves a gorgeous shimmery finish that feels almost magical.
This activity is great for all ages, needs no fancy tools, and the end results? Frame-worthy. ✨
Why You’ll Love This Activity
🌈 Mesmerizing and vibrant results
🖌️ Perfect for kids (but adults will want to join in too!)
🍬 Glossy, sugar-crystal shine once it dries
🧠 Great for fine motor skills and creative thinking
📚 Fun science meets art experiment
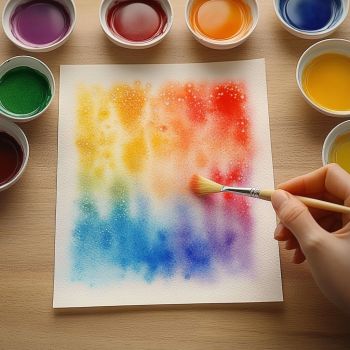
What It Looks and Feels Like
As the sugar water dries, it creates a glossy, slightly raised texture on the page. When you dab on colors, they feather and spread in dreamy, watercolor-like patterns. Think: candy-colored galaxies, magical landscapes, and whimsical swirls. You’ll see the sparkle as it dries—and yes, it’s just as satisfying as it sounds.
Benefits of Sugar Water Painting
Encourages creativity and experimentation
Teaches basic color theory and blending
Introduces kids to absorption and surface tension science
Involves minimal cleanup
Works beautifully for seasonal cards, bookmarks, or DIY wall art
🧂 Ingredients & Supplies
1 cup warm water
3 tablespoons sugar
Watercolor paints or food coloring
Watercolor paper or thick white paper
Paintbrushes
Bowls or cups for mixing
Optional: pencil for sketching
🛠️ Tools You’ll Need
Small mixing bowls or plastic cups
A sturdy table or craft surface
Paper towels (just in case of spills)
Drying rack or counter space for your finished art
Sugar Water Painting Activity
Ingredients
Equipment
Method
- In a bowl or cup, stir the sugar into the warm water until it’s fully dissolved. Let it cool a bit to get ready for painting.
- Gather your paints, sugar water, brushes, and thick paper on a flat surface where you can work comfortably.
- Dip a brush into the sugar water and paint it directly onto the paper. Let your imagination run wild with all sorts of designs or pictures!
- While the sugar water is still wet, grab another brush (or use a different color) to dab some watercolor or food coloring on top.
- Once your masterpiece is complete, lay it flat to dry completely. You’ll see a beautiful, glossy finish thanks to the sugar.
- Optional: Lightly sketch shapes with pencil first, then trace over them with sugar water before adding color for a cool layered look.
Notes
🎨 Step-by-Step Instructions
1. Make Your Sugar Water
In a bowl, combine 1 cup warm water with 3 tablespoons sugar. Stir until fully dissolved. Let it cool slightly—lukewarm is perfect for painting.
2. Set Up Your Space
Lay out your paper, paints, brushes, and sugar water. You want everything within reach before you start.
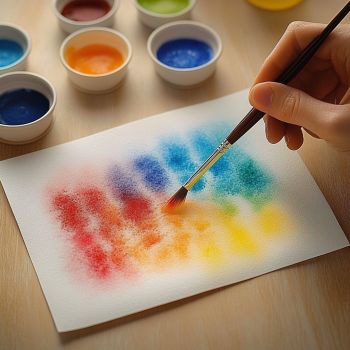
3. Paint with Sugar
Dip your brush into the sugar water and start “painting” directly onto your paper. You won’t see much at first—this is the invisible magic part!
4. Add Your Color
While the sugar water is still wet, dip another brush into your watercolor or food coloring and gently dab or stroke over the sugar-painted areas. Watch as the colors swirl and spread!
5. Let It Dry
Once your painting is finished, lay it flat and let it air dry completely. The sugar creates a beautiful, glossy sheen that brings your design to life.
6. Optional: Sketch First
For added creativity, lightly sketch shapes or outlines in pencil first. Then trace with sugar water and finish with color. Great for creating hearts, stars, names, or nature scenes!
🎭 Tips & Variations
Try different papers: Watercolor paper gives the cleanest look, but even printer paper can work for light designs. Experiment!
Brush variety: Use different sizes—from thick flats to tiny detail tips—for fun effects.
Salt sparkle: Sprinkle a pinch of salt over wet paint for an added crystallized texture.
Layer colors: Try letting one layer dry before adding more color for a textured, layered look.
🗃️ Storage & Cleanup
Finished artwork can be stored flat in a dry area or framed for display.
Sugar-based art may attract moisture in humid climates, so avoid storing in bathrooms or kitchens.
Brushes and cups rinse clean with warm water and soap.
🧠 Science Corner: Why Does It Work?
This activity sneaks in a bit of science too! Sugar water changes the surface tension of the paper and affects how the pigment spreads. It also slows evaporation slightly, giving those dreamy, tie-dye blooms and shimmering textures. You’re not just making art—you’re making chemistry magic.
🙋 FAQ
Can I use food coloring instead of watercolor?
Yes! Food coloring works beautifully—just dilute it with a few drops of water before applying.
What kind of sugar should I use?
Plain white granulated sugar works best. Brown sugar or alternatives may not give the same glossy effect and could stain.
Is this safe for toddlers?
Yes, with supervision! It’s non-toxic and safe to touch. Just make sure younger kids don’t try to lick their paintbrushes. (We’ve all been there…)
🍭 Conclusion
This Sugar Water Painting Activity is one of those rare crafts that checks all the boxes: easy, affordable, stunning, and full of possibility. Whether you’re creating just for fun or sneaking in a little STEAM learning, this is a sweet way to spark some serious joy.
So break out the brushes, mix up a little sugar magic, and let your imagination shine!
✨ Looking for More Creative Fun?
You’ll love these too:
📷 Share Your Sweet Masterpieces!
If you tried this activity, I’d love to see what you created!
Tag your art on Pinterest or Instagram and inspire others with your sugar sparkle!
🍬 Nutritional Info?
Nope—this one’s all about visual sweetness. No calories, just creativity! 😄
Thanks for stopping by, friend! Until next time, stay curious, stay creative, and let your days shine with a little DIY magic.