Introduction
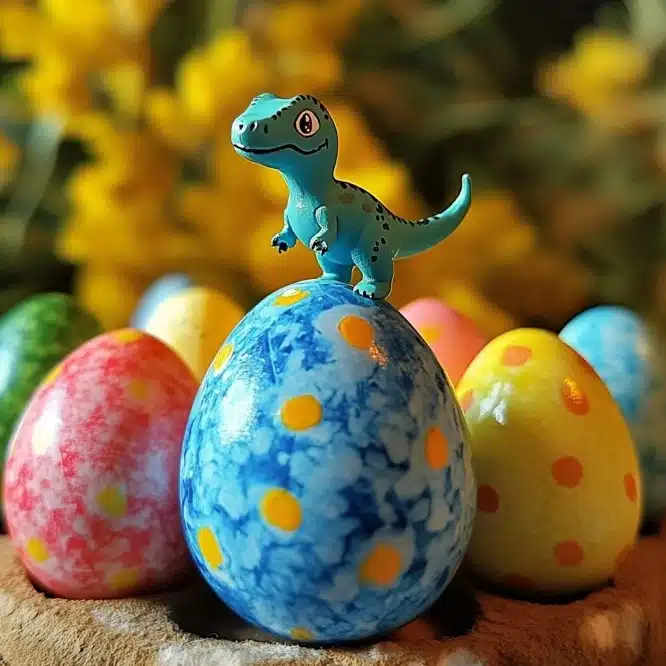
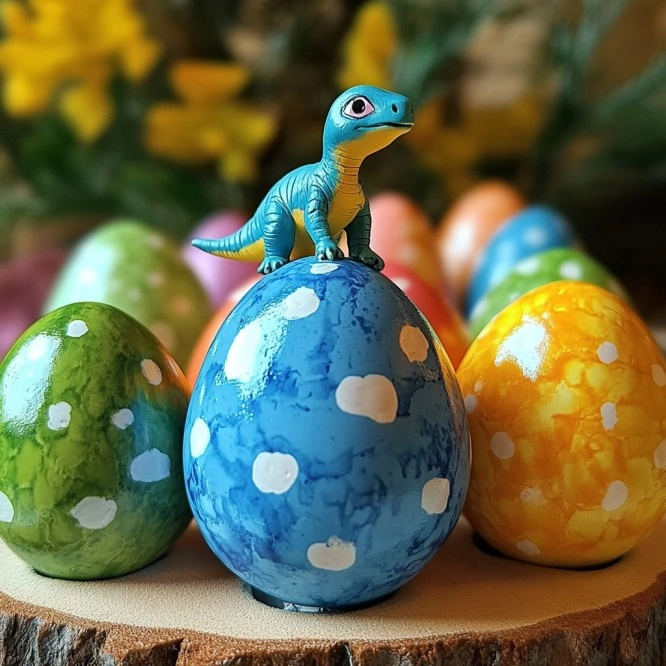
Are you looking for an exciting science experiment that doubles as an imaginative playtime adventure? Then you’re going to love this fizzing hatching dino eggs recipe! Not only does it engage kids with hands-on creativity, but it also sneaks in a bit of STEM learning with a fizzy chemical reaction that feels just like magic. As the vinegar touches the baking soda eggs, they fizz and bubble dramatically, slowly revealing a hidden baby dinosaur inside—just like a prehistoric surprise straight out of Jurassic Park!
Moreover, this easy, at-home activity is perfect for rainy days, birthday parties, classroom experiments, or even educational playdates. So whether you’re a parent, teacher, or caregiver, you’ll find this DIY dinosaur egg project both educational and wildly entertaining. Let’s get started with everything you need to know about making your very own fizzing dino egg hatchery.
Why You’ll Love This Recipe
First and foremost, this fizzy dinosaur egg activity is a multi-sensory experience that captures the attention of curious young minds. Because the process combines crafting, chemistry, and toy discovery all in one, it keeps children actively engaged from start to finish. Additionally, it’s an excellent way to introduce scientific concepts like chemical reactions in a fun and age-appropriate manner.
Furthermore, the fizzing reaction adds an exciting twist to a classic toy-unboxing moment. Instead of simply handing kids a dinosaur figure, you’re inviting them to work for it, which builds anticipation and deepens the impact of the surprise. Not to mention, you’ll also be cultivating fine motor skills and sensory play through the hands-on molding and excavation phases.
On top of all that, this DIY activity is extremely budget-friendly and made using household items, making it easily accessible to families of all kinds. Plus, you can personalize each dino egg by using different food coloring combinations and hidden toy surprises, keeping the activity fresh and exciting every time.
Ingredients
To bring your fizzing dinosaur eggs to life, you’ll need the following ingredients. Thankfully, most of these items are already in your kitchen or craft drawer!
- 1 cup baking soda per egg – This is the main ingredient and forms the “shell.”
- 1/4 to 1/3 cup water per egg – This helps bind the baking soda into a moldable dough.
- Food coloring – Use any colors you like to give each egg its own prehistoric personality.
- Miniature dinosaur toys – These serve as the hidden surprise inside the egg.
- 1–2 cups white vinegar – This causes the baking soda to fizz and reveal the dino!
- Spray bottle (optional) – Great for a slow reveal and less mess.
- Rubber gloves (optional) – Protect hands from food coloring or if there’s skin sensitivity.
Necessary Tools
To successfully craft your fizzing dinosaur eggs, make sure you have these tools ready:
- Mixing bowls – For combining baking soda and colored water.
- Spoons or spatulas – To mix your ingredients thoroughly.
- Cookie sheet or tray – To dry and store the molded eggs.
- Plastic dropper or spray bottle – Ideal for controlled vinegar application.
- Measuring cups – To keep ingredient proportions accurate.
- Fan (optional) – Helps speed up drying if you’re short on time.
Ingredient Swaps and Additions
Sometimes, you might want to switch things up or use what you have on hand. Here are a few smart substitutions and enhancements:
- Cornstarch Addition: Add 1 tablespoon of cornstarch per egg for a denser, slower-fizzing shell.
- Essential Oils: A drop or two of kid-safe essential oils like lavender can make this a calming sensory experience.
- Natural Food Coloring: For a safer alternative, use beet powder, turmeric, or spirulina for natural hues.
- Mini Insects or Gemstones: Instead of dinosaurs, try hiding plastic bugs or “fossil” gems to keep things exciting.
- Glitter Magic: Add a pinch of glitter to the baking soda mixture for some extra sparkle during fizz time.

Step-by-Step Instructions
Here’s your complete guide to making fizzing hatching dino eggs, explained in clear and manageable steps. Each phase includes pro tips to ensure success!
- Measure the Baking Soda
Begin by adding 1 cup of baking soda into a bowl for each egg you want to make. Additionally, ensure the bowl is big enough to mix comfortably without spills. - Color the Water
In a separate container, mix 1/4 to 1/3 cup water with several drops of food coloring. You can experiment with blending colors to make your own unique shades. Stir thoroughly. - Create Moldable Dough
Gradually pour the colored water into the baking soda while stirring constantly. Keep adding just until the mixture holds together like wet sand. If it’s too crumbly, add a splash more water. - Form the Egg and Hide the Dino
Scoop a portion of the mixture into your palm and press a miniature dinosaur into the center. Then, mold more of the mixture around it to form an egg shape. Make sure the toy is completely covered. - Dry the Eggs
Set your completed eggs on a cookie sheet. Let them dry for several hours or overnight. If you’re in a rush, you can place a fan nearby to speed up the process, though air drying is ideal. - Prepare for the Fizz
Once the eggs are dry and hard, place them in a shallow bowl or outside on a tray. Fill a cup with vinegar or load a spray bottle with it. - Start the Reaction
Pour or spray vinegar over each egg. Watch the fizzing magic begin! The acid from the vinegar reacts with the base (baking soda), releasing carbon dioxide gas and causing that fun bubbling effect. - Reveal and Repeat
As the reaction subsides, a dinosaur will begin to peek out. Let your kids dig in and “hatch” their own prehistoric pal!
Pro Tips for Success
To guarantee a smooth and exciting fizzing dino egg experience, keep these practical tips in mind:
- Don’t Oversaturate: When adding water to baking soda, do so slowly. Too much liquid makes the dough soggy and harder to mold.
- Use Gloves for Coloring: Food coloring can temporarily stain skin, so gloves are helpful—especially when working with vibrant hues.
- Dry Eggs on Parchment: This prevents sticking and makes cleanup a breeze.
- Customize for Age: Use larger toys for younger kids to reduce choking risks, and choose more detailed toys for older explorers.
- Pre-Make Batches: These eggs can be made in advance and stored in a dry place for up to a week, making them perfect for party favors or classroom kits.
Serving Suggestions
Although not edible, these dino eggs are a huge hit at themed parties and educational events. Here are some creative ways to present and “serve” them:
- Dino Dig Activity: Bury the dried eggs in sand or sensory bins for a full excavation adventure.
- Birthday Bash: Wrap each egg in colorful tissue paper and place in gift bags.
- Science Lab Setup: Pair with lab coats and goggles to turn your kitchen into a mini science lab.
- Countdown Calendar: Hide different colored eggs behind daily doors for a dinosaur-themed advent countdown.
- Learning Corner: Incorporate them into homeschool lesson plans on dinosaurs, chemical reactions, or geology.
Storing and Reheating
If you make a large batch of fizzing dinosaur eggs, you’ll want to keep them fresh and fizz-ready. Here’s how:
- Storage: Keep dried eggs in an airtight container in a cool, dry place. Avoid moisture, as it can trigger premature fizzing.
- Shelf Life: Best used within 7–10 days for maximum fizz, though they may last longer if stored well.
- Reactivating: If your eggs get slightly soft, allow them to air dry again for a few hours before use.
Nutritional Information
Since this recipe is non-edible, there’s no nutritional data. However, for safety and peace of mind:
- All Ingredients Are Non-Toxic
- Use Only Kid-Safe Toys and Colorants
- Avoid Ingestion—For Play Only
Frequently Asked Questions (FAQs)
1. Are fizzing dinosaur eggs safe for toddlers?
Yes, as long as the toys are size-appropriate and there’s adult supervision. Always avoid choking hazards.
2. Can I make the eggs in advance?
Absolutely! They dry beautifully overnight and can be stored for up to a week or more in airtight containers.
3. What can I use instead of vinegar?
Lemon juice also works well and creates a similar fizzy reaction, although it may be slightly less dramatic.
4. How do I clean up the fizz mess?
Vinegar and baking soda are natural cleaning agents, so cleanup is surprisingly easy. Just wipe surfaces with a damp cloth.
5. Can I reuse the toys inside the eggs?
Definitely! Simply rinse the toys after the fizzing ends and let them dry for future use.
Conclusion
In summary, fizzing hatching dinosaur eggs offer an unbeatable combo of fun, learning, and discovery. Whether you’re entertaining a group of energetic kids or adding excitement to a rainy afternoon, this hands-on project is sure to impress. So gather your materials, prep your prehistoric hatchery, and let the fizz-tastic fun begin! For more DIY science and sensory play ideas, don’t forget to check out our related recipes below.

Fizzing Hatching Dino Eggs
Ingredients
Method
- Begin by adding 1 cup of baking soda into a bowl for each egg you want to make. Ensure the bowl is big enough to mix comfortably without spills.
- In a separate container, mix 1/4 to 1/3 cup of water with several drops of food coloring. Experiment with blending colors to create unique shades. Stir thoroughly.
- Gradually pour the colored water into the baking soda while stirring constantly until the mixture holds together like wet sand. If it’s too crumbly, add a splash more water.
- Scoop a portion of the mixture into your palm, press a miniature dinosaur into the center, and mold more of the mixture around it to form an egg shape, fully covering the toy.
- Set your completed eggs on a cookie sheet and let them dry for several hours or overnight. If in a rush, place a fan nearby to speed up the process.
- Once the eggs are dry and hard, place them in a shallow bowl or outside on a tray. Prepare a cup of vinegar or fill a spray bottle with vinegar.
- Pour or spray vinegar over each egg and watch the fizzing magic begin. The acid from the vinegar reacts with the baking soda, causing bubbling.
- As the reaction subsides, a dinosaur will begin to peek out. Let your kids dig in and 'hatch' their own prehistoric pal!