
Introduction
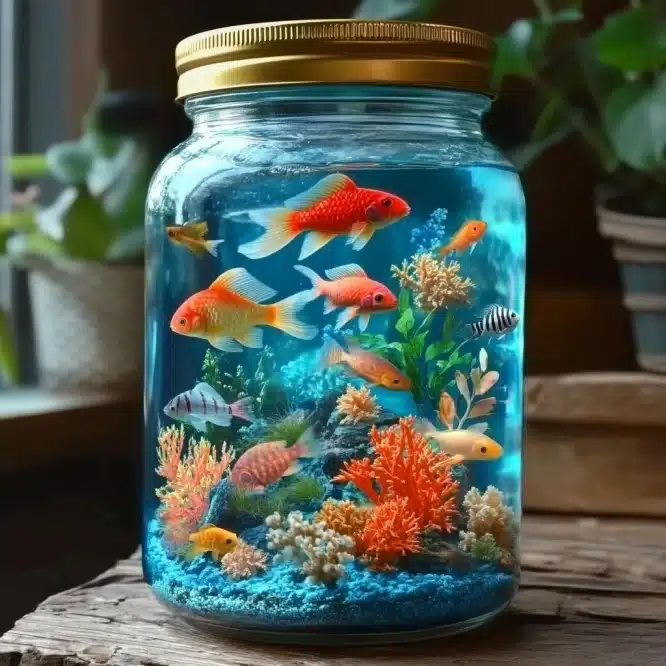
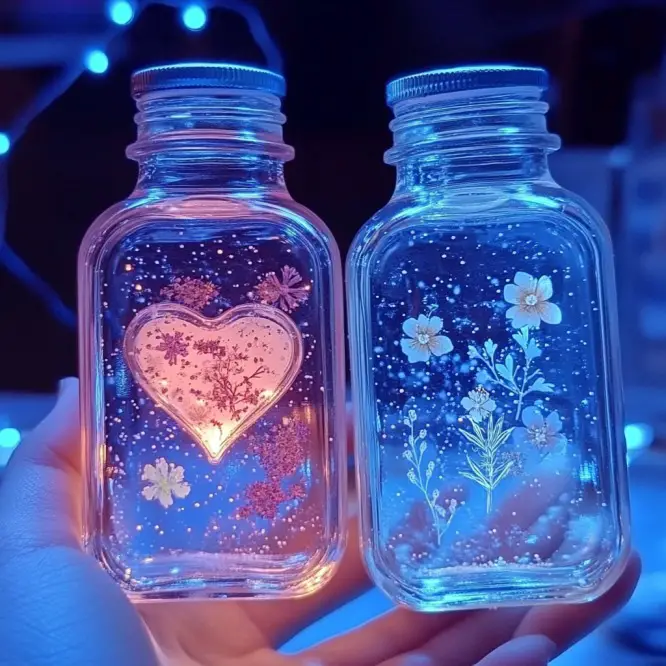
If you’re looking for a simple yet stunning DIY project that brings the beauty of the sea right into your home, this Ocean in a Jar craft is the perfect choice. Designed with creativity and wonder in mind, this hands-on activity is a favorite among kids and parents alike. Whether you’re homeschooling, planning a beach-themed birthday party, or just want an educational way to pass the afternoon, this mini ocean habitat in a mason jar combines science, sensory play, and visual appeal into one delightful experience. Not only is it fun to make, but it also serves as a calming sensory bottle or decorative keepsake that can be enjoyed for years.
Why You’ll Love This Recipe
This Ocean in a Jar project is more than just a craft—it’s a mini ecosystem brought to life. Kids are instantly captivated by the glistening blue water, glittering particles, and whimsical sea creatures floating inside. Because this project incorporates creative play and fine motor skills, it’s an excellent choice for early learners and curious minds. Moreover, the steps are simple enough for young children to follow with adult guidance, making it a perfect bonding activity. Since the materials are easy to find and affordable, this project is budget-friendly and eco-conscious, especially if you repurpose jars and decorations. Furthermore, once completed, the Ocean in a Jar becomes a tranquil piece of ocean-inspired decor, adding a splash of serenity to any room.
Ingredients
- 1 mason jar with lid (pint or quart size)
- 1 cup filtered or distilled water (adjust as needed)
- 1-2 drops blue food coloring or watercolor paint
- 1-2 tsp glycerin (optional)
- 2-3 small plastic sea figurines or toy fish
- 1-2 plastic aquarium plants
- 2 tbsp aquarium rocks or colored pebbles
- 1 pinch blue and white glitter
Necessary Tools
- Spoon or stirring stick
- Measuring spoons
- Hot glue gun (optional for sealing the lid)
- Dropper (for food coloring)
- Funnel (to avoid spills when filling the jar)
Ingredient Swaps and Additions
Although the classic Ocean in a Jar recipe is simple, you can easily modify it based on what you have at home. Instead of plastic sea creatures, you could use LEGO sea-themed miniatures, buttons shaped like shells, or even printed waterproof images. If glycerin isn’t available, baby oil or clear corn syrup can offer a similar suspension effect for glitter. Likewise, the glitter can be swapped with iridescent confetti, small beads, or even biodegradable glitter for a more eco-friendly version. If you want to add educational elements, consider labeling each item on the jar or including a legend showing different sea creatures. For a glow-in-the-dark twist, you can use glow powder or tiny waterproof LED lights to add nighttime magic.
Step-by-Step Instructions
- Add Aquarium Rocks: Begin by placing 2 tablespoons of aquarium rocks or colored pebbles into the bottom of the mason jar. This forms the ocean floor and gives the jar stability.
- Arrange Plants and Figurines: Gently position the plastic plants inside the jar to simulate ocean vegetation. Then, nestle your toy fish or sea figurines among the rocks and plants. Feel free to use tweezers for precision if needed.
- Color the Water: In a separate cup, mix 1 cup of filtered or distilled water with 1-2 drops of blue food coloring or watercolor paint. Stir well to ensure the color is even.
- Add Glitter and Glycerin: Before pouring the water into the jar, add a pinch of blue and white glitter to the mixture. Add 1-2 teaspoons of glycerin (if using) to help the glitter float more gracefully.
- Fill the Jar: Slowly pour the water mixture into the jar using a funnel to minimize spills. Fill until there’s about 1 inch of space at the top.
- Seal the Jar: If you plan to let kids shake or carry the jar around, use a hot glue gun to secure the lid for safety. Then, tightly screw on the lid.
- Shake and Display: Gently shake the jar to see the ocean come to life, or place it on a shelf where it can reflect sunlight and sparkle like the sea.
Pro Tips for Success
- Use Distilled Water: This prevents cloudiness and keeps the water crystal clear.
- Add Glycerin Slowly: Too much can make the mixture overly thick; start with a teaspoon and adjust.
- Secure Decorations: Use aquarium-safe glue to affix heavier decorations to the jar’s bottom if they float undesirably.
- Avoid Overfilling: Leave headspace at the top of the jar to allow movement and prevent leaks.
- Let Kids Help: Assign simple tasks like dropping in glitter or positioning sea animals to involve children and keep them engaged.
Serving Suggestions
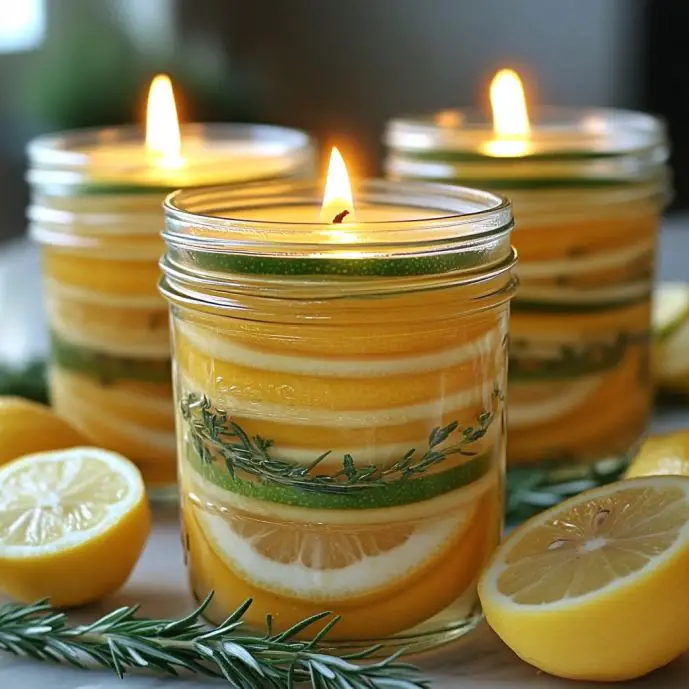
While you won’t be eating this craft, there are many delightful ways to present and enjoy it! Arrange several Ocean in a Jar crafts along a table as themed party centerpieces. Alternatively, create a labeled shelf at home or in the classroom to display multiple versions made by kids. For an immersive ocean-themed experience, pair this craft with ocean storybooks, sea-themed snacks, and beachy music. It also makes a lovely DIY gift, especially if you personalize the lid or add a tag with the date and your child’s name.
Storing and Reheating
This craft doesn’t require reheating, but it does benefit from proper storage. Keep the jar away from direct sunlight to preserve the vibrant color. Over time, if water evaporates slightly, top it off with more filtered water. If you notice cloudiness or floating residue, carefully unscrew the lid and rinse the contents or rebuild it fresh. Avoid shaking too vigorously to maintain clarity and positioning of the items inside. For long-term use, sealing the lid with glue or waterproof tape will minimize spills and contamination.
Nutritional Information
Although this isn’t an edible craft, here is a breakdown of its “sensory and developmental benefits”:
- Visual Stimulation: Bright colors and shimmering glitter captivate the eyes.
- Fine Motor Skills: Pouring, placing, and assembling small pieces enhances dexterity.
- Sensory Exploration: The motion of glitter and figures in the jar promotes calmness.
- Creative Expression: Children design their own underwater scenes.
- STEM Concepts: Teaches water density, light refraction, and marine habitats.
FAQs
- Can I use tap water instead of filtered water? Yes, but filtered or distilled water is preferred to avoid cloudiness.
- Is glycerin necessary? Not at all! It enhances the visual effect but is optional.
- How long does the Ocean in a Jar last? With proper sealing and minimal movement, it can last for years.
- Can I use real shells or sand? Yes, but rinse thoroughly to prevent bacteria or clouding.
- What age group is this craft for? Ideal for kids ages 4 and up, with adult supervision for glue and small parts.
Conclusion
Creating an Ocean in a Jar is more than just a craft—it’s a magical adventure beneath the waves. With every shimmer of glitter and drift of a toy fish, your child gets a glimpse into the beauty of the ocean. This project is perfect for sparking curiosity, encouraging creativity, and offering a peaceful visual experience. Whether you’re crafting with a classroom full of children or spending a quiet afternoon at home, this activity will leave lasting memories and a beautiful keepsake to treasure. Dive into the world of ocean-themed crafts and let your imagination swim free!

Ocean in a Jar
Ingredients
Method
- Add 2 tablespoons of aquarium rocks or colored pebbles into the bottom of the mason jar.
- Gently position the plastic plants inside the jar to simulate ocean vegetation.
- Nestle your toy fish or sea figurines among the rocks and plants.
- In a separate cup, mix 1 cup of filtered or distilled water with 1-2 drops of blue food coloring or watercolor paint.
- Add a pinch of blue and white glitter to the water mixture and stir well.
- If using, add 1-2 teaspoons of glycerin to help glitter float.
- Slowly pour the water mixture into the jar using a funnel to minimize spills.
- Seal the jar using a hot glue gun if children will be shaking it.
- Gently shake the jar to see the ocean come to life or display it on a shelf.
Notes
More Craft Innovations
- After a Decade Together, She Discovered the True Value of Her Contributions
- My Daughter Disappeared After Prom Night—Almost a Year Later, an Ordinary Beanbag Chair Revealed the Truth
- Stop Your Bed Sheets From Balling Up in the Dryer: Simple Tricks That Actually Work
- Woman Injured While Trying to Separate Fighting Water Buffaloes: A Powerful Reminder About Livestock Safety


Don’t the things inside the jar float all over when you shake it? Do you glue the pieces down?
Where did you get your fish and coral that they’re so lifelike I live in a nursing home and I help lead craft activities on the weekend and I would like to be able to do this craft with my fellow residence so I’d like to know where to be able to order These fish and coral and plants that you’ve used cause they’re beautiful
How did you get your fish to stay in position throughout the jar?