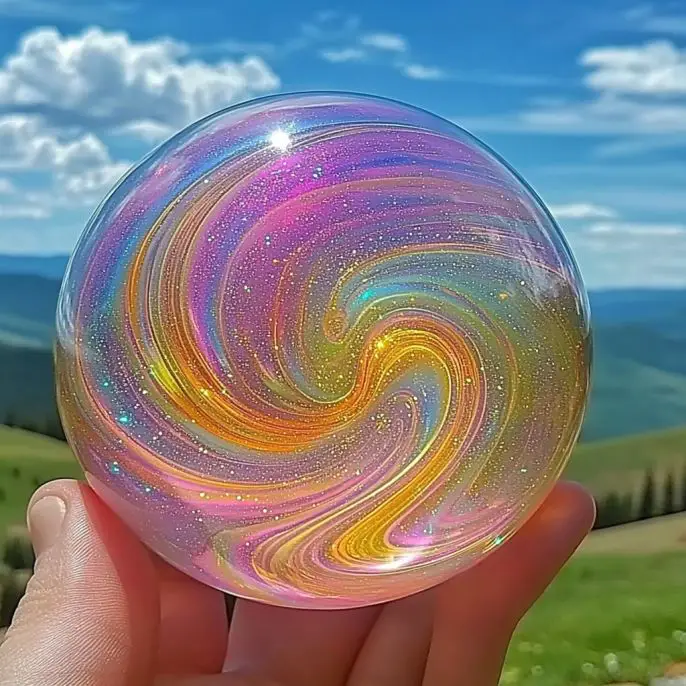
Hello, friend! I’m so glad you’re here because I’ve got something extra fun and hands-on for you today. Imagine mixing colors, crafting shapes, and then—boing!—watching your creation bounce across the room. Welcome to the magical world of DIY Colorful Bouncy Balls!
This is more than just a craft—it’s a mini science experiment packed with color, creativity, and discovery. Whether you’re a teacher looking for a classroom hit, a parent planning a rainy-day activity, or just someone who loves a good bounce, this one’s for you.
💌 Want more hands-on, smile-inducing experiments like this? Be sure to subscribe for weekly fun delivered straight to your inbox!
What Is This Experiment About?
This project lets you make your very own homemade bouncy balls using borax, glue, water, and color. It’s a playful introduction to polymers—chains of molecules that link together to form flexible, moldable materials. Science + art = FUN!
You’ll mix, squeeze, roll, and shape gooey glue into rubbery, vibrant balls that really bounce. And yes—you get to choose your favorite colors or even mix a rainbow!
Why You’ll Love This Activity
Simple ingredients from around the house
Educational and interactive: a perfect blend of STEM and play
Customizable colors and shapes—each ball is unique
Great for sensory play and fine motor development
Ideal for kids’ parties, classrooms, or rainy afternoons
Ingredients
Here’s what you’ll need to make your very own bouncy creations:
½ cup warm water
1 tablespoon borax powder
1 to 2 teaspoons clear glue per ball
Food coloring or liquid watercolors (red, orange, yellow, green, blue, purple)
Colorful Bouncy Balls
Ingredients
Equipment
Method
- Pour 1/2 cup of warm water into a bowl.
- Add 1 tbsp borax powder and stir until fully dissolved. This is your borax solution.
- Divide the borax solution into small cups—one for each color you want to make.
- Add food coloring to each borax cup and stir to mix the colors.
- In separate small containers, measure 1–2 teaspoons of glue for each color. Add more coloring if needed.
- Pour each colored glue into its matching borax cup. The glue will begin to solidify into a ball.
- Remove the clump, squeeze gently, and roll it between your palms to shape it into a ball.
- If the ball feels sticky, dip it back into the borax briefly and continue rolling.
- To create a rainbow ball, press smaller colored balls together and roll into one large ball.
- Let finished balls dry on parchment paper for a few hours before bouncing.
Notes
Tools You’ll Need
Small mixing bowls or cups
Spoons or craft sticks for stirring
Measuring spoons
Parchment paper (for drying surface)
Gloves (optional, to keep hands clean while mixing)
Step-by-Step Instructions
1. Make the Borax Solution
In a mixing bowl, pour in ½ cup of warm water. Add 1 tablespoon of borax powder and stir until completely dissolved.
2. Divide and Color
Pour the borax solution into small cups—one for each color you plan to make. Then, add a few drops of food coloring or liquid watercolor to each cup and mix.
3. Prepare the Glue
In separate small containers, add 1 to 2 teaspoons of clear glue for each color. You can tint the glue further with a few drops of the same food coloring for extra vibrancy.
4. Pour and Watch the Reaction
Slowly pour the colored glue into its matching cup of borax solution. Immediately, you’ll see the glue start to clump and form!
5. Shape It Up
Use your hands (or a spoon) to remove the clump from the solution. Gently squeeze out excess liquid and start rolling the material between your palms to form a ball.
6. Dip and Roll
If your ball feels too sticky, dip it back into the borax solution for a few seconds and continue shaping.
7. Create a Rainbow! 🌈
Want a big, colorful bouncy ball? Make several small balls in different colors, press them together, and roll them into a smooth, blended shape.
8. Let It Dry
Place your finished bouncy ball(s) on parchment paper. Let them dry for at least a few hours to firm up and get extra springy!
Tips & Variations
Mix colors like red + blue to make purple, or yellow + blue for green. Science AND art!
Layer or marble your colors by gently twisting two shades together before rolling.
Dry longer for better bounce. Overnight is ideal for long-lasting fun!
Add glitter to the glue for sparkly, magical bouncy balls.
Shape them uniquely—you can even try making bouncy eggs or hearts.
The Science Behind the Bounce
When glue (a liquid polymer) reacts with borax, it links up into longer, stretchy chains. This process creates a viscoelastic material—firm but flexible—perfect for bouncing! It’s a safe, fun way to introduce polymer chemistry.
Frequently Asked Questions (FAQ)
Can I use white glue instead of clear glue?
Yes! The ball will be more opaque, but still bouncy and fun.
Is borax safe?
Yes, when used responsibly in small quantities. Keep it out of eyes and mouths, and wash hands after playing.
How long do the bouncy balls last?
They’ll last a few days to a week with gentle play. Keep them in a sealed bag to prevent drying out.
Do I need to refrigerate them?
Nope! Just store in a cool, dry place.
Can I bounce them outside?
They’re best for indoor play on smooth surfaces. Avoid rough pavement to prevent cracks.
Conclusion
Making your own Colorful Bouncy Balls is more than just a craft—it’s a joyful journey into color, chemistry, and creativity. It’s science you can touch, and fun you can bounce. 🌈
Whether you stick to one favorite color or roll a full rainbow, these DIY balls are sure to bring smiles, giggles, and maybe even a little science curiosity into your day.
More Playful Experiments to Try
Salt Volcano Eruption
Baking Soda Balloon Magic
Rainbow Walking Water
DIY Glitter Slime
Show Off Your Creations!
Tried this activity? I’d love to see your colorful bouncy balls! Snap a pic and share it on Pinterest or tag me on social media. Let’s inspire more fun one bounce at a time!
Approximate Cost per Batch
$2–$5 depending on supplies already at home.
Thanks for joining me for this vibrant adventure. Here’s to making, bouncing, and learning—together! Let me know if you’d like a printable version for your science journal or kids’ party kit. 🎨🧪🟣